As any digital device, Optonet can be handled with a mouse and/or a keyboard.
Mouse: it is useful when the OVU is in a computer (e.g., for vision training, campimetry, or for teleconsultations), but not a practical option for distant vision charts.
Wireless Keyboard #
Keyboard: a hand-held wireless mini keyboard is a popular option for distance vision testing in clinic and domiciliary. The four arrows, together with Intro/OK and Page Down / Page Up keys (for sequences) are enough to manage most common functions.
Also, each function has been assigned a key from the keyboard. When you open the right Tools Menu in a chart and hover the mouse over any button, it will display the key assigned to that function.
E.g.: Pressing ‘M’ opens the Charts Menu, then the arrows will take us from chart to chart, and Intro/OK will select one. All these keys are easily accessible in wireless mini keyboards, like the one shown here:

Below are two diagrams of an example of a wireless keyboard with the main functions for controlling the Optonet Vision Unit:


Additionally, each function is assigned a shortcut key. The assigned key is displayed in the Tools Menu: it appears in parentheses when you hover the mouse over the button. For example, here we can see that the ‘B’ key activates the Bichromatic.

Tablet #
Using a Tablet (or phone) as a Remote Controller
The most popular option for managing distance vision charts is likely using a tablet that has been paired through an internet router connection. The menus displayed on the tablet are visual and intuitive, and the same tablet can later be used to display near vision charts (which can be directly controlled via touchscreen on a tablet or phone).
A phone can also be used as a remote controller, but it might feel a bit small for comfort. All instructions mentioned for tablets are also applicable to phones.
To Activate a Tablet as a Remote Controller
1. Go to your tablet’s store and install the application named Optonet Vision Unit. You will need your credentials to activate it.
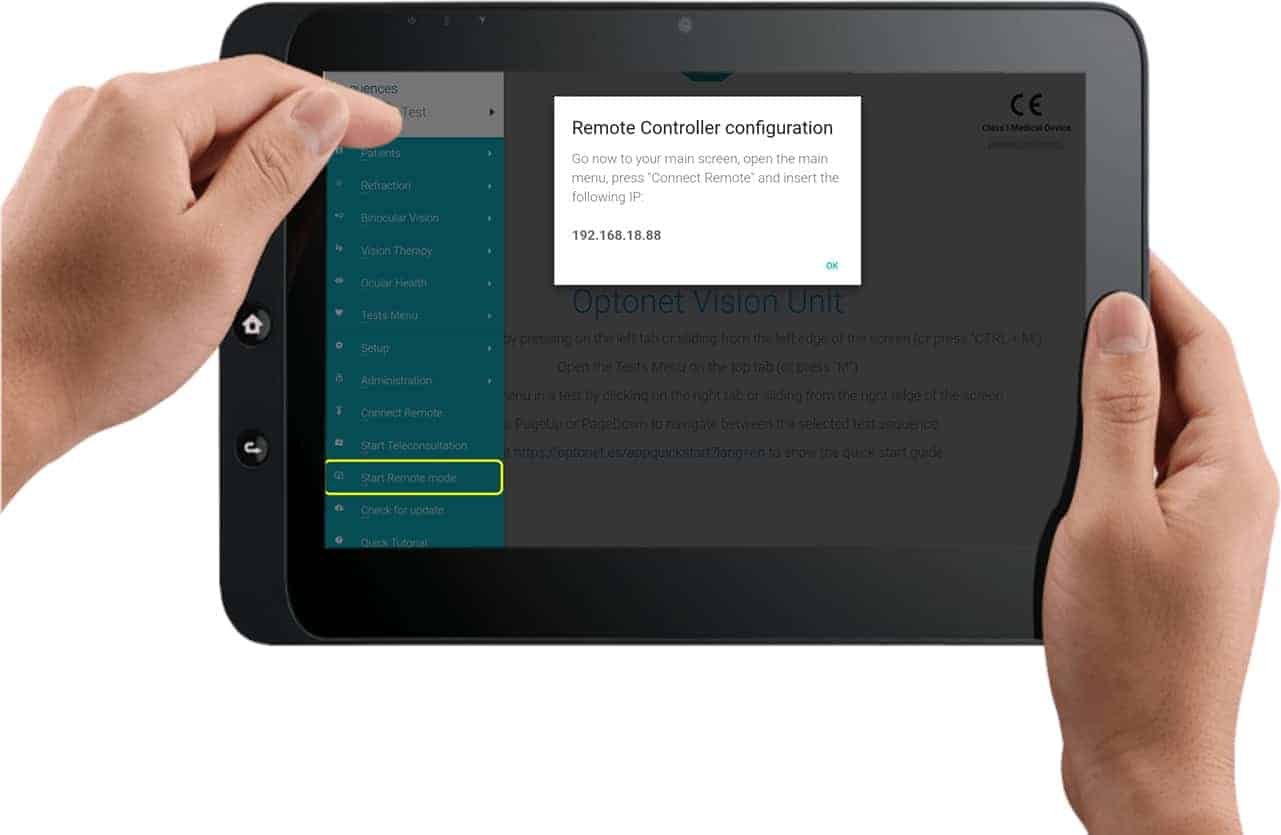
2. Open the Unit on the tablet, then access the left menu. Find the link for Start Remote Mode and tap it. (Be cautious not to confuse it with the link named Connect Remote just above, which is for remotely controlling the tablet from another tablet.)
3. When you tap on Start Remote Mode, a message with the IP address will appear, asking you to open the Distance Vision Unit you want to control.
In the Distance Vision Unit:
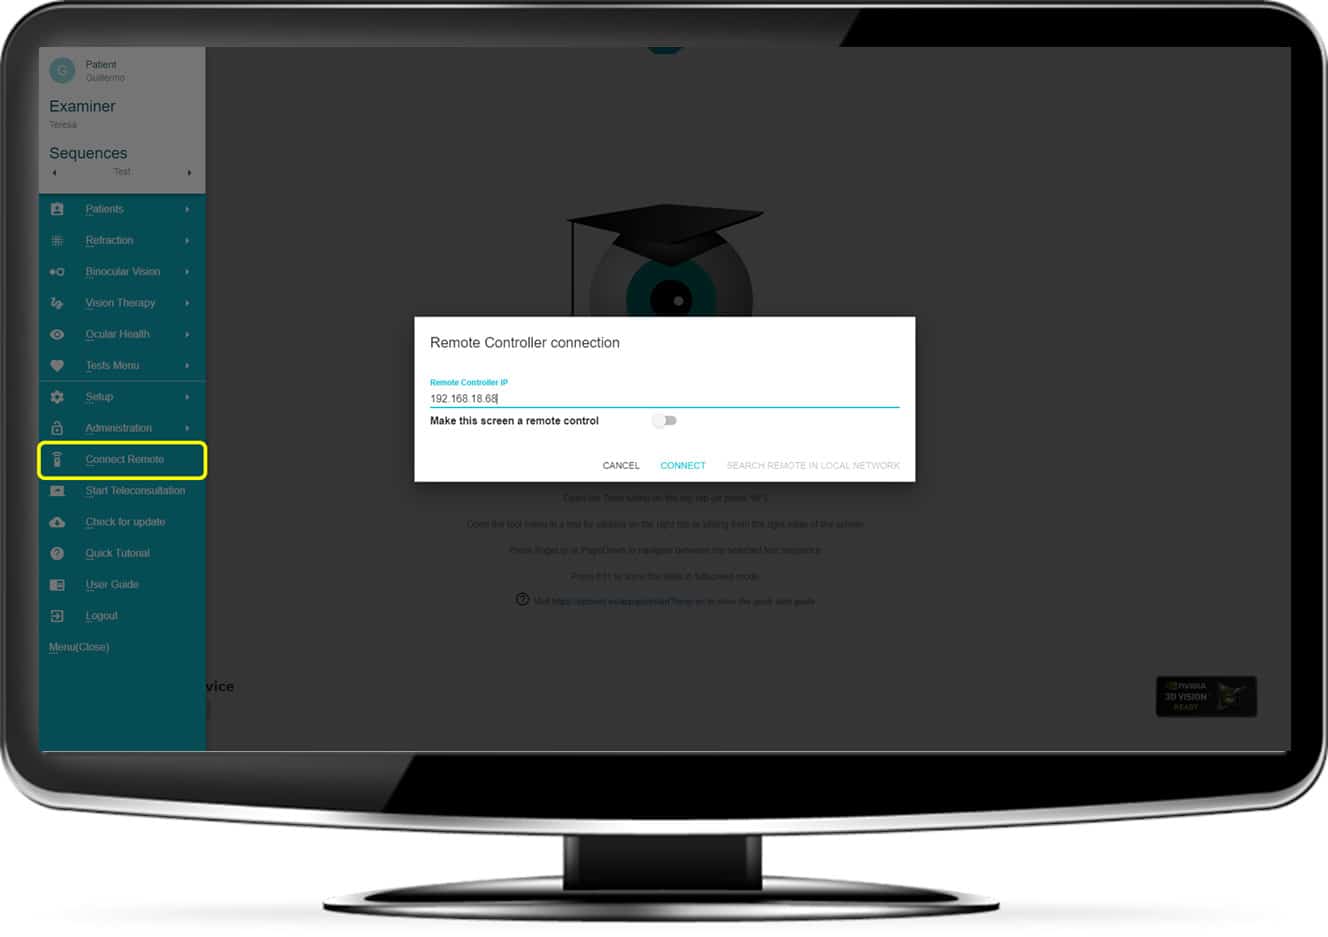
1. Open Connect Remote from the left menu.
2. Enter the IP number displayed on the tablet and press Connect.
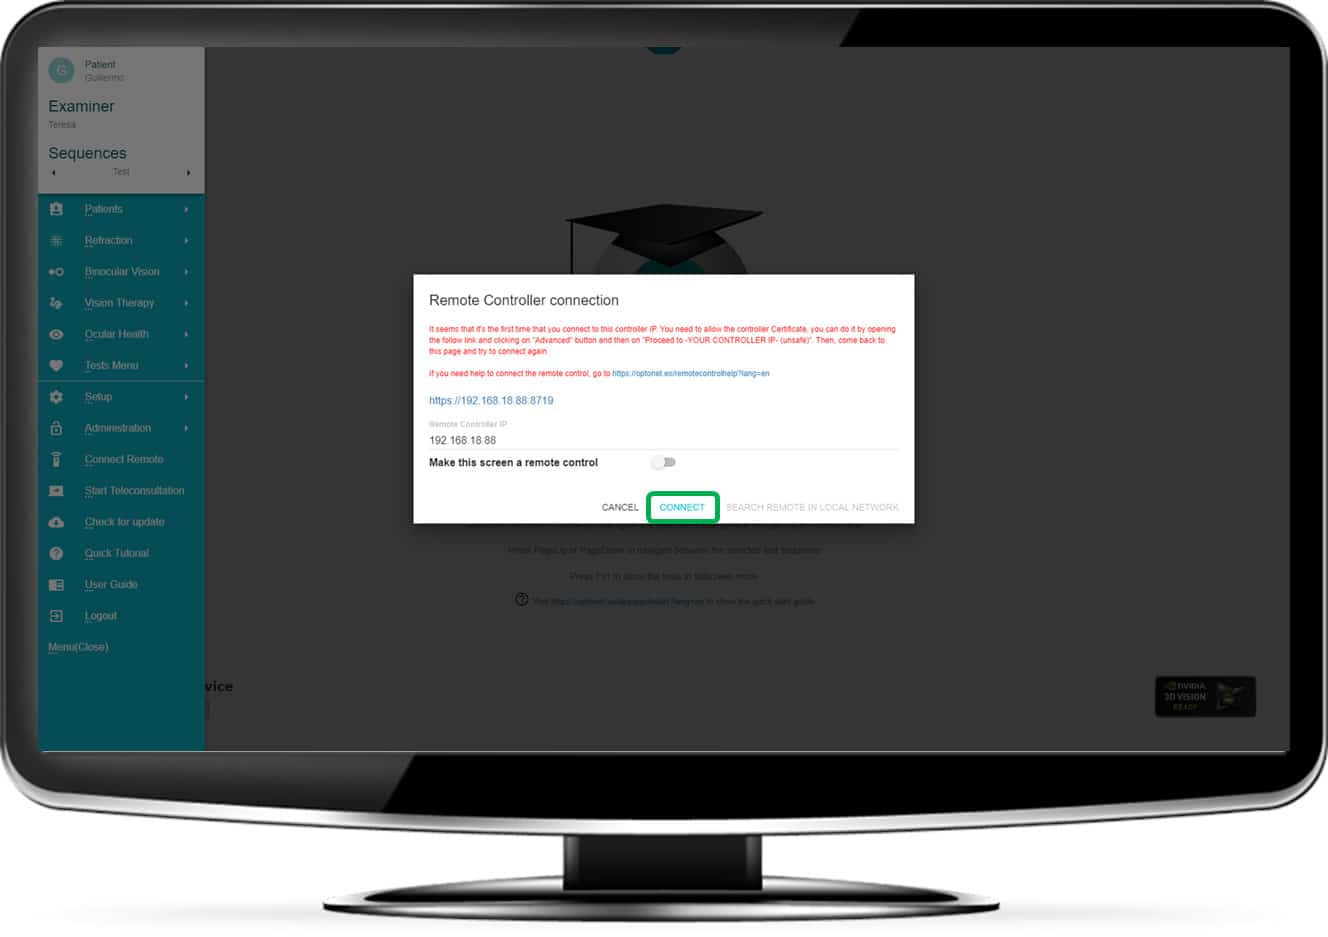
Note for Windows
The first time a remote connection is established on Windows using Chrome, the browser will ask for permission to connect with the tablet.
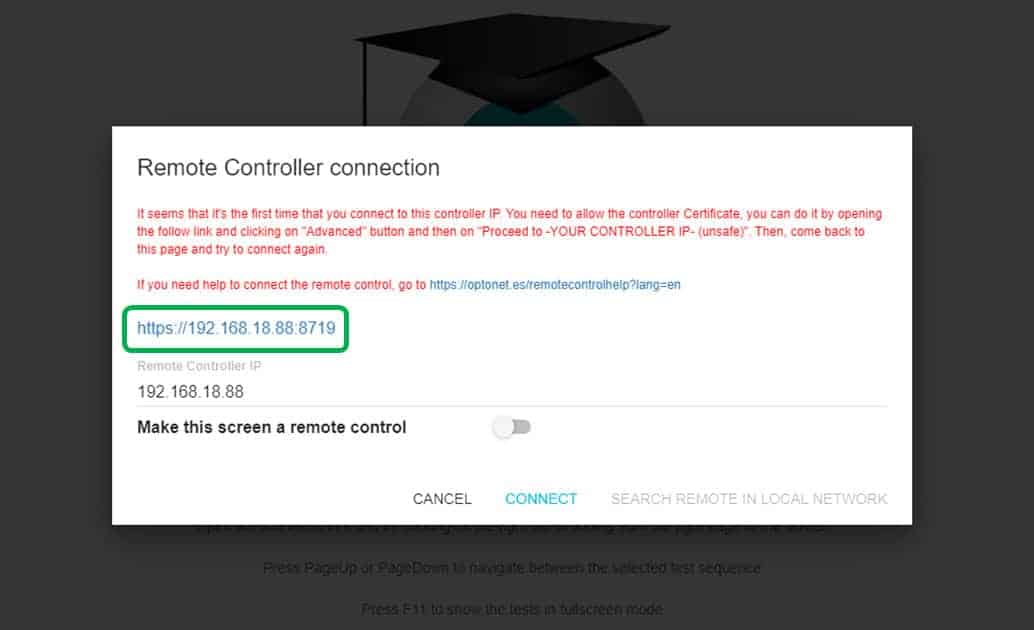
— To grant permission, click on the blue link in the window (see image above) to open a new tab in Chrome.
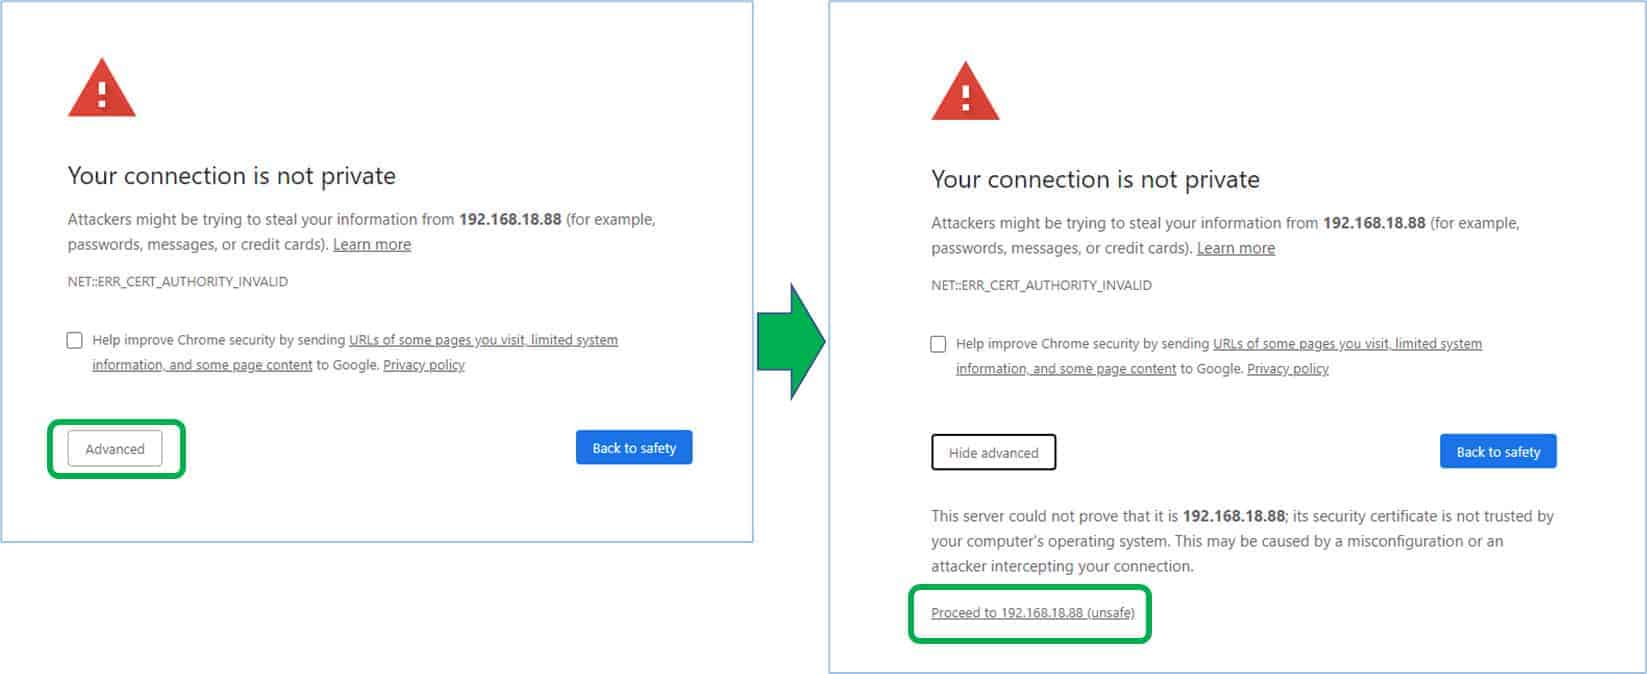
— Click on Advanced, then ‘Proceed to (IP number) (unsafe)’. A message reading “404 WebSocket Upgrade Failure” will appear, indicating a successful connection.
— Close that Chrome tab, go back to the distance vision unit, and click on Connect again (if in full screen mode, press F11 first).

Handling Distance Vision Tests #
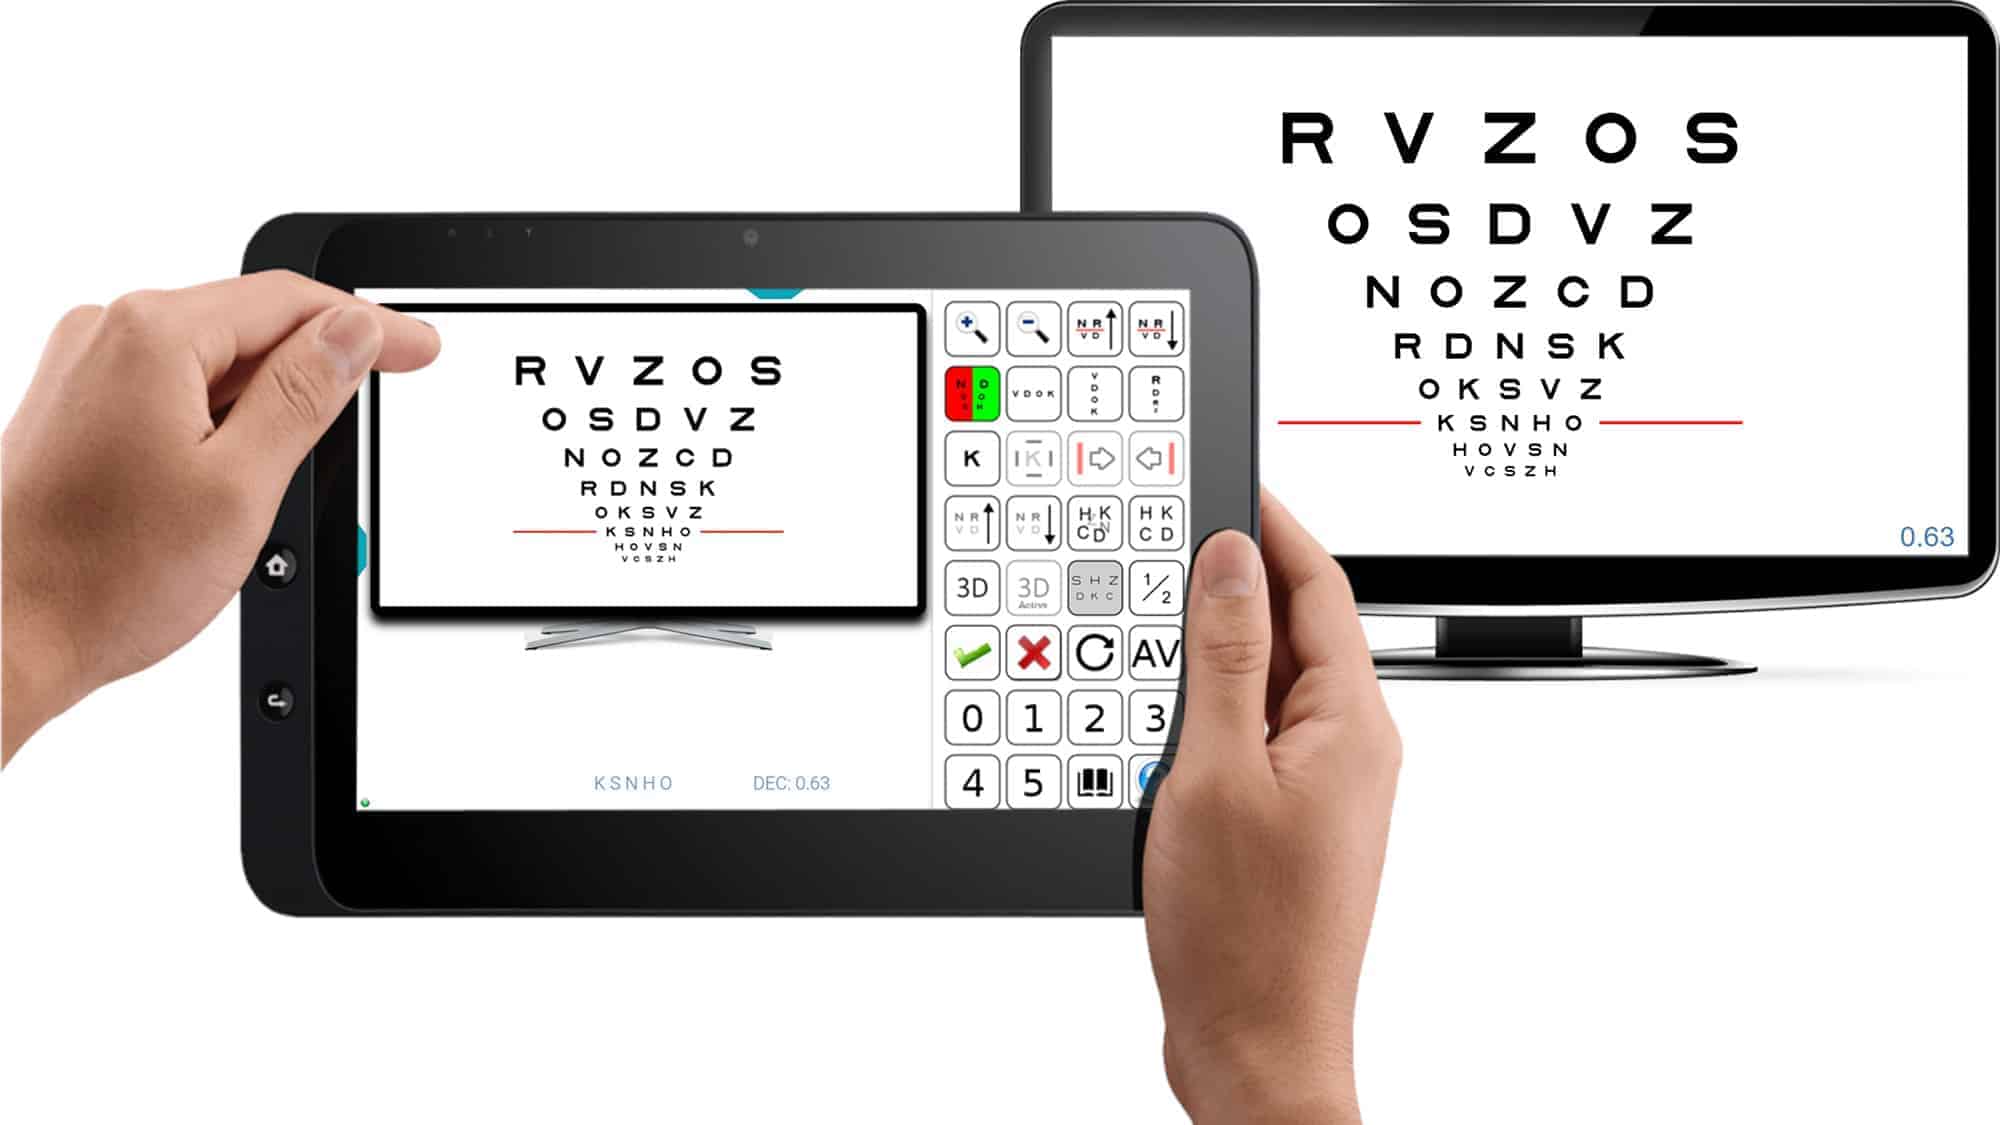
From here onwards, you can navigate through the menus from the tablet, which will automatically synchronize with the charts displayed for distance vision testing. Once in a test, the right side of the tablet displays the options for that test, whilst the left displays the same image shown to the patient on the distance vision screen.
Navigate through the menus from the tablet, which will automatically synchronize with the charts displayed for distance vision testing. The right side of the tablet displays options for the chart, while the left shows the same image shown to the patient on the distance vision screen.
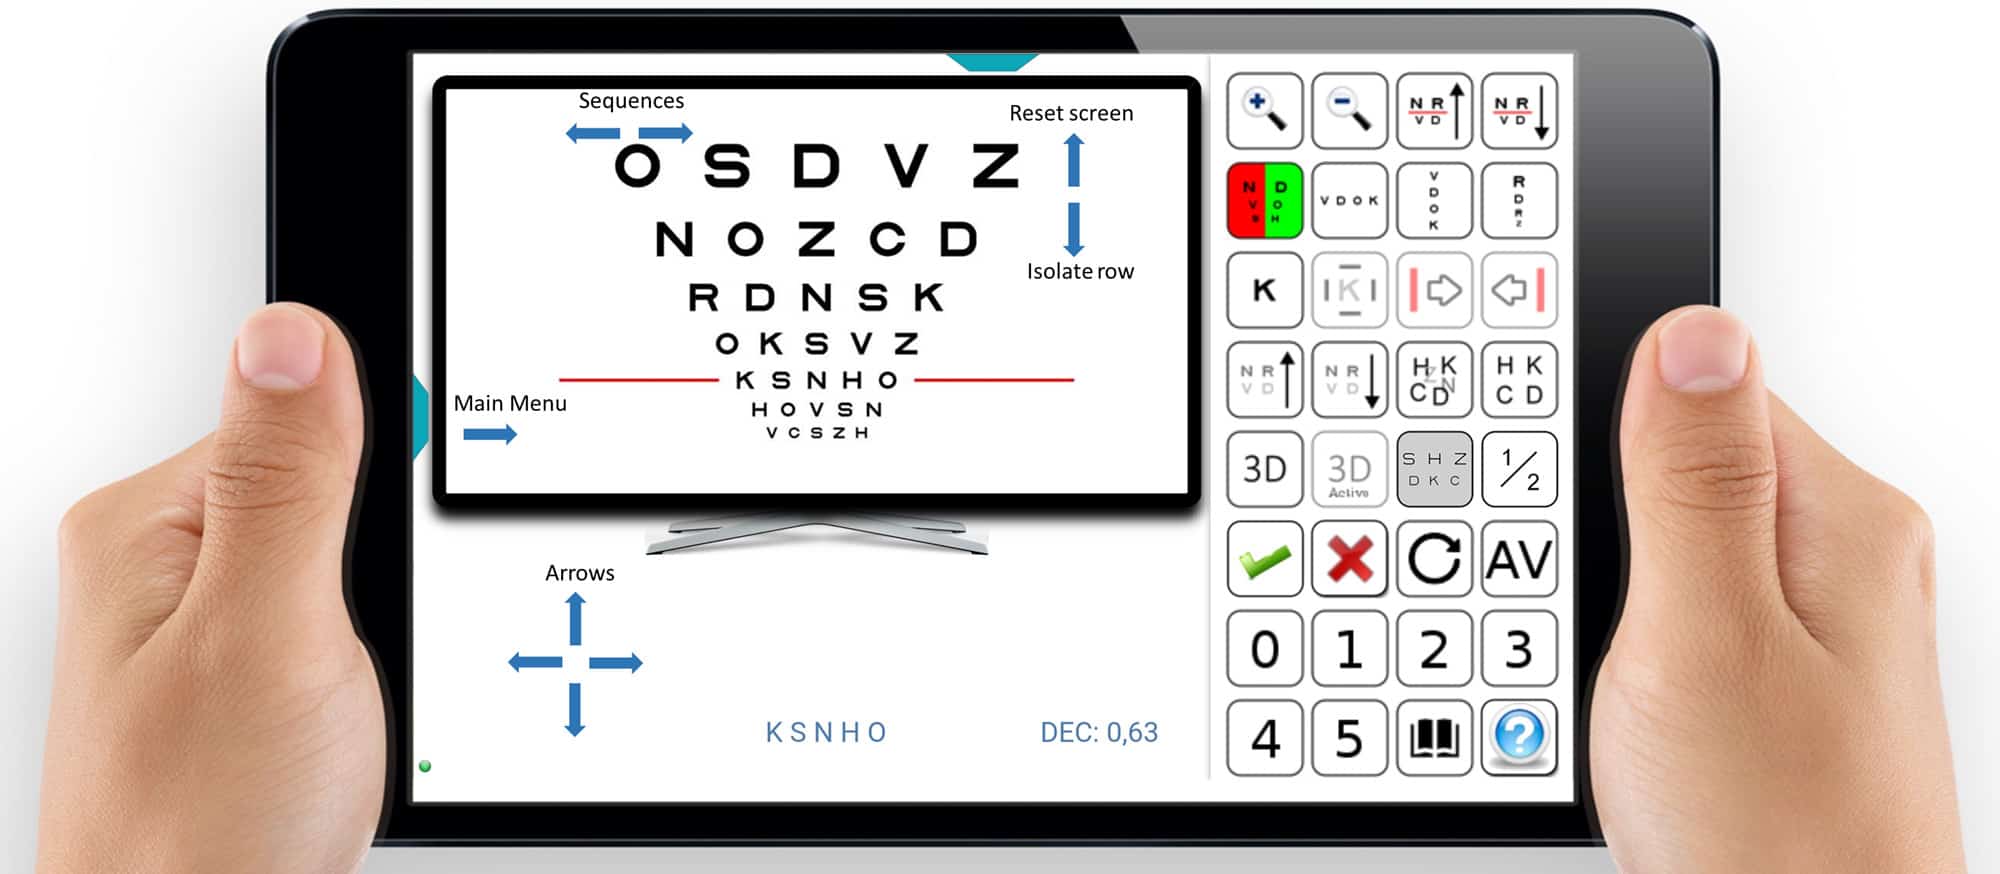
The small tab on the top gives access to the Charts Menu, while the one on the left opens the Main Menu. Gestures can also be used with the tablet as a remote controller.
Here are the gestures you can use, indicated by blue arrows: ![]()
Disconnecting and Reconnecting the Tablet #
For subsequent connections, press Start Remote Mode on the tablet and Connect Remote on the distance vision screen. Alternatively, press (Ctrl) + (Y) on the distance vision device keyboard. The IP address is automatically stored in memory.
Using a Tablet in the Clinic #
Use the tablet as a remote control for distance vision tests and to display near vision tests. After completing the distance vision examination, go to the main menu and tap on the Exit Remote Mode link. Then, you can use the tablet to show near vision charts to the patient (we recommend creating your sequence of charts on the tablet for near vision examination).
To reactivate the tablet as a remote control, return to the main menu and tap on Start Remote Mode (Note: Do not confuse this with the “Connect Remote” link).
Note: If you turn off the tablet and want to re-pair it with the distance vision screen, you can do so directly with the mini wireless keyboard by pressing (Ctrl) + (Y). This eliminates the need to move from your spot to pair the tablet. For connection issues, restart the Unit on the remote mini-computer by pressing (F10) on Android or (F5) on Windows (or (Ctrl) + (R)).