The following section is dedicated to the Aniseikonia test, which includes a single chart:
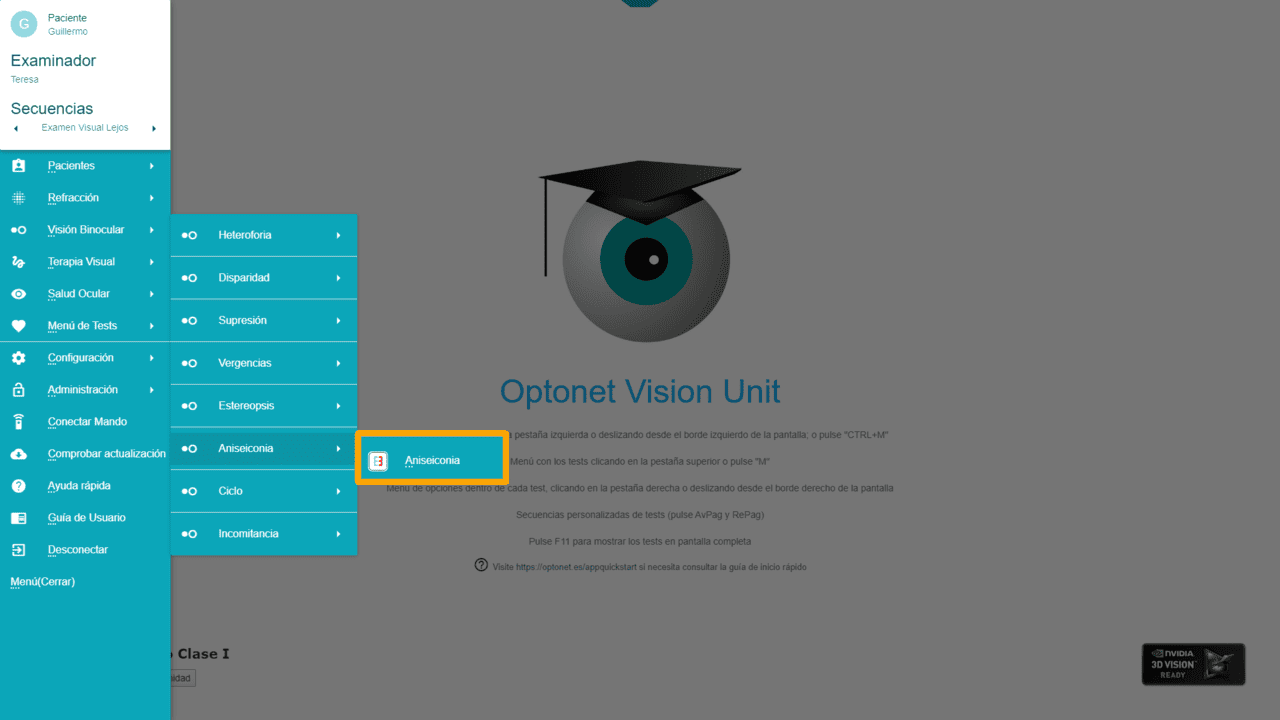
Aniseikonia #
The Aniseikonia test consists of two capital “Es” facing each other, so that with red/blue glasses, each eye sees only one of the figures. The blue “E” on the left is seen with the right eye (RE), which has the red filter; while the red “E” is seen with the left eye (LE). The patient will also use their refractive correction.
If both “Es” are of equal size and the patient does not have Aniseikonia, they will indeed see them as identical through the filters. However, if the patient has Aniseikonia, they will see one of the figures as larger than the other. The simplest way to appreciate this difference is to compare the height of the two “Es”. This way, we assess vertical Aniseikonia.
We can change the actual size of one of the figures (the blue one) until the patient with Aniseikonia perceives two figures identical in height. In that case, the larger figure on the screen will be observed by the eye that receives a smaller image on its retina.
Aniseikonia is then measured as the size difference of the images that need to be shown to the patient to see two identical figures. This difference is indicated in percentage, which by convention is always expressed in terms of the size of the image seen by the RE (i.e., the size of the image that needs to be shown to the RE for it to perceive it as the same size as seen by the left eye).
If the right eye needs to be shown a larger image, Aniseikonia will have a positive value, and if a smaller image needs to be shown, its sign will be negative. Therefore, we will only modify the size of the image projected to the right eye, that is, the blue “E” located on the left, until the patient indicates that it is the same size as the figure observed by the left eye.
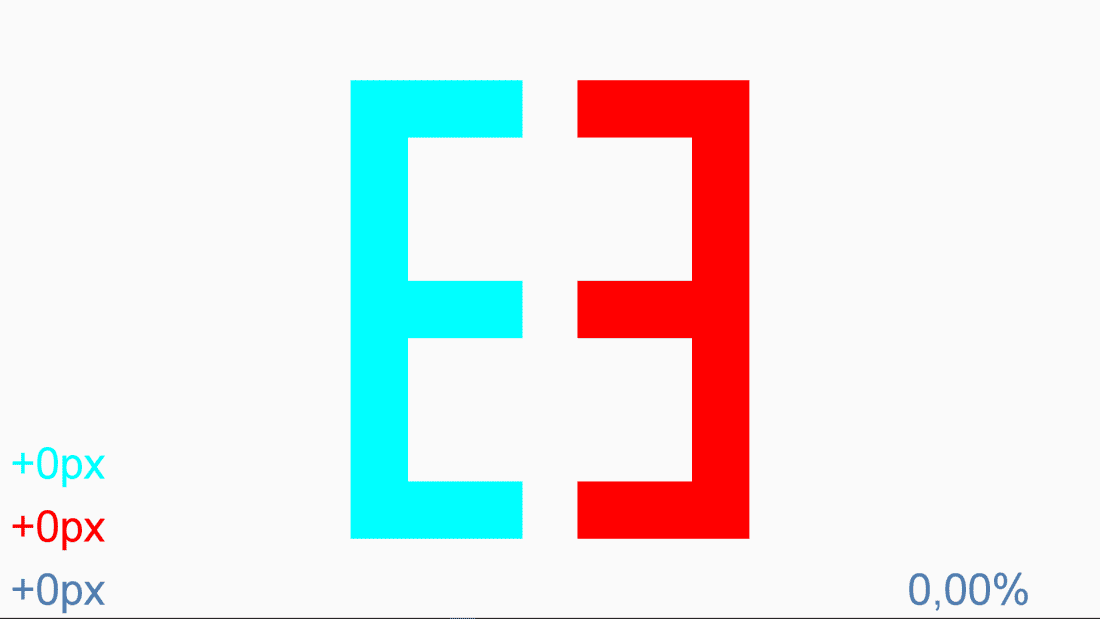
To change the size of the blue “E”, we press the icons on the tool menu (or the “+” and “-” keys) and the percentage of Aniseikonia will be displayed in the bottom right corner of the screen (with its + or – sign). As we mentioned, by comparing the height of the figures, we are analysing vertical Aniseikonia.
If we want to make both “Es” larger or smaller, we have a zoom icon in the tool menu that allows us to make these changes, or we can also press the “Z” key repeatedly. With this zoom, it’s possible to choose between 4 different sizes of “Es”, as long as the monitor dimensions allow it. These 4 sizes, from smallest to largest, will allow the steps of the Aniseikonia measurement to be 1.0%, 0.5%, 0.33%, and 0.25%, respectively.
Adjustments for Ocular Deviation #
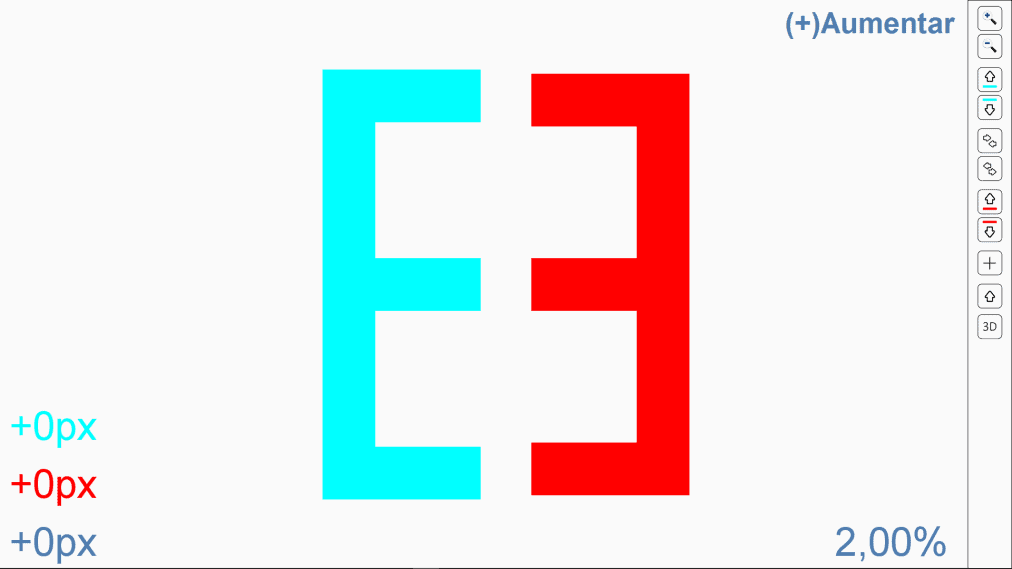
Some patients with heterophorias find it difficult to compare the size of the figures, as they see how the “Es” facing each other move horizontally and/or vertically, crossing or separating. To avoid this and facilitate measurement, we can alter the position of the figures relative to each other until the patient sees that they are aligned and stable. We have controls that can raise or lower each of the “Es” and others to bring them closer or further apart. The keyboard arrows achieve the same functions, so to separate or join them, we use the right (→) and left (←) arrow, respectively. To raise or lower the blue “E,” we press the up (↑) and down (↓) arrows, while to move the red “E”, we press the “Ctrl + Shift” along with the up and down arrows on the keyboard.
![]() (↑)
(↑) ![]() (↓)
(↓) ![]() (Ctrl + Shift + ↑)
(Ctrl + Shift + ↑) ![]() (Ctrl + Shift + ↓)
(Ctrl + Shift + ↓)
First, we ask the patient to focus on the central strokes of the “Es” to indicate if they are aligned, or if one of the “Es” is higher than the other.
Sometimes it’s useful to show a fixation cross that both eyes see, achieved by pressing the corresponding icon or the “C” key.
Pressing the icons on the tool menu or using the shortcut keys, we can modify the vertical position of the “Es”. Thus, we can raise or lower one or the other until the patient indicates that the central segments of both “Es” are at the same height.
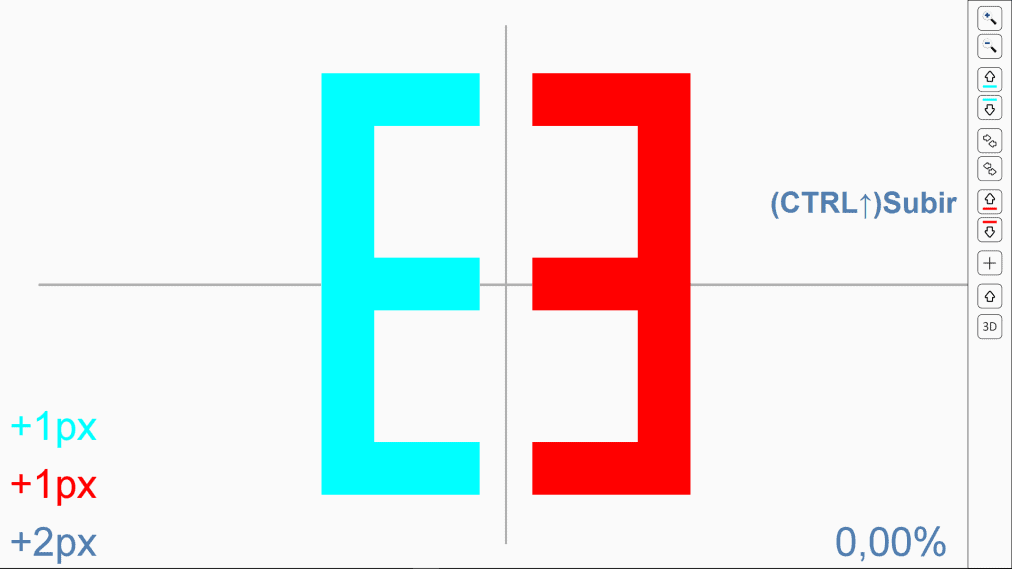
This deviation we have neutralized is actually a fixation disparity, and, in fact, the left side of the screen indicates the value in pixels of the position adjustment for each eye. For horizontal deviations, we can also move the “Es,” bringing them together using the corresponding icon (or ←) or separating them (→) until the patient’s deviation is countered. We seek a position where the patient sees the figures are close but not touching, and more or less still. If the figures still move, and it’s difficult for the patient to compare their size, we can leave the central cross, which, being seen binocularly, helps stabilize the position of the visual axes.
Horizontal heterophorias are more common and larger in magnitude than vertical ones, so the problem of the figures coming together or separating is more common horizontally. For the same reason, it is often more difficult to determine Aniseikonia in the horizontal meridian.
Viewing Distance #
The viewing distance, in principle, is not important, as the percentage difference remains the same at any distance. However, if the patient gets too close to see the figures, they will have to move their eyes up and down, so they will no longer be looking through the optical centres of the lenses. In these circumstances, the measurement may be contaminated by different prismatic effects (dynamic Aniseikonia).
Therefore, it’s advisable to observe the test from the greatest possible distance, which usually coincides with the distance used for the rest of the optotypes.
Use #
The Aniseikonia test allows us to determine the difference in size of retinal images in the vertical direction. Aniseikonia generally occurs when there is anisometropia but can also present in other cases, such as patients who have undergone refractive surgery and cataract surgery. Today, we know that the amount of Aniseikonia cannot be predicted from refractive correction, so it must be measured in any patient where it is suspected to be present.