VA Testing Protocol (≥ 6 years old) (ETDRS) #
First, ensure that the Optonet Vision Unit is correctly calibrated for the selected viewing distance (recommended 4 m) (see https://optonet.online/va-charts-calibration/). Leave the lights on in the room and select a VA chart. The VA charts can be remotely controlled with a wireless keyboard or via a tablet paired with the computer.
Isolate the central column of letters by pressing the button ![]() (or the left arrow ← / or the letter T on the keyboard).
(or the left arrow ← / or the letter T on the keyboard).
Ask the patient to read all the letters down the column until they make a mistake.* Use the up and down buttons ![]() (or arrow keys ↑ ↓) to point each letter with red lines on either side.
(or arrow keys ↑ ↓) to point each letter with red lines on either side.

Press the column button ![]() again (or the letter T / or the left arrow ←) to return to the full chart and move the red lines up (or ↑ key) one level and ask the patient to read that row. The patient is expected to read all letters correctly in the first row. Otherwise, move one row up until the patient can read all five letters of one row correctly.
again (or the letter T / or the left arrow ←) to return to the full chart and move the red lines up (or ↑ key) one level and ask the patient to read that row. The patient is expected to read all letters correctly in the first row. Otherwise, move one row up until the patient can read all five letters of one row correctly.
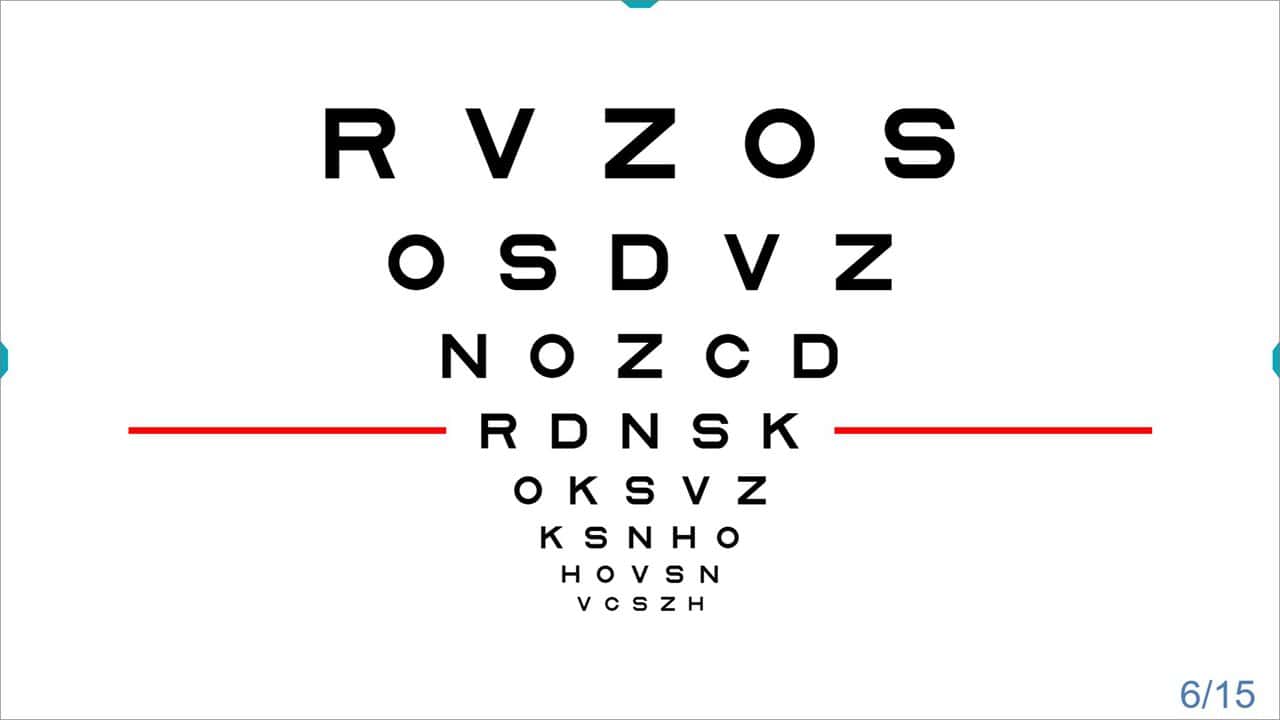
Count the number of letters correctly identified per row (will be 5 to start with) and press the number on the panel or keyboard. The red lines will go down one level automatically.
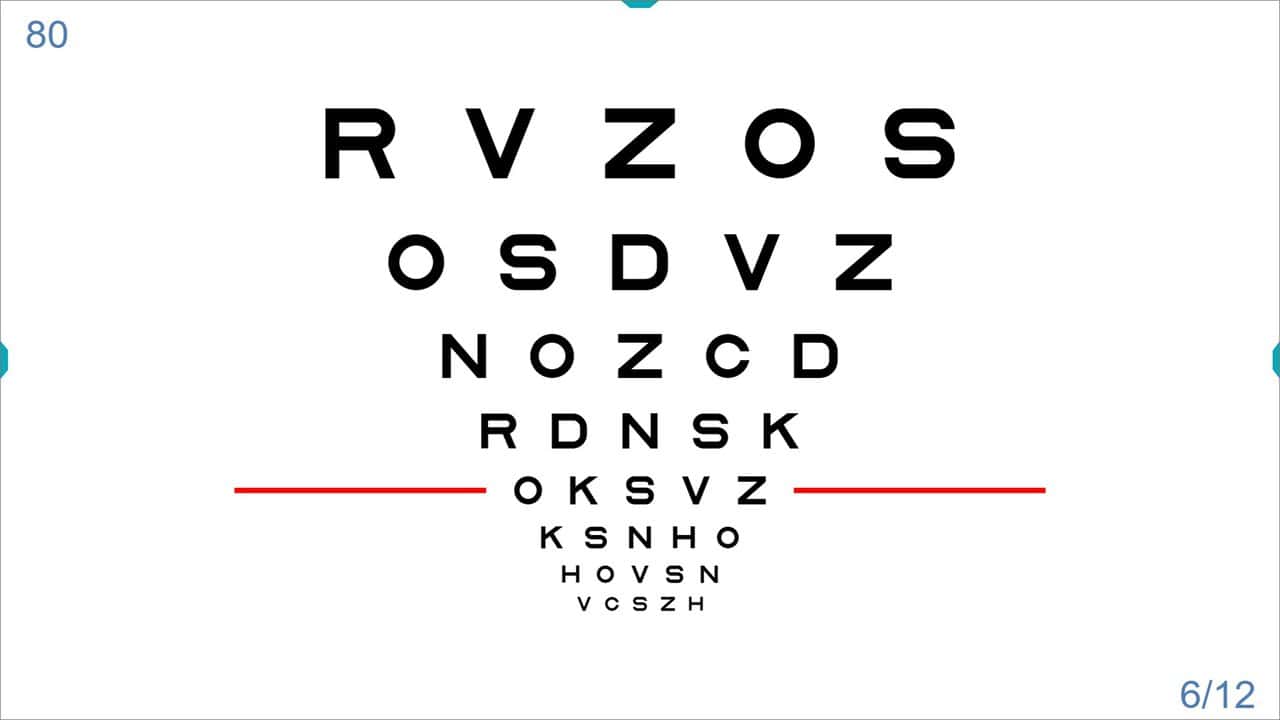
Then ask the patient to read the next row indicated by the red lines, count the number of letters correctly identified, and press the appropriate number on the keyboard or panel (from 0 to 5).
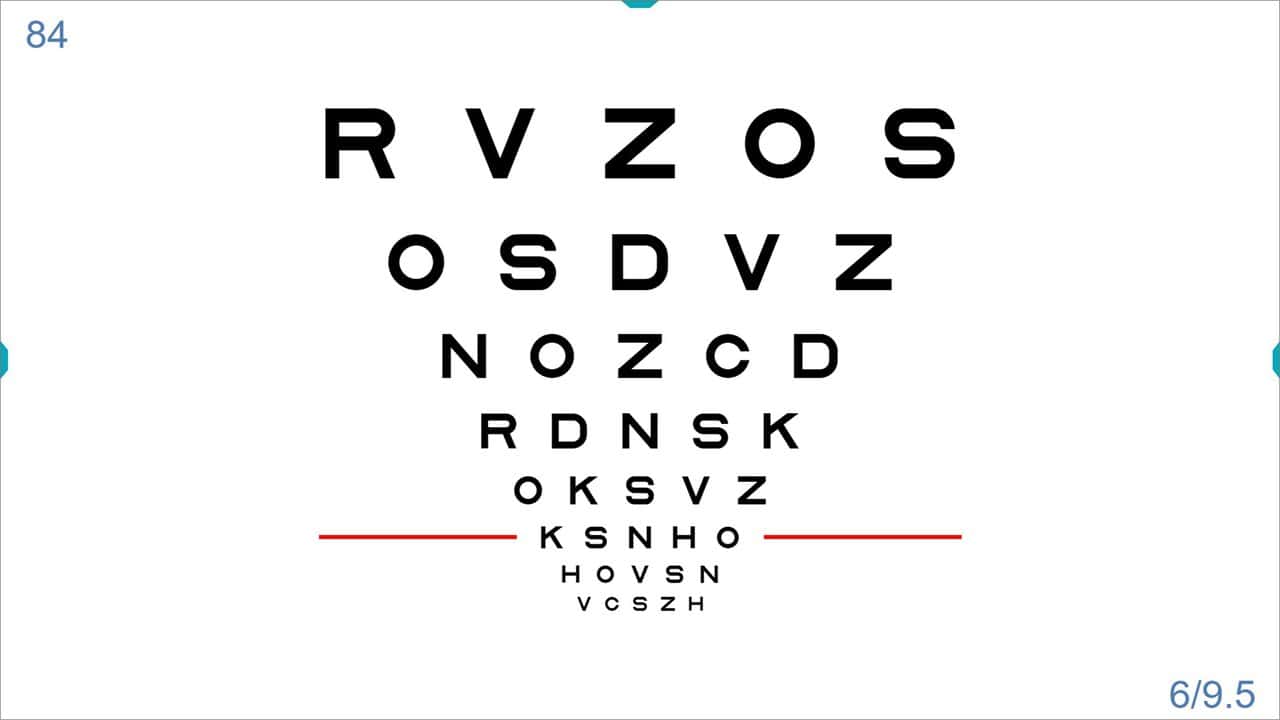
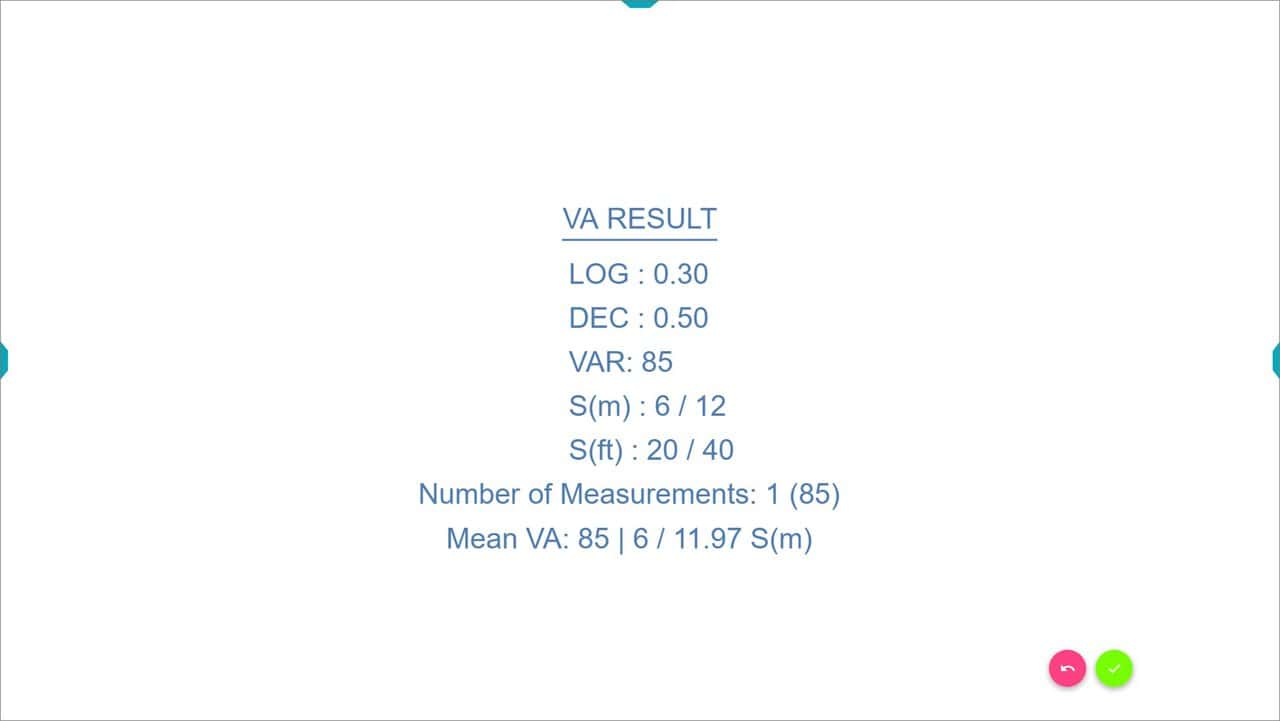
Carry asking to read the letters and introducing the number of correct answers per row until pressing on 1 or 0; or if reaching the end of the chart. Then the Optonet Vision Unit displays the VA result in various notations.
We recommend repeating the measurement for increased accuracy. To repeat, press the buttons ![]() /
/![]() (or the key Intro/OK) and the program will show different letters and will point to the level of VA where the measurement started before, for convenience. If you take several measurements, the program will automatically calculate the Mean and Standard Deviation values.
(or the key Intro/OK) and the program will show different letters and will point to the level of VA where the measurement started before, for convenience. If you take several measurements, the program will automatically calculate the Mean and Standard Deviation values.
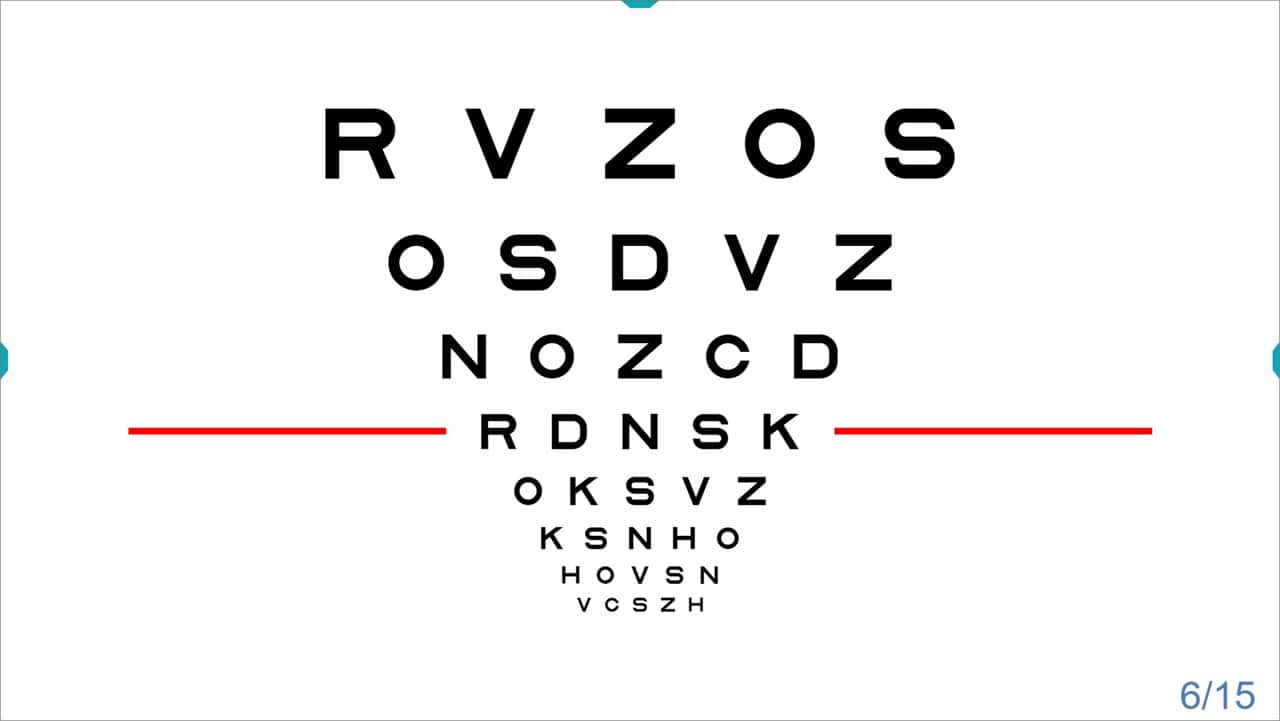
To randomly change the letters, press the designated button (or the Z key). Finally, press the button (or the F4 key) to save the results in the Patient Record.
To cancel the measurement, press “Esc”.
Remind the patient to keep their other eye occluded without pressing on it (for example, with a cupped hand or an occluder). The patients should not squint their eyes or move closer to the screen if they cannot see the letters.
*Remember to encourage the patient to guess when they report not being able to see a letter.
VA Testing Protocol (< 6 years old) (Symmetrical) #
Verify the Optonet Vision Unit is calibrated correctly and establish the appropriate viewing distance (recommended 3 m). Leave the lights on in the room and select the Symmetrical VA chart. Prior to VA testing, use a “Matching Card” to teach the child to point to the same letter indicated by the examiner.
Isolate a single letter pressing ![]() (or → key) and introduce contour interaction bars with
(or → key) and introduce contour interaction bars with ![]() (or “C” key). Ask the child to read* isolated letters in decreasing sizes until a mistake is made or the child struggles. Use
(or “C” key). Ask the child to read* isolated letters in decreasing sizes until a mistake is made or the child struggles. Use ![]() or ↑ and ↓ keys to change size.
or ↑ and ↓ keys to change size.

Go up one size and press on ![]() (or the keys “Enter” or “R”) to switch to a row of 5 letters. Use red arrows to point to one letter at a time
(or the keys “Enter” or “R”) to switch to a row of 5 letters. Use red arrows to point to one letter at a time  (can also move them with the keyboard arrows: → or ←). Ask the child to identify each letter (or to point them out on the matching card.)** If an error is made, go up one level until all 5 letters are correctly seen.

Count the number of letters correctly identified (it is expected to start with five correct letters) and then click on the number on the screen or keyboard. The next row of letters will be shown automatically.

Ask the child to read all the letters, pointing to them one at a time, and click on the correct number of letters seen per row each time (from 0 to 5). Always encourage the child to guess, even if not sure of the answer.

Carry on until you click on 1 or 0; or if you reach the end of the chart. Then the Optonet Vision Unit will display the VA result on different notations.
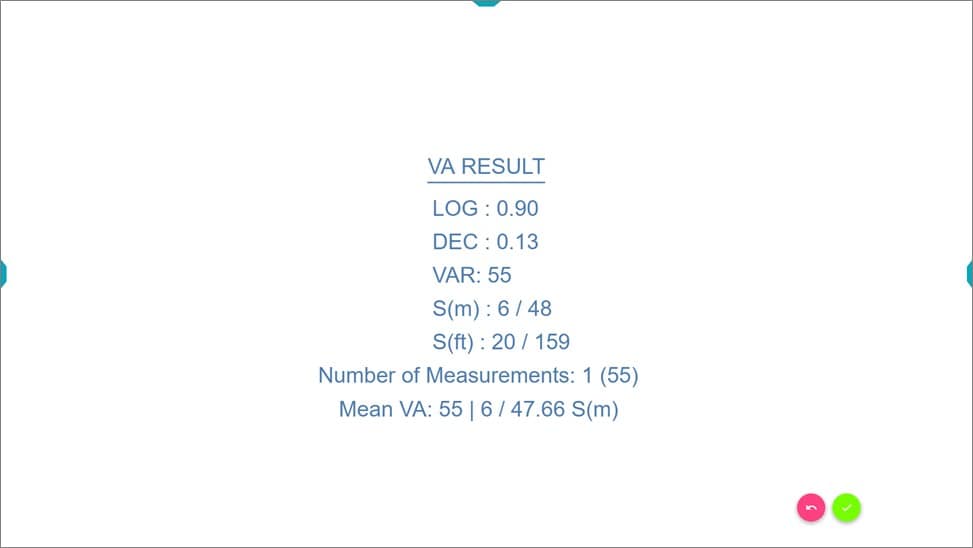
We recommend repeating the measurement for increased accuracy. To repeat, press ![]() /
/![]() or “Enter/OK” key and the program will show different combinations of letters, starting with the size where the measurement started before. If you take several measurements, the program will automatically calculate the Mean and Standard Deviation values.
or “Enter/OK” key and the program will show different combinations of letters, starting with the size where the measurement started before. If you take several measurements, the program will automatically calculate the Mean and Standard Deviation values.
To randomly change the letters, press the designated button  (or the “Z” key). Finally, press the button
 ![]() (or the F4 key) to save the results in the Patient Record.
(or the F4 key) to save the results in the Patient Record.
The child should avoid squinting their eyes, and we recommend occluding the eye with an occluder.
To cancel the measurement, press “Esc”.
*Remember to encourage the child to guess when they report not being able to see a letter.
**Young children often respond better by pointing to a matching card, as they may recognize the letter even if they don’t know its name. They can practice with their parents beforehand on this page:
