Introduction to Vergences #
Let’s explore how the Optonet Vision Unit is utilized for measuring and rehabilitating vergences. In the menu, we find four links: two for horizontal vergences and two for vertical vergences. This section’s procedures emulate traditional vectograms and anaglyphs, which are tools used for training vergence Amplitude and Facility.
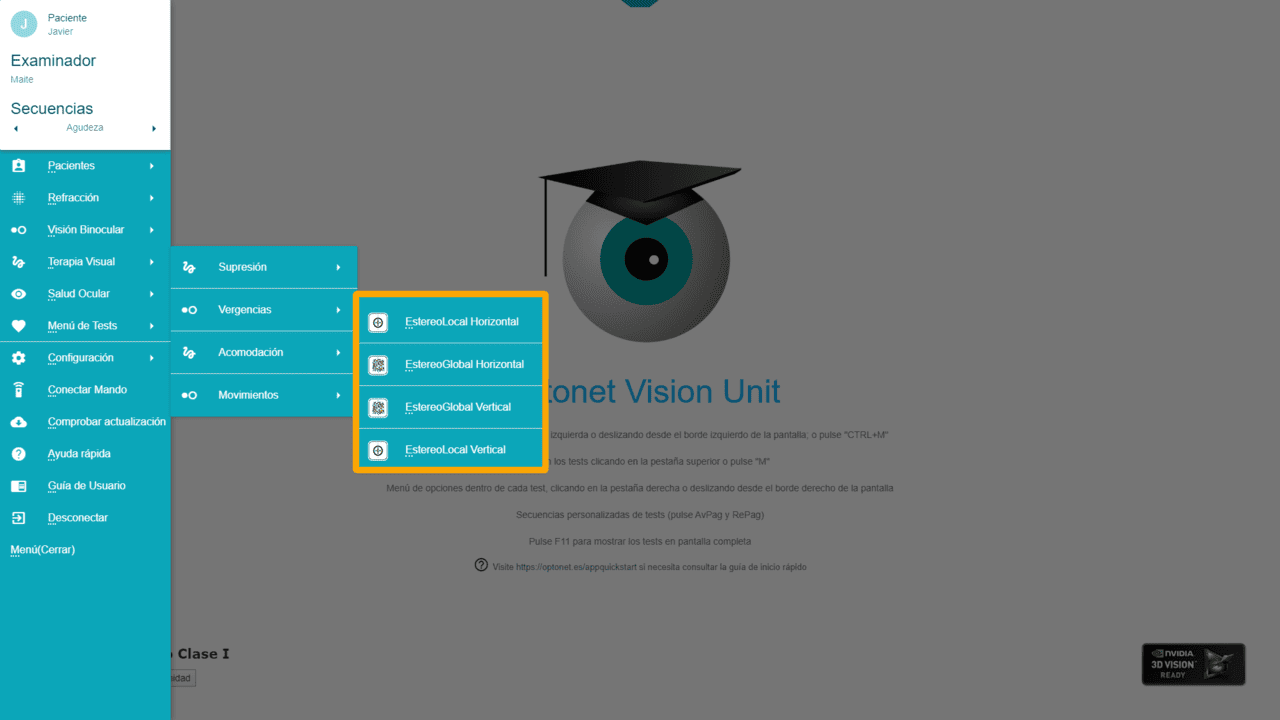
To explain these exercises, we will use the example of horizontal Stereo-Local, although we will discover that the others are very similar. In all of them, clicking on the right tab always brings up a tool menu with buttons that offer various options. Hovering the mouse over each button displays its function, along with the corresponding keyboard letter for the same action (indicated in parentheses).
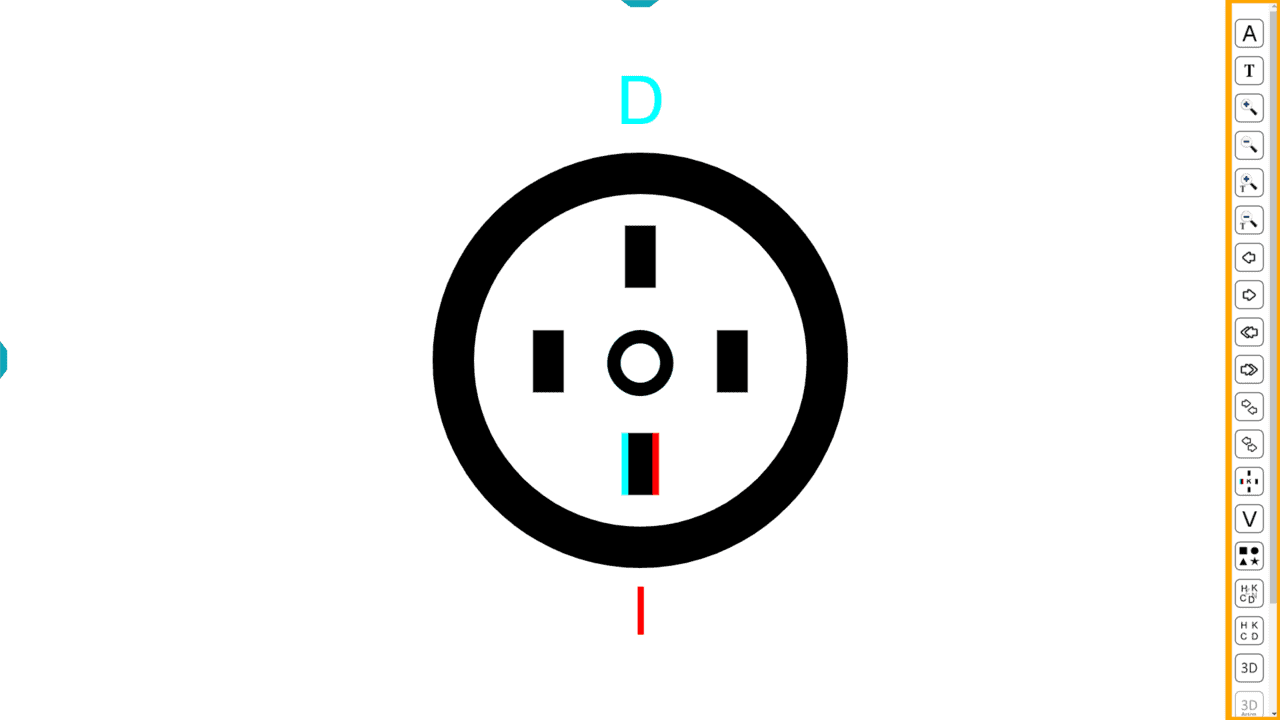
To carry out these exercises, red/blue filters (or polarizing filters for 3D passive monitors) are always required. This setup dissociates vision, allowing each eye to see a distinct image. In this scenario, the images are two circles.
The program enables the shifting of circles relative to one another. For the patient to fuse them into a single image, they must either converge or diverge, depending on the circles’ separation, as each eye aims towards its respective circle.
To maintain a clear image, the patient must keep consistent accommodation, given that the screen distance remains unchanged. This method allows us to train vergences while keeping accommodation steady. The circle visible to the right eye (RE) features a letter “R” at the top, whereas the circle seen by the left eye (LE) displays a letter “L” at the bottom. These letters will move with their respective circles.
How the exercise works #
To introduce the exercise to the patient, we can begin by only showing the circles. We conceal the internal rectangles and letters by clicking the hide icon (or pressing the “H” key). The patient then puts on the red/blue (or polarized) filters, and we slowly separate the circles using the keyboard arrows, urging the patient to focus to prevent the image from doubling and to maintain a single, clear circle.
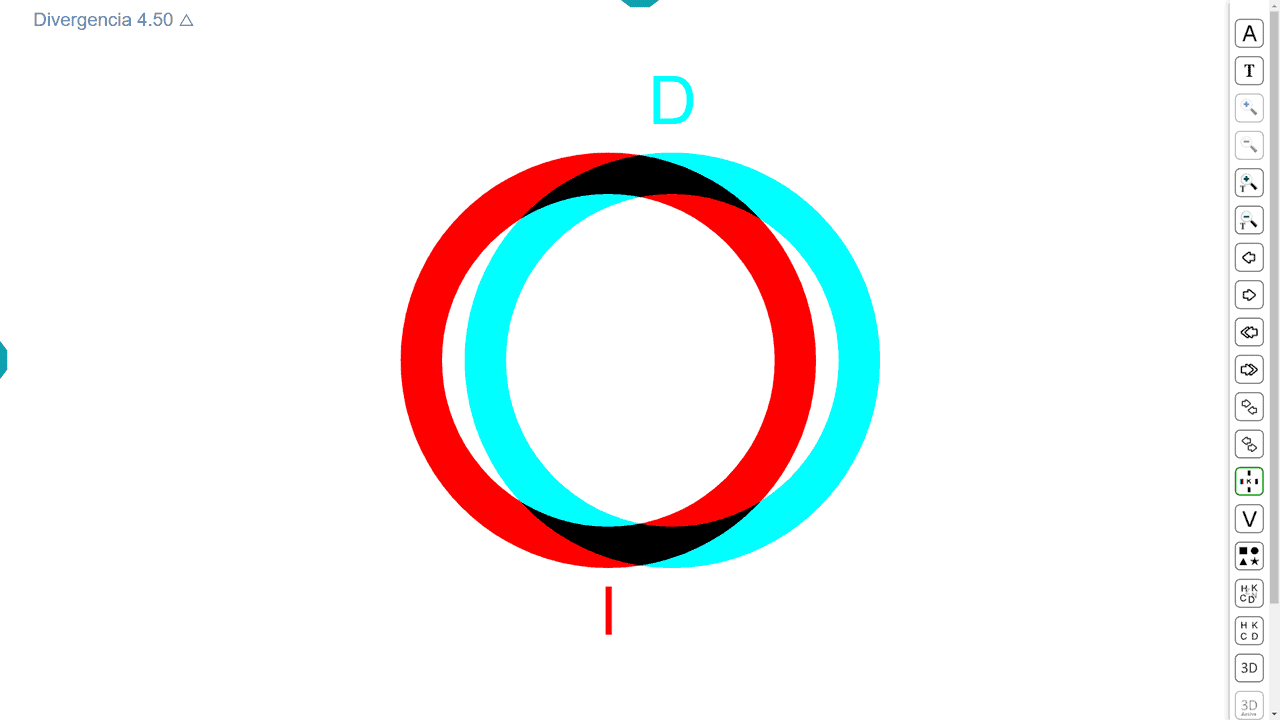
We use the left and right arrows on the keyboard (← →) (or buttons from the tool menu) to adjust the circles’ positions. Pressing the right arrow shifts the circle seen by the RE to the right and the circle seen by the LE to the left by 0.5 Δ increments. To fuse these two circles into one, the patient must diverge their gaze. The screen’s top-left corner displays the divergence in prism diopters, according to the predetermined viewing distance.
By pressing the left arrow, the circle viewed by the RE is moved left and the circle viewed by the LE is moved right, also by 0.5 Δ increments, thus necessitating convergence. The amount of required convergence is similarly shown in the screen’s upper-left corner.
Feedback on Response Accuracy #
The objective of these exercises is to enhance the patient’s capacity for convergence and divergence. It is crucial to verify the accuracy of their performance continuously, necessitating a reliable feedback mechanism.
Silo Effect #
One straightforward method to ascertain if the patient correctly executes the exercises involves querying about their visual experience of the circle: when successfully fusing the images, the circle seems to enlarge and recede during divergence, whereas it appears to shrink and approach during convergence. This phenomenon is referred to as the SILO effect, denoting Small-In; Large-Out.
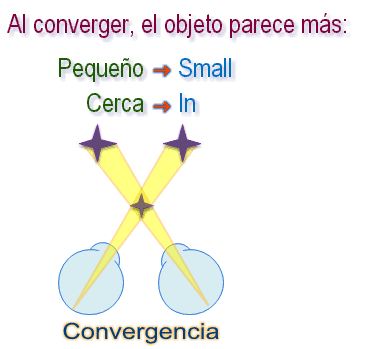
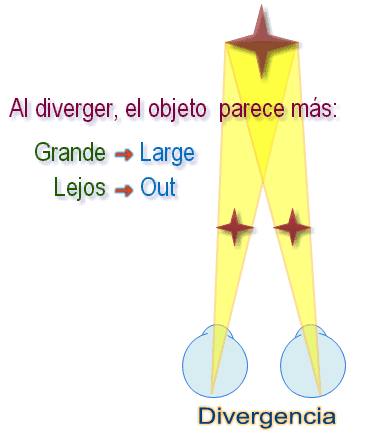
If the patient confirms this, it indicates they are correctly performing the exercise for convergence or divergence.
Stereopsis Feedback #
Furthermore, the Optonet Unit’s exercises incorporate a much more precise method to ensure that the patient is correctly executing the task, utilizing stereopsis as feedback.
It’s important to remember that stereoscopic vision is achieved because each eye views a slightly different image due to their separate positions on the face. This difference in viewing angles allows the brain to merge these images into a single 3D perception.
Artificial stereoscopic perception can also be achieved by presenting each eye with a distinct image. Two types of figures are commonly used for this:
1. Figures whose outlines are visible monocularly but require binocular vision to perceive depth. Since stereopsis is realized through minor differences in the images, this is referred to as local stereopsis or Stereo-Local.
2. Another method to generate 3D images involves presenting each eye with a field of dots arranged to appear random. While only dots may be visible monocularly, binocular viewing merges these into a coherent volumetric shape. Since these images require the integration of information over larger areas of the visual field, this approach is termed global stereopsis or Stereo-Global and provide no monocular cues.
The Vision Unit employs both kinds of stereoscopic imagery: random dots and contoured images. These are used to continuously verify that the patient is performing the exercise correctly, serving as real-time feedback.
Response accuracy in Stereo-Local exercises #
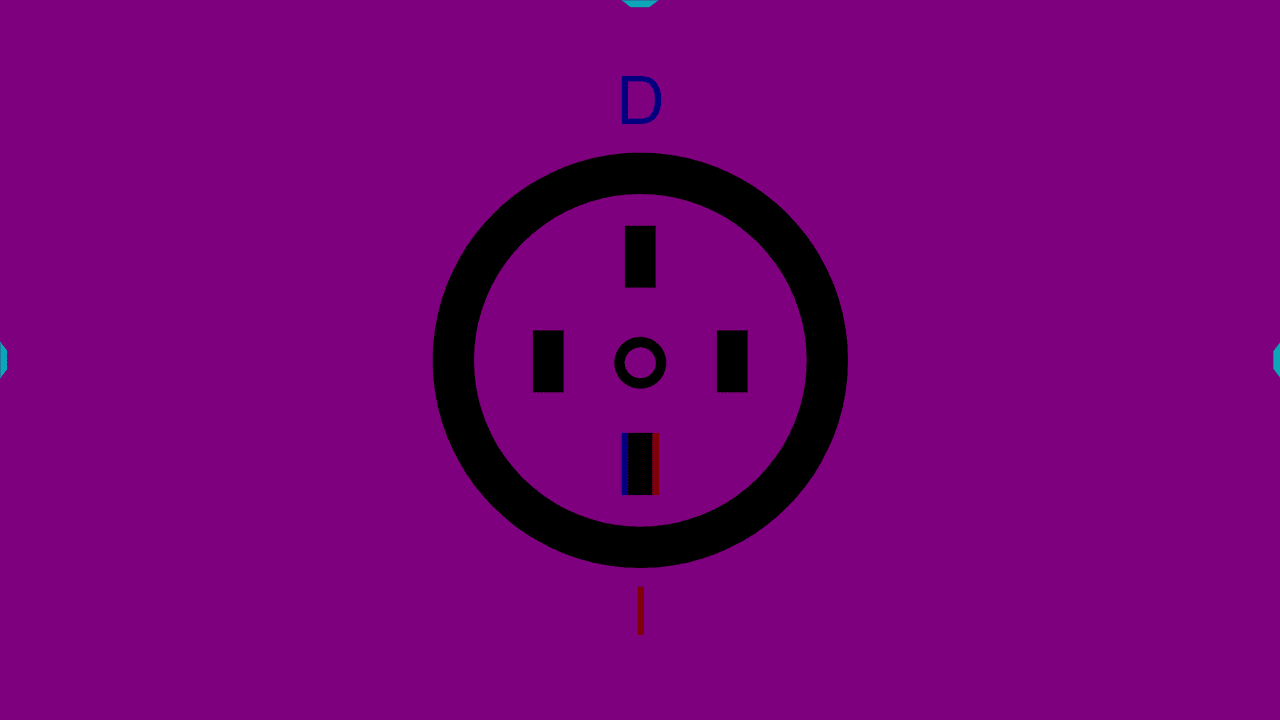
In the Stereo-Local tests, a circle containing a letter and four bars is presented. Patients are asked to identify which bar appears most prominent. A correct response confirms the exercise was performed accurately, as the 3D rectangle is only visible when the images from each eye are fused.
Response accuracy in Stereo-Global exercises #
During Stereo-Global exercises, if the patient successfully fuses the images from each eye, a letter emerges in stereopsis. The patient is required to identify this letter. Correct identification assures proper execution of the exercise, as the letter cannot be discerned through the filters without image fusion.
Accommodation Control #
Stereo-Local exercises #
In the centre of the circle viewed by the patient, there is a Sloan-type letter serving as accommodation control. This ensures the patient maintains focus at the screen distance, even as their visual axes converge in front of or diverge behind the screen. With each test change, a new letter is presented, and the patient is asked to identify it.
Stereo-Global exercises #
Similarly, in Stereo-Global exercises, the patient has to say which letter they see when they fuse both images, and for that, they must accommodate at the screen distance. In both types of exercises (Stereo-Global or Stereo-Local), we can use the right menu to change the letter the patient sees, or also its size. The smaller the letter, the more precise the amount of accommodation the patient needs to see it clearly.
In Stereo-Global exercises, the patient is required to identify a letter that becomes visible when the images from each eye are fused, necessitating accommodation at the screen distance.
For both exercise types (Stereo-Global and Stereo-Local), the menu on the right allows for adjustments in the letter seen by the patient, including its size. The smaller the letter, the greater the precision of accommodation needed for clear vision.
Stereo-Local Vergence Menu #
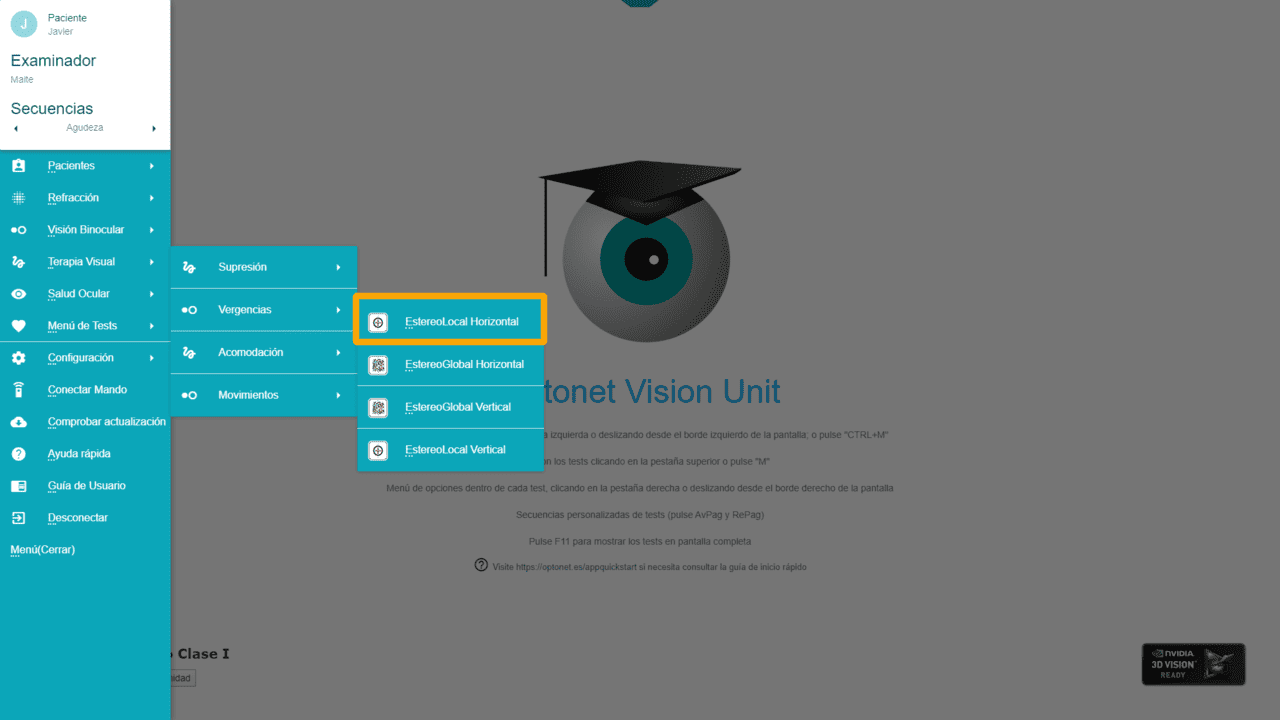
As we have seen, this test displays a circle with a letter at the centre and four bars around it. When the patient looks at the screen with the corresponding filters and manages to fuse the images from both eyes, one of the bars appears in stereopsis, raised above the others.
The images seen by each eye will be shifted relative to each other, requiring the patient to either converge or diverge their eyes to fuse them. The exercise is considered performed correctly when the patient identifies which bar appears raised. This can be done by pressing the corresponding arrow on the keyboard or by clicking on it with the mouse on the screen. Following this, the program advances to the next step.
Tools Menu #
Clicking on the right tab displays a menu of options. Hovering the mouse over each option reveals its function. Additionally, each function can be activated by pressing the corresponding letter on the keyboard (shown in parentheses). Below are the options:
| Icon | Function | Keyboard Shortcut |
| This function is used to measure Vergence Amplitude (the ability for convergence and divergence fusion) as an alternative to using a Risley prism or prism bar. This assessment is typically conducted before starting vision training and then repeated as necessary to monitor the patient’s improvement. | A | |
| This button initiates the training session. It allows the selection of training for convergence, divergence, or facility; the duration of the exercise; the increment size in prismatic diopters; and lastly, the inclusion of a “Landolt C” for accommodation control (to ensure that the patient accommodates correctly during the test). | T | |
| These buttons are used to increase or decrease the size of the circles displayed on the screen. |
+ – |
|
| We can also increase or decrease the size of the letter displayed at the centre. |
Ctrl + Ctrl – |
|
| These arrows offer the possibility of making vergence changes in steps of 0.5 Δ (prism diopters) or in steps of 1 Δ. |
←→ ↑↓ |
|
| When the patient fuses the circles, one of the rectangles is seen in 3D, appearing raised more than the others. With these buttons, we can adjust the degree of stereopsis of that rectangle. |
J S |
|
| This icon can hide the contents within the circles, for instance, to present the patient with the test for the first time. | H | |
| To display the values on the screen: which rectangle is raised the most, the size of the letter at the centre and of the circles (in VA scale), and the stereoacuity value of the rectangle seen in 3D. | V | |
| You can change the geometric shape displayed. | G | |
| You can randomly change the centre letter and which rectangle is shown in stereopsis. | Z | |
| To return to the initial letter. | X | |
| To switch to the polarization version if using a passive 3D screen (utilizing circular polarizing filters). | D |
Ghost Images #
In this exercise, a slight ghost image may be observed in the areas where the circles overlap. To mitigate this, we can select a color combination with a Magenta background. It is advisable to maximize the screen brightness, as the magenta background can appear somewhat dark. A similar combination with a lighter pink background is explained in the Color Calibration instructions.
Stereo-Global Vergence Menu #
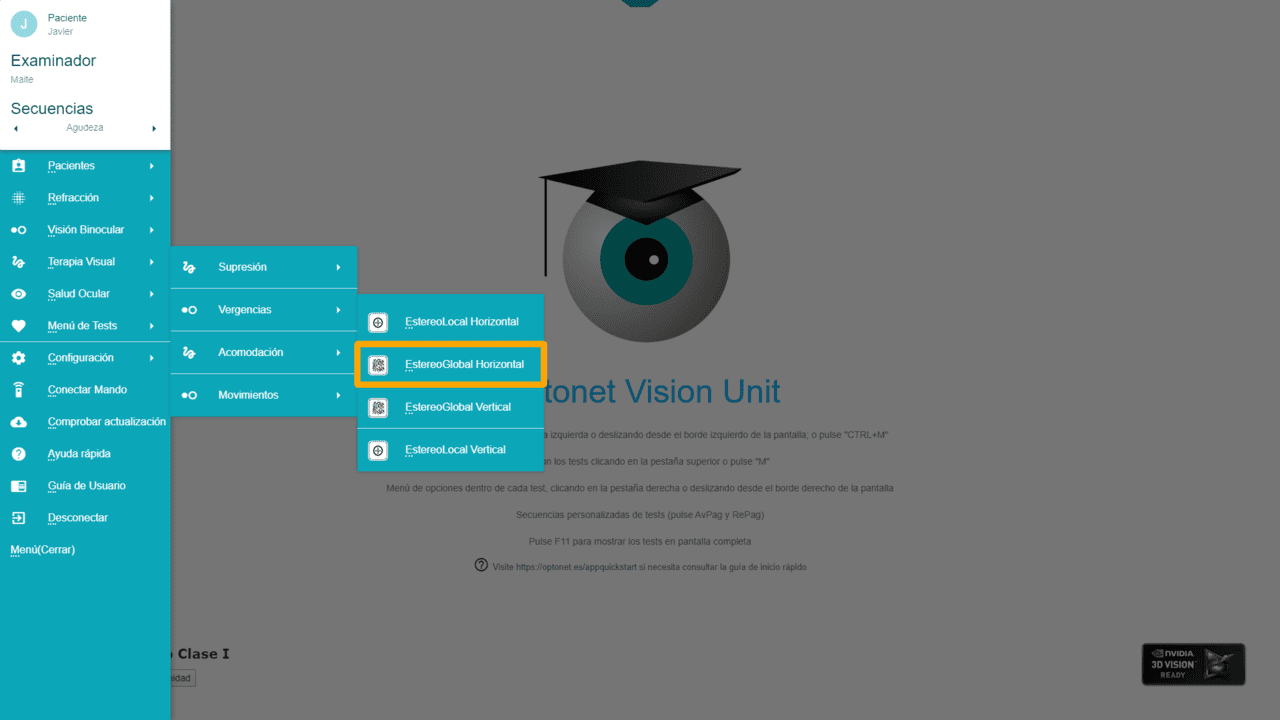
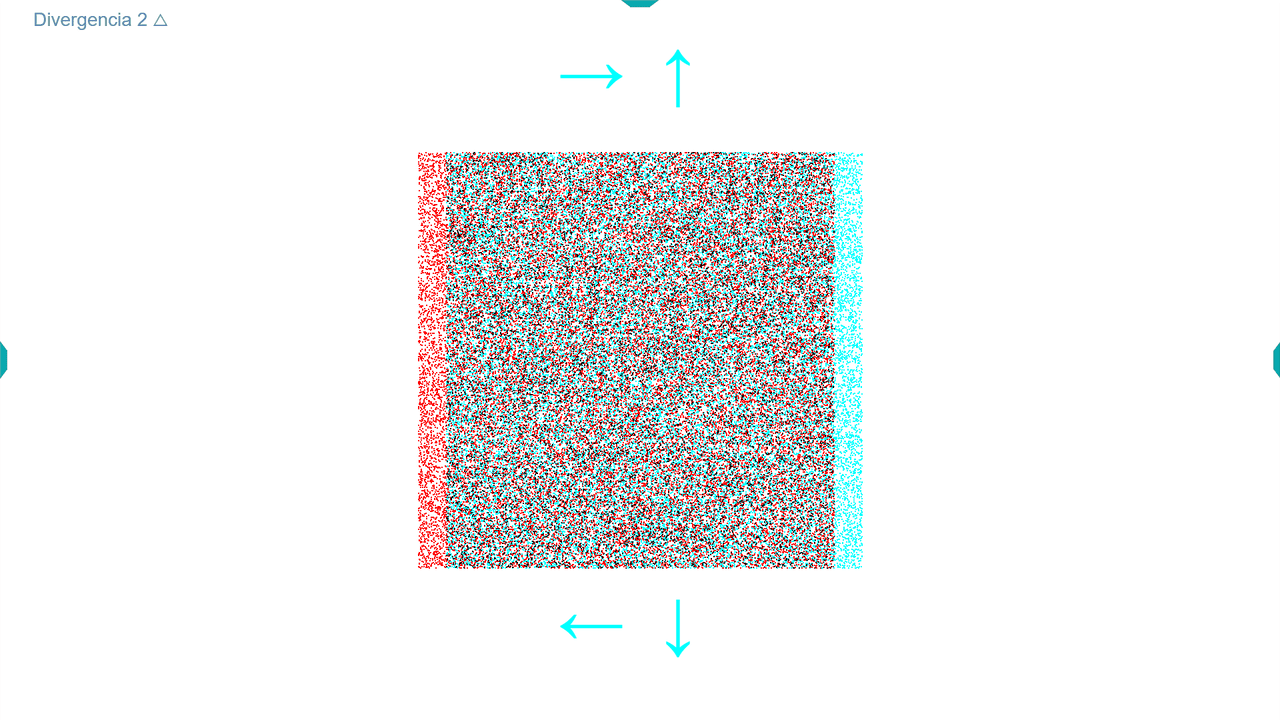
In this exercise, two squares filled with random dots are displayed, with each eye only seeing one square through the filters. If the patient successfully fuses both images, a letter or figure will appear in stereopsis, floating in front of the screen.
Similar to the local stereo exercise, to introduce the exercise to the patient, we can press the left and right arrows on the keyboard to move the squares relative to each other and create a demand for convergence or divergence.
The main difference in this test is the absence of monocular clues when looking through the filters; that is, the letter or figure can only be seen if the patient successfully fuses the two images of random dots.
Therefore, if the patient correctly identifies which letter or figure they see in stereopsis, it confirms they have managed to meet the prismatic demand required to fuse the images.
Colour Combination #
For this exercise, a light gray background is recommended, as it usually does not produce ghost images.
Tools Menu #
As always, clicking on the right tab displays the tools menu with the following options:
| Icon | Function | Keyboard Shortcut |
| This function is used to measure Vergence Amplitude (fusion convergence and divergence) before starting training, in a manner similar to measurements taken with the Risley prism or prism bar. This measurement can be repeated as needed to check for patient improvement. | A | |
| This button initiates Training, allowing the selection of training for convergence, divergence, or facility, the duration of the exercise, and the size of the steps in prismatic diopters for vergence changes. | T | |
| We can increase or decrease the size of the squares with these buttons. |
+ – |
|
| We can also increase or decrease the size of the letter (or figure) that appears in stereopsis. |
Ctrl + Ctrl – |
|
| These arrows offer the possibility of making vergence changes in steps of 0.5 Δ (prism diopters) or in steps of 1 Δ. |
←→ ↑↓ |
|
| When the squares are fused, a letter or figure appears in 3D. With these buttons, we can adjust the degree of stereopsis of that three-dimensional image. |
J S |
|
| To have the values displayed on screen: which letter or figure is shown in 3D, its size, and that of each square of random dots (in VA scale), and the stereoacuity value of the 3D image for response control. | V | |
| Change the letter seen in 3D upon fusion to Sloan type. | L | |
| Change the letter seen in 3D upon fusion to Symmetrical type. | E | |
| Change the figure seen in 3D upon fusion to Landolt Cs. | O | |
| Change the figure seen in 3D upon fusion to geometric shapes. | G | |
| Change the figure seen in 3D upon fusion to a rectangle, which is displayed in one of the 4 positions (up, down, right, left). | ||
| Initial demonstration image to explain to the patient. | P | |
| The letter (or figure) that appears in stereopsis when fusing the squares of random dots can be changed randomly. | Z | |
| To return to the initial state of the last function. | X | |
| To switch to the polarization version if using a passive 3D screen (using circular polarizing filters). | D |
As we can observe, most functions are consistent with those introduced in the local stereo test. However, we also offer additional options that enable changes to the letter or figure appearing in stereopsis when images are fused. This flexibility allows us to accommodate the unique characteristics of each patient or simply to add variety to the vision training exercises.
The program provides the following five options:
1. Sloan Letters: Used in standardized visual acuity tests, Sloan letters allow patients to advance the program to the next step by pressing the letter on the keyboard or clicking on it on the screen with the mouse when they see it.
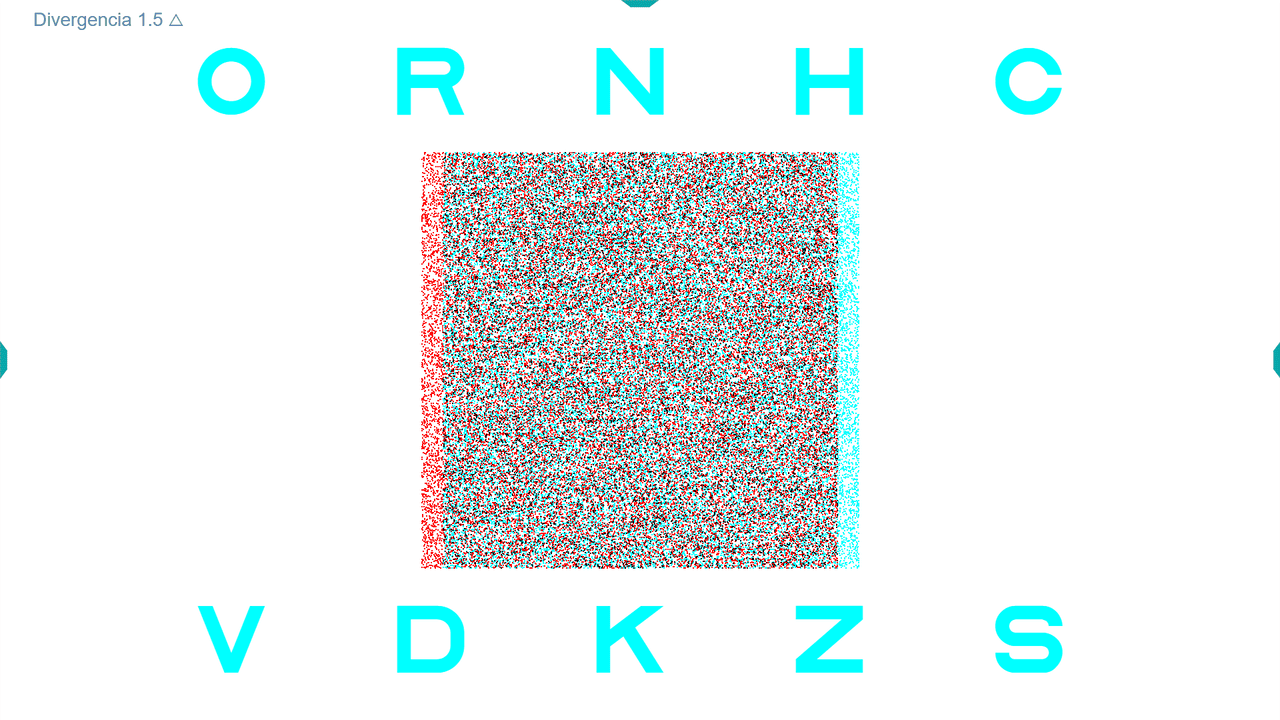
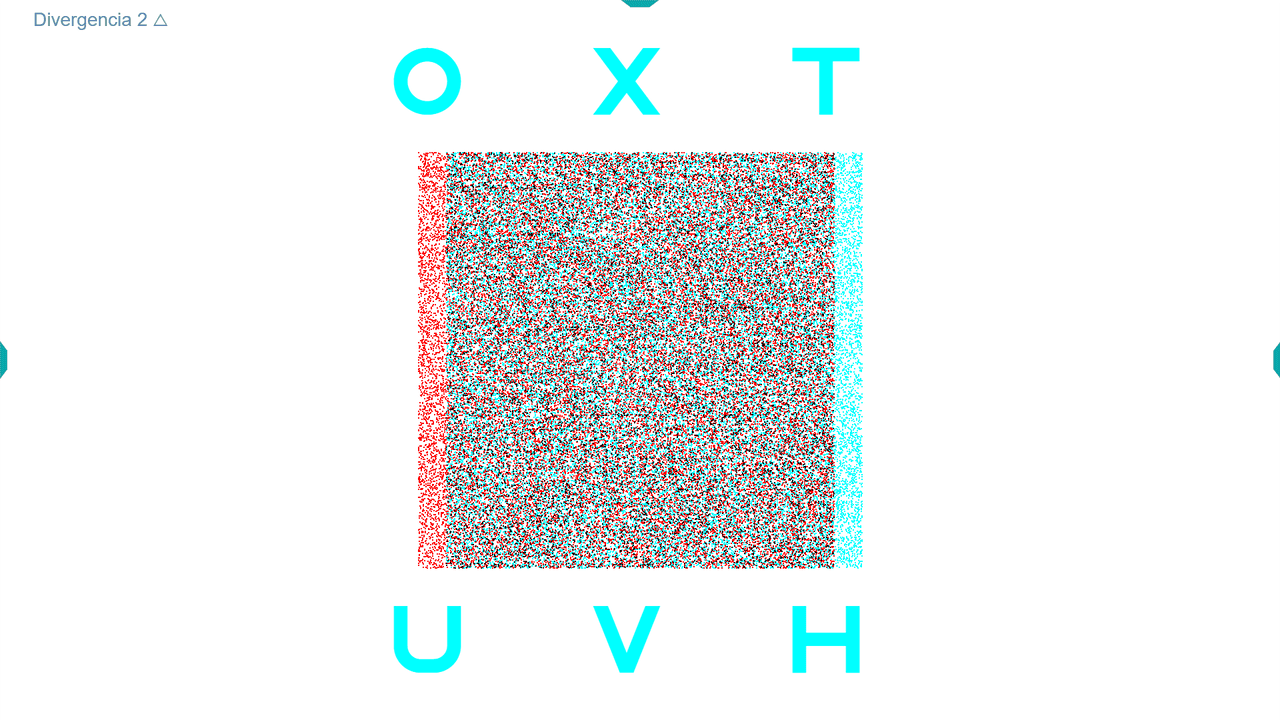
2. Symmetrical Letters: Responses are recorded in a manner similar to that for Sloan letters.
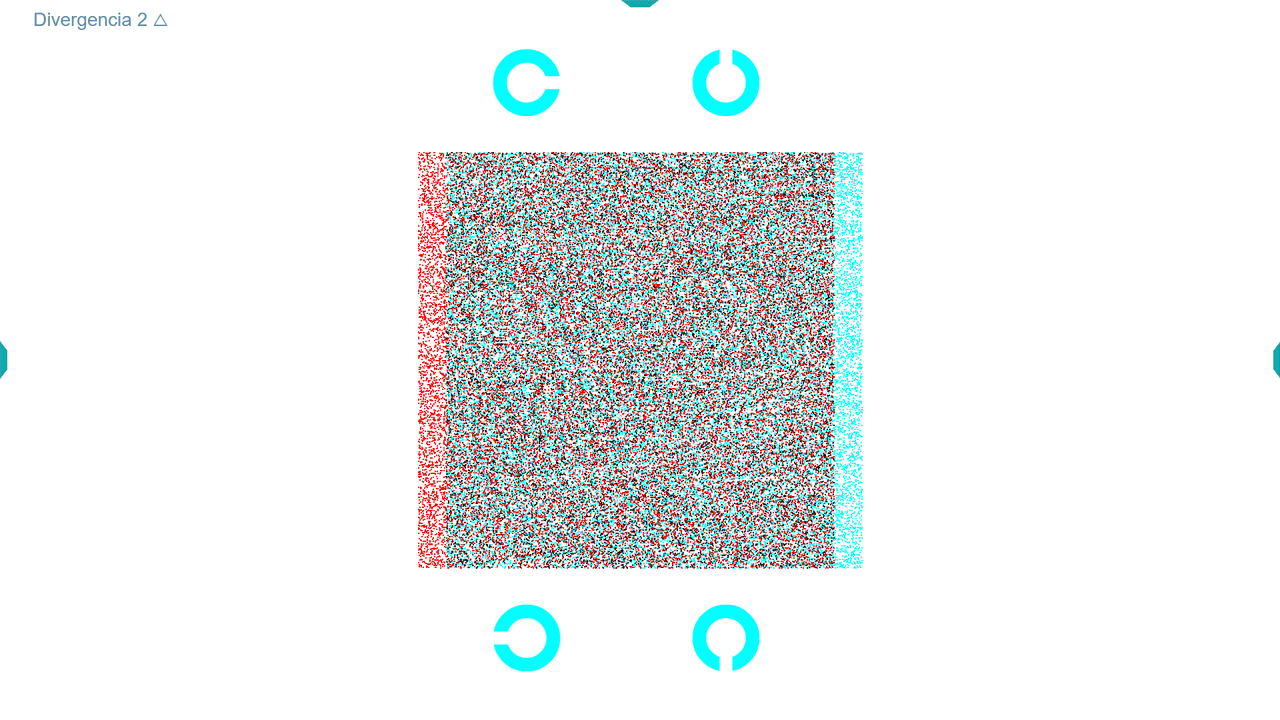
3. Landolt Cs: Patients are required to indicate the direction in which the ring they see upon fusion opens, either using the keyboard arrows or by clicking on the corresponding ring on the screen.
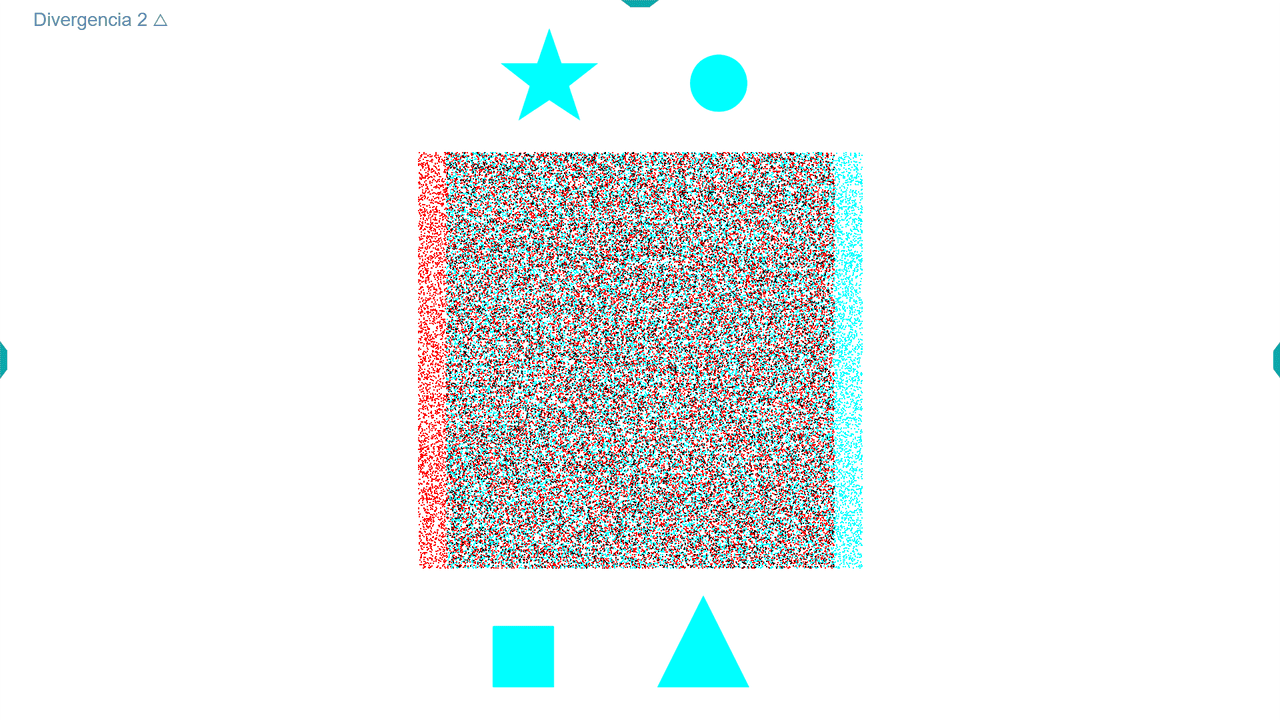
4. Geometric Figures: Especially useful for younger children due to their ease of identification, four shapes are included: star, circle, square, and triangle. Patients must click on the identical figure among those displayed above and below the square of random dots.
These options can be selected using the buttons on the right-hand tool menu or the shortcut keys as indicated in parentheses.
5. Rectangle: This option displays a rectangle in one of four positions (up, down, right, left), which the patient must identify. Patients can respond by pressing the corresponding arrow on the keyboard or clicking on the arrows shown on the screen with the mouse.
Fusional Vergence Amplitudes #
Before initiating training, it is essential to measure the patient’s fusional vergences using the Optonet Vision Unit. This process should be recorded in the patient’s file for accurate tracking. We recommend beginning with Divergence measurements. This preference arises because the medial rectus muscles, responsible for convergence, are robust and take time to relax after intensive contraction. Consequently, starting with Convergence might result in temporarily reduced Divergence capabilities due to the time required for the medial rectus muscles to fully relax.
Measuring Vergences with the Vision Unit
First, select a patient’s record to ensure the measurements are documented. Choose between a Stereo-local test (circle test) or a Stereo-global test (random dot background) for the measurement. For illustration purposes, we will discuss the Stereo-local procedure, though the random dot background might often be preferred with patients.
Navigate to the sidebar menu and select the Amplitude button (or press the “A” key).
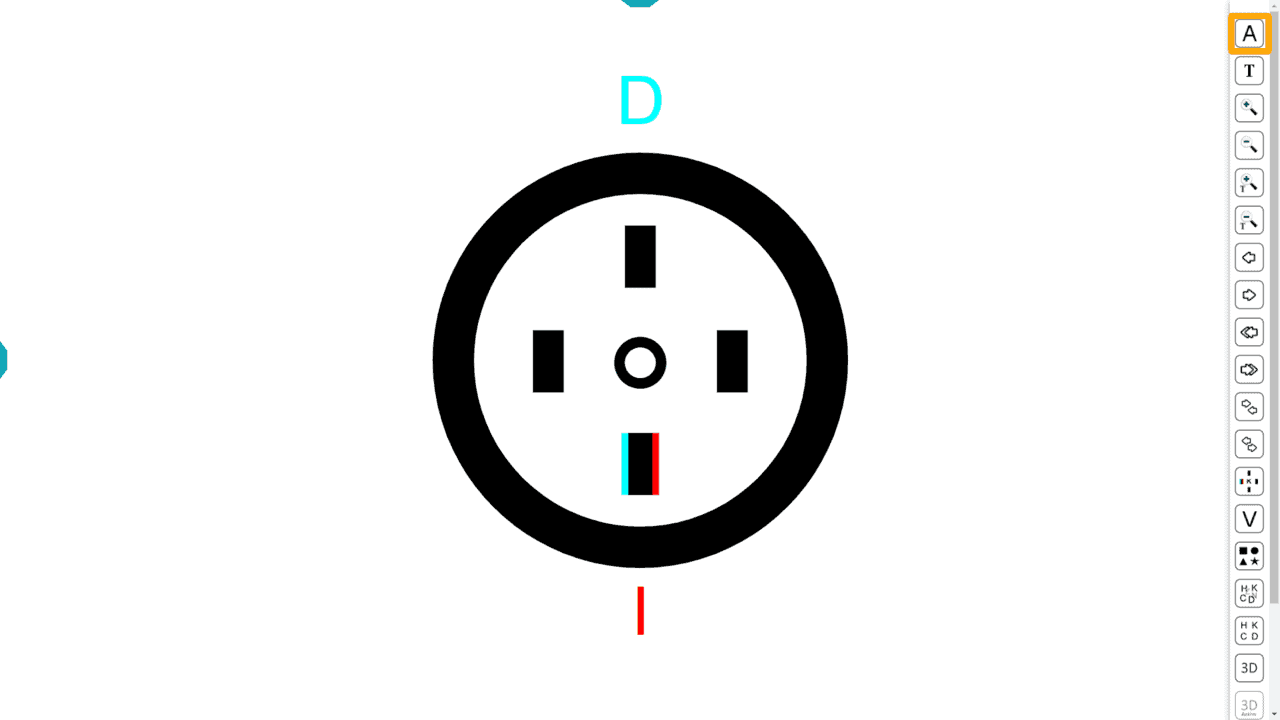
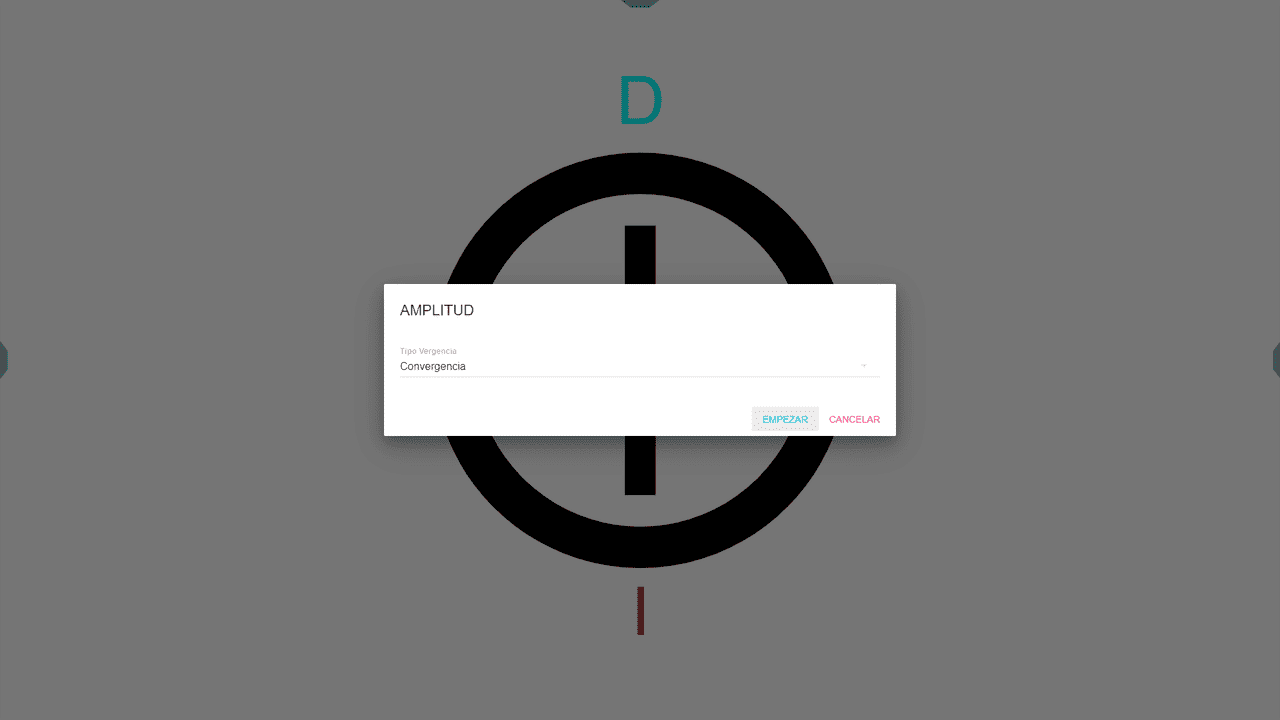
Select either Fusional Convergence or Divergence and click Start.
Measurement of Stereo-local Vergence Amplitude #
The program initiates with circles separated by 2 ∆, adjusted for the Unit’s calibrated distance.
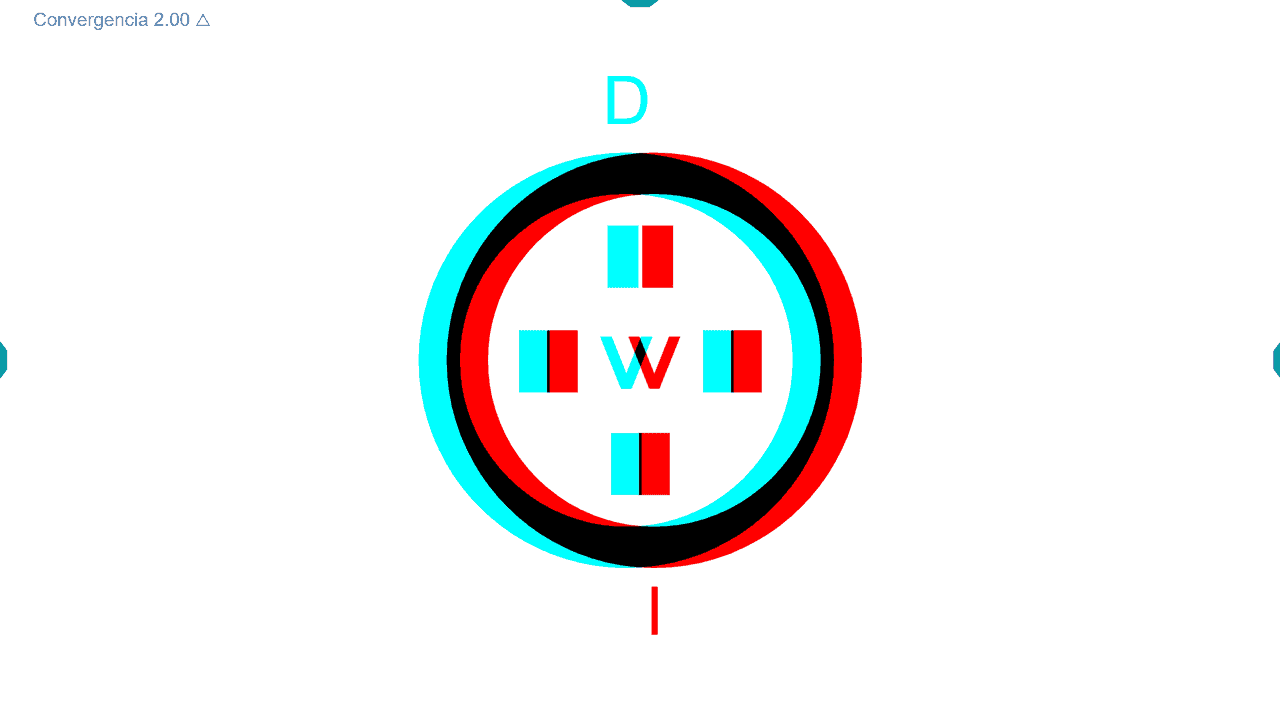
Ask the patient to look at the screen with their glasses and filters on, then identify which of the 4 rectangles appears most elevated.
Patients can respond using the keyboard’s arrow keys (up ↑, down ↓, right →, left ←) for simplicity, or by clicking on the floating rectangle on the screen.
A sound indicates whether the response is correct or incorrect, providing immediate feedback to the patient and professional. Mistakes require restarting to avoid recording incorrect data.
Correct responses cause the circles to separate further by 2 ∆, increasing vergence demand and randomly changing the stereoscopic rectangle and central letter. The process continues, progressively increasing vergence demand until an error occurs, noted as the Break Point.
If patients cannot fuse the circles and see double, they’re advised to try for a few seconds. If fusion remains unachieved, they should press the spacebar or click any empty screen area. This action records the maximum convergence or divergence exerted by the patient as the Break Point.
The program then gradually decreases the prismatic demand in 2 ∆ steps until a correct response is achieved, noted as the Recovery Point.
The measurement concludes with the display of break and recovery values in prism diopters:
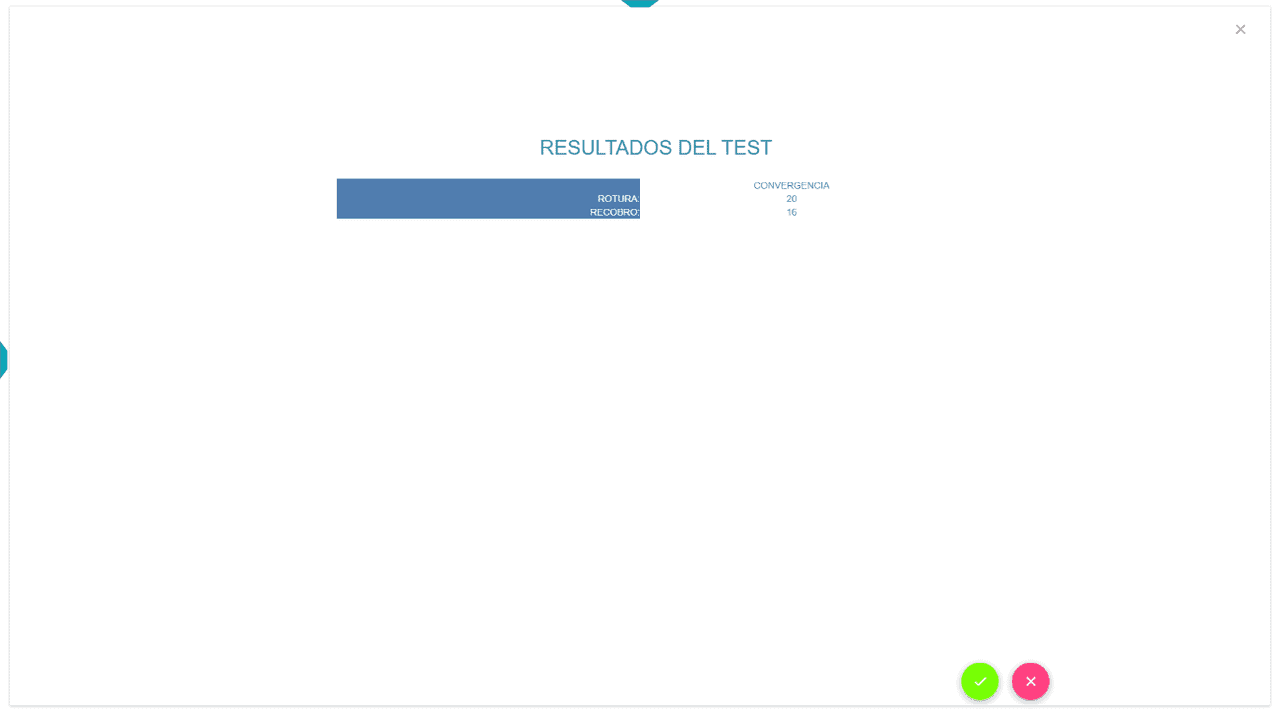
To save the results, confirm the test’s accuracy and record the data in the patient’s record.
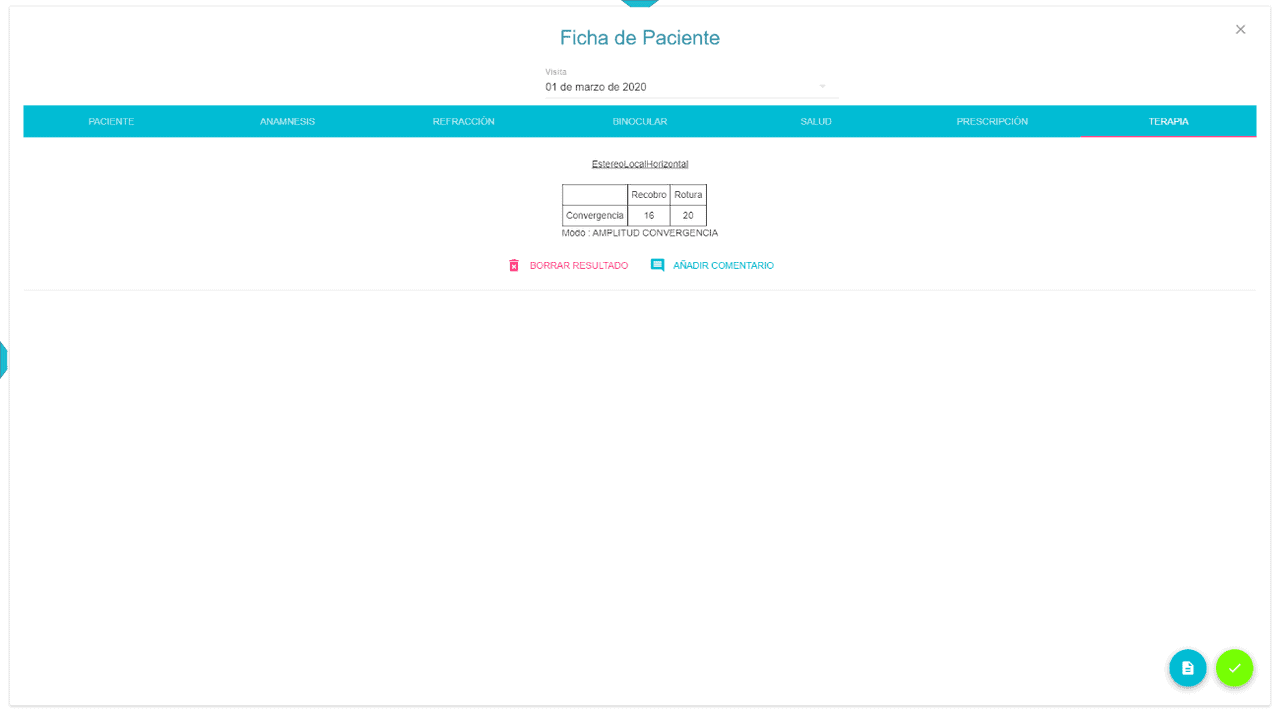
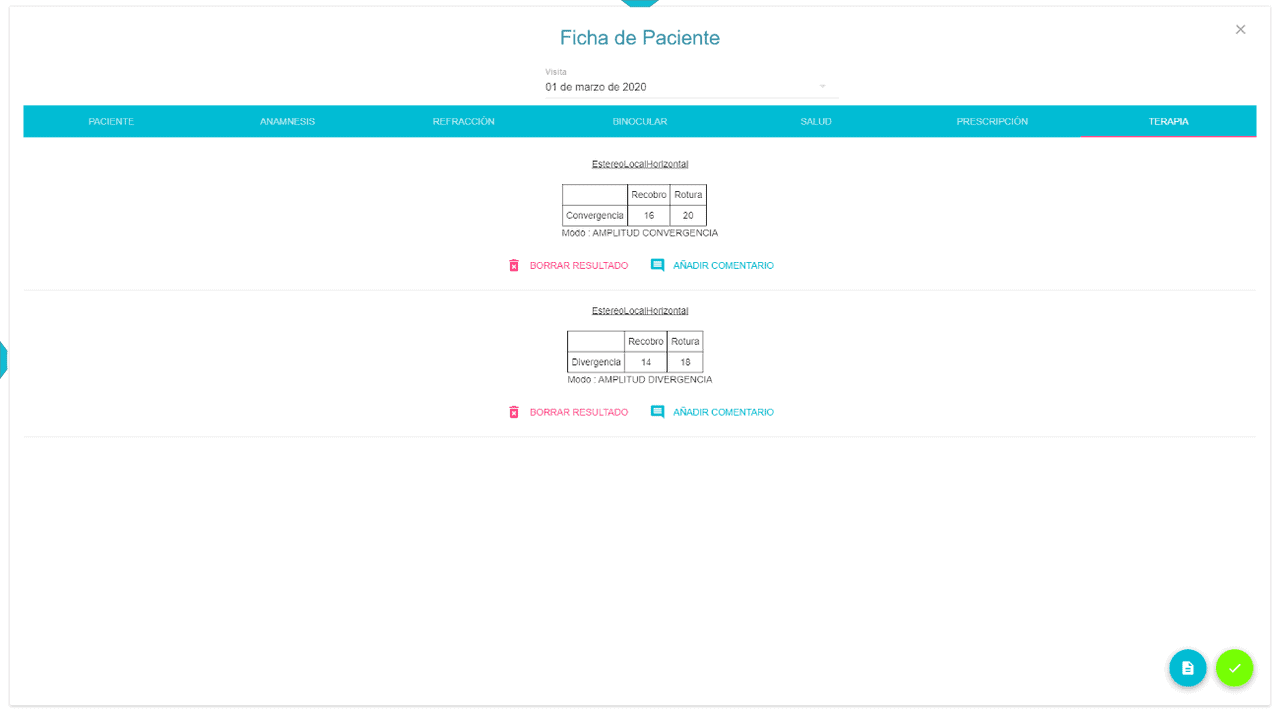
Repeat the process for Fusional Divergence, saving the results similarly.
Cancel any activity at any moment by pressing the Esc key.
Measurement of Stereo-global Vergence Amplitude #
Choose the letter/figure for stereopsis visibility before starting. Initially, the Landolt C is shown for directional indication by the patient.
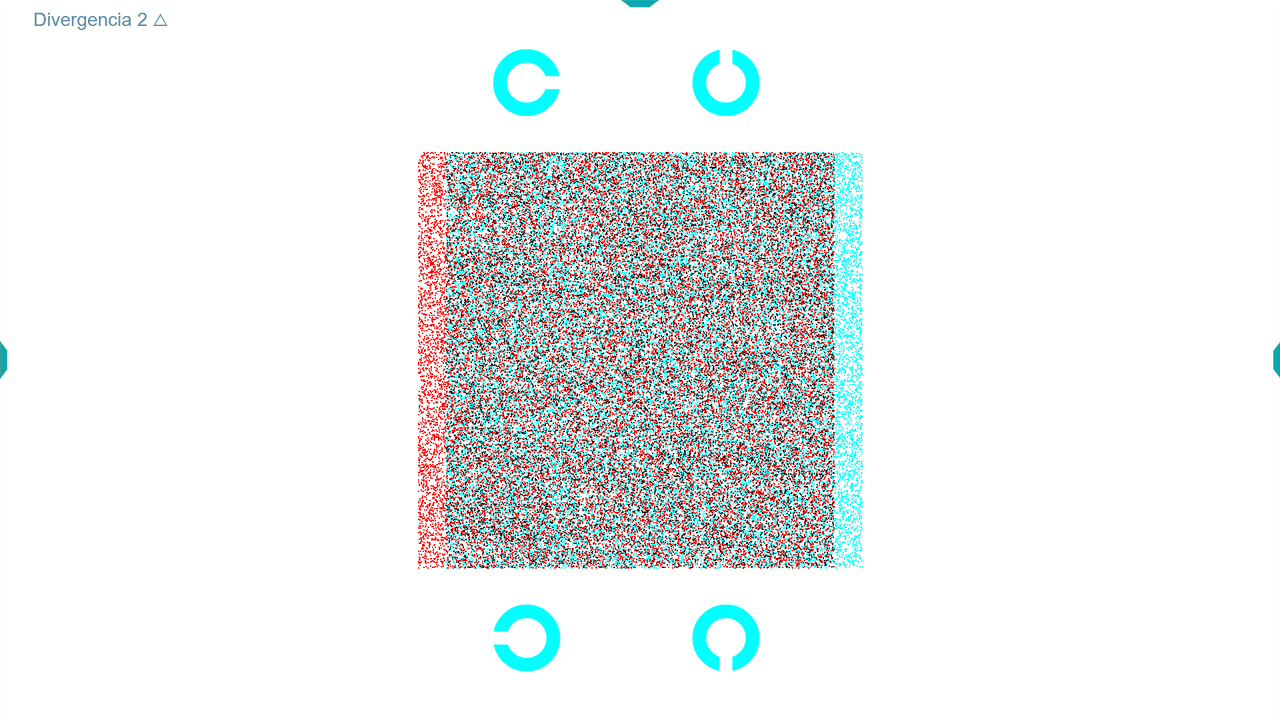
Responses are made via keyboard arrows or screen clicks, with each correct response separating the images by 2 ∆ to increase vergence demand. The cycle continues until the patient provides an incorrect answer or cannot fuse the images, necessitating a space bar press or screen click, marking the Break Point.
The program reduces vergence demand until correct response achievement, noted as the Recovery Value.
Changes, correct responses, and the corresponding sounds help track accuracy during each step.
After evaluating Fusional Convergence in the same manner, ensuring the patient’s ability to accommodate at screen distance despite vergence demands is crucial. Adjusting the letter or figure size via the side menu options allows for more precise accommodation control. Noting the blurriness point during vergence measurements can be subjective but useful for interested clinicians, provided the visual acuity unit size is recorded.
Remember, discussions about accommodation are less applicable to patients over 40, who should use their reading glasses with the Vision Unit due to reduced accommodation amplitude.
Vergence Training #
To conduct vergence training with the Optonet Vision Unit, initiate by selecting or creating a patient profile to ensure results are documented. Next, decide whether to utilize the circle test (Stereo-local) or a random dot background (Stereo-global) for exercises.
Opting for Stereo-local for demonstration, it’s noted the process remains the same for Stereo-global exercises; the latter allows for choosing different objects or letters.
Navigate to the right-side menu and click on the Training button (or press the “T” keyboard key):
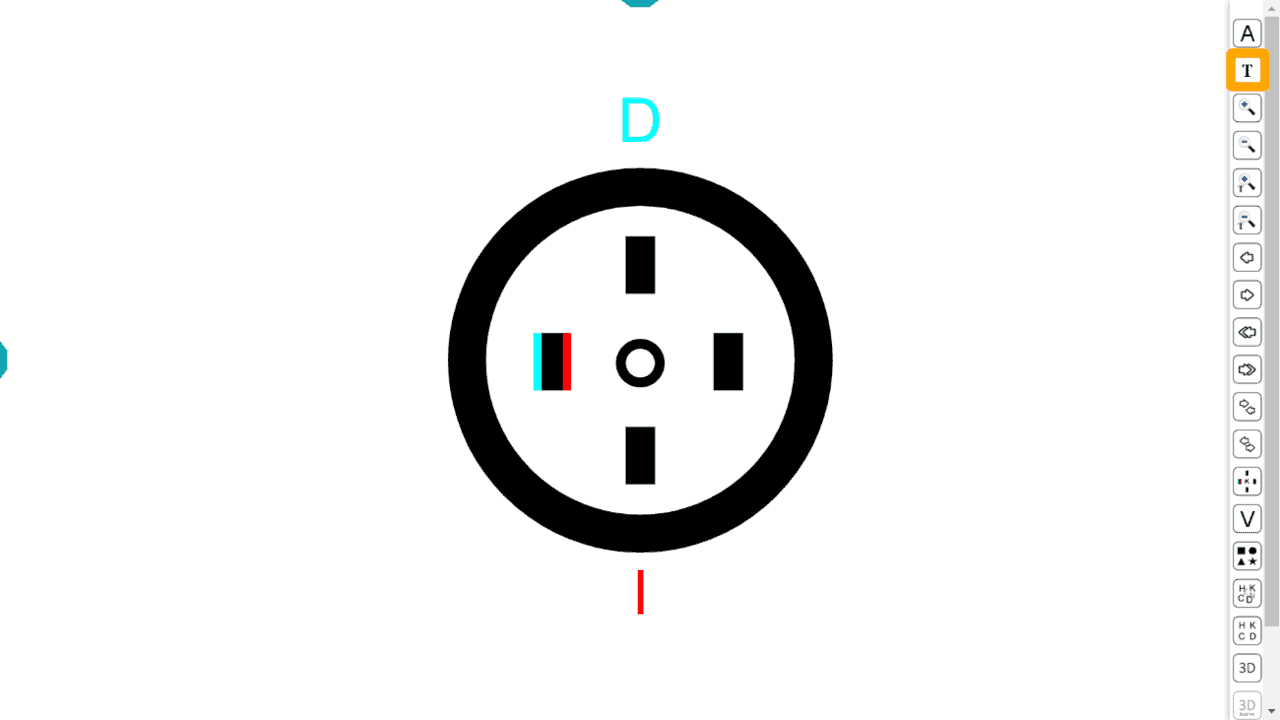
This action opens a configuration window for the exercise to be conducted automatically by the patient. Initially, it presents three options: Convergence, Divergence, or Facility.
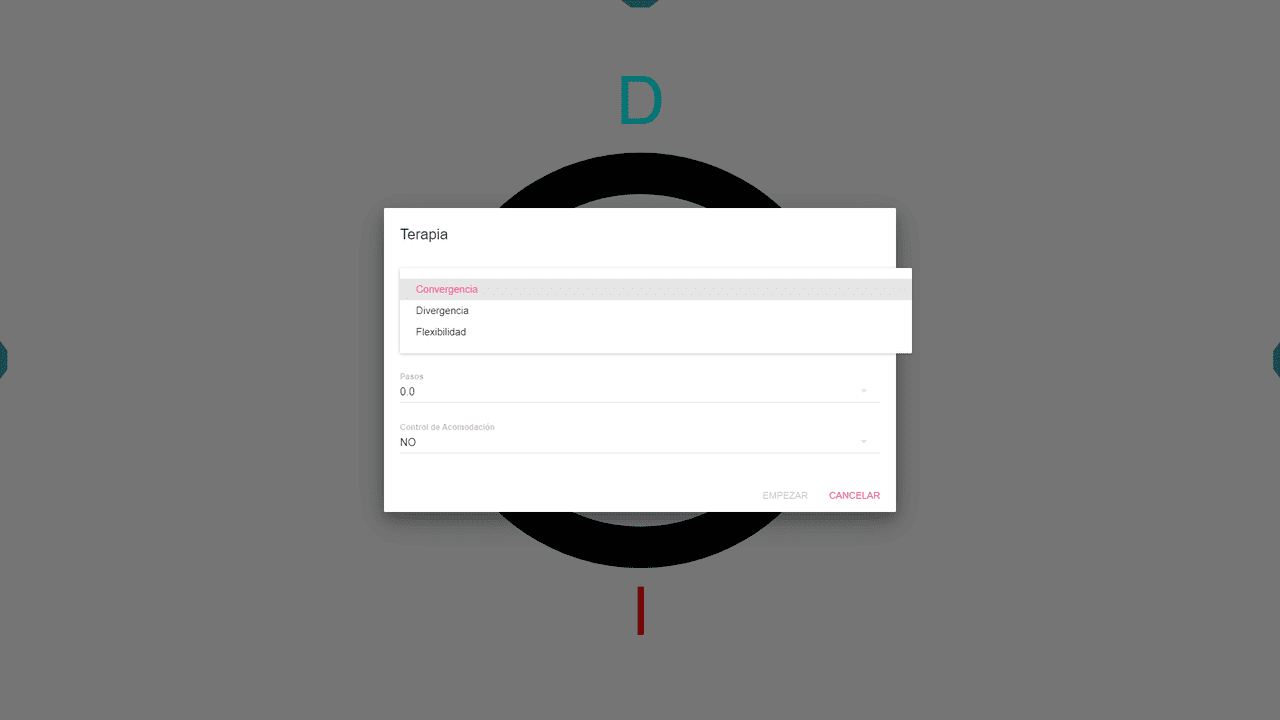
Furthermore, selections include:
1. The exercise’s duration, with a maximum limit of 5 minutes.
2. The increment steps in prism diopters (∆), from 0.5 ∆ to 4 ∆.
3. The option to include or exclude automatic accommodation control.
Convergence and Divergence Without Accommodation Control #
Both Convergence and Divergence options function similarly. Without accommodation control, for example, convergence can be practised for 5 minutes with adjustments in 2 ∆ steps.
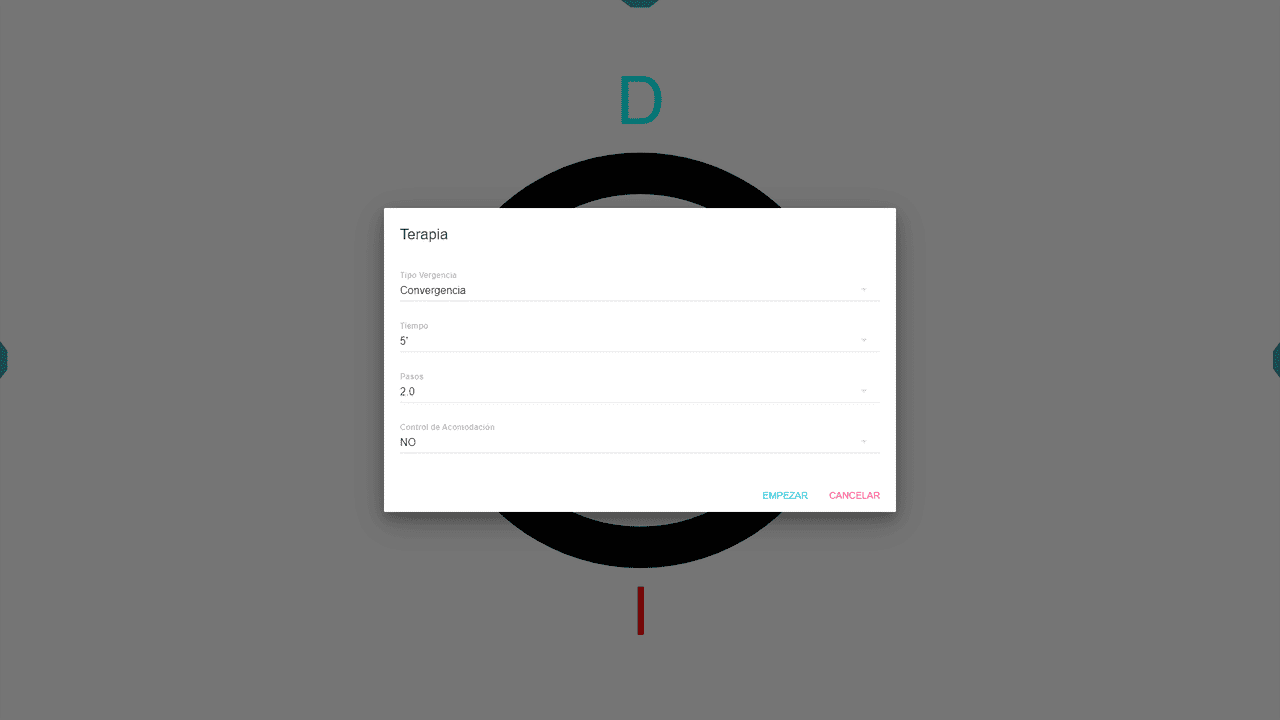
Upon starting, the program displays two circles separated by a convergence demand equivalent to the selected step (for instance, 2 ∆):
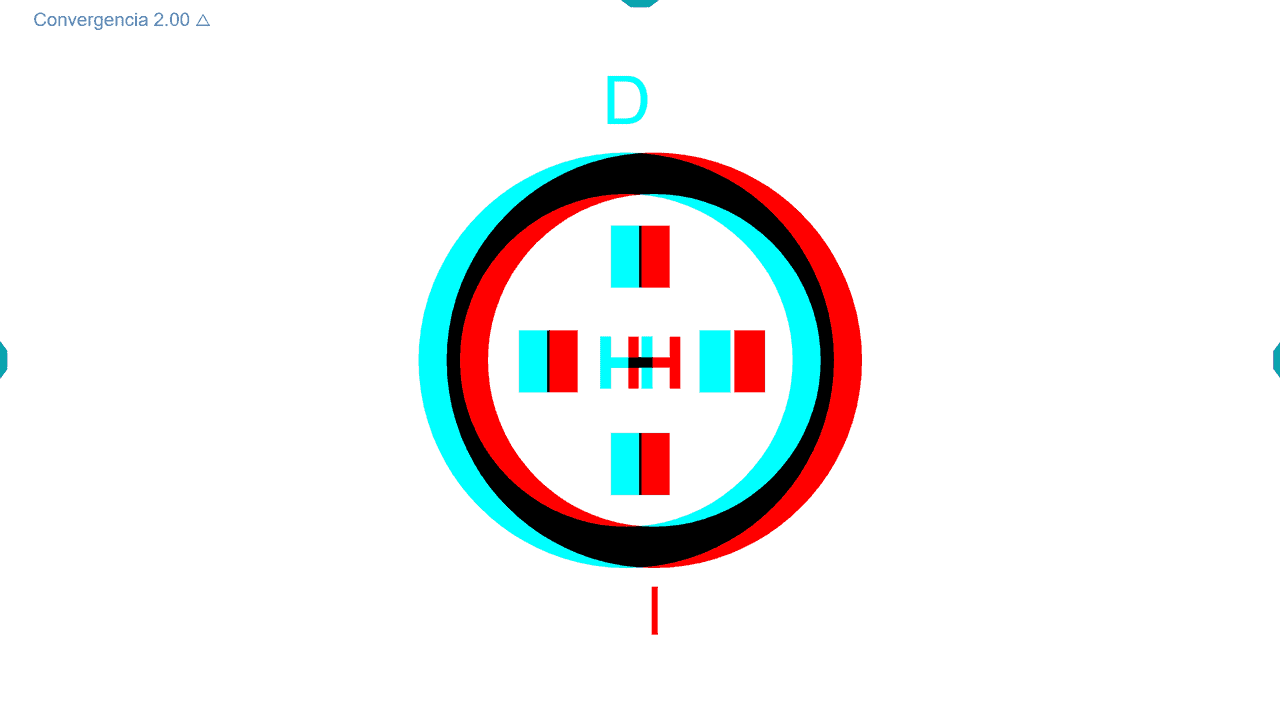
The patient must converge 2 ∆ to fuse them. Then, they are asked which of the rectangles seen in stereopsis appears most elevated. The patient can either click on the rectangle or use the keyboard’s arrow keys to respond.
A correct answer triggers a success sound, and the program randomly alters the rectangle in stereopsis for repeated exercise at the same convergence demand.
Achieving two consecutive correct answers at a consistent vergence level auto-separates the circles by the predetermined prism diopters. A mistake results in a one-step reduction of the vergence demand.
This cycle persists indefinitely until the elapsed time, culminating in a results display showing correct and incorrect responses, success percentage, peak value reached, the last value before the exercise concluded, and its duration.
Should the patient fail to fuse the circles, indicating this by pressing the space bar or clicking in an empty screen area is advised.
An identical procedure applies to Divergence exercises, aimed at enhancing the ability to achieve eye fusion, maintaining steady accommodation.
Examples include divergence training outcomes:
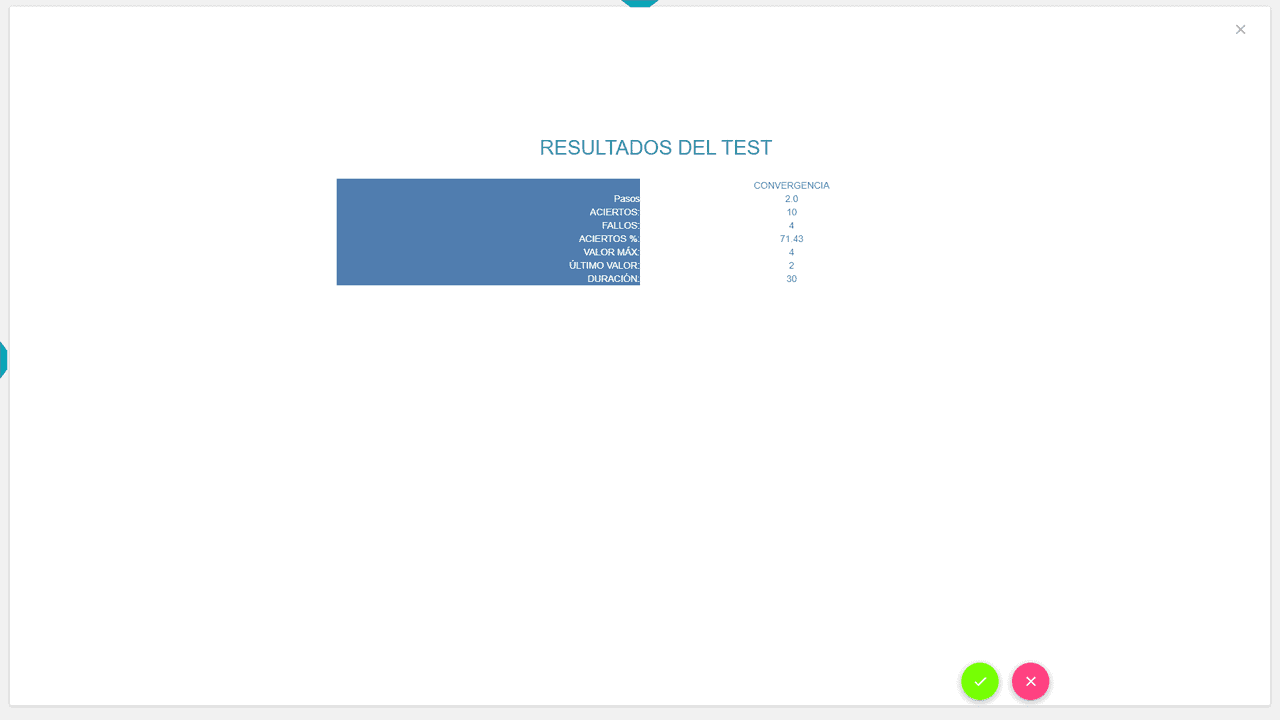
Displayed here are the documented results from the divergence training:
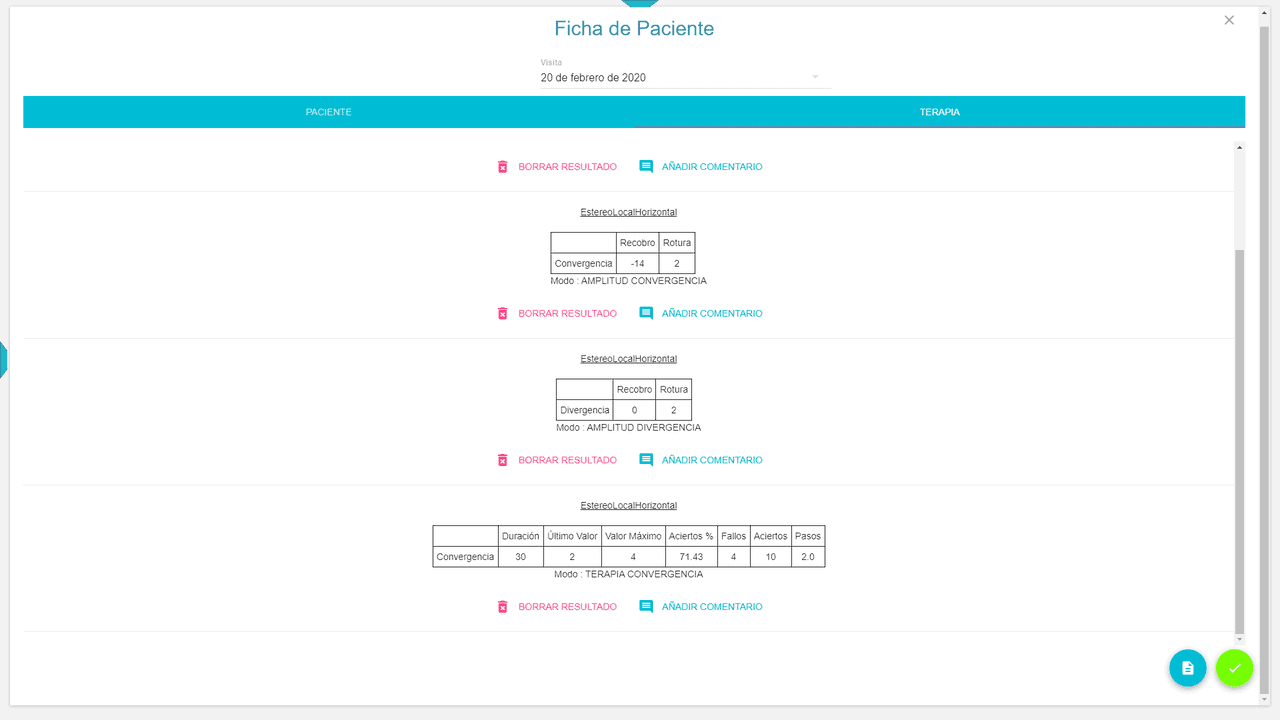
Vergence Facility Without Accommodation Control #
Facility exercises necessitate alternating between convergence and divergence.
Selecting a patient and test type (e.g., Stereo-global with Landolt rings) is followed by choosing the training option from the sidebar menu (or hitting the “T” key). Facility training is then set for two minutes in 1 ∆ steps and initiated in the following example:
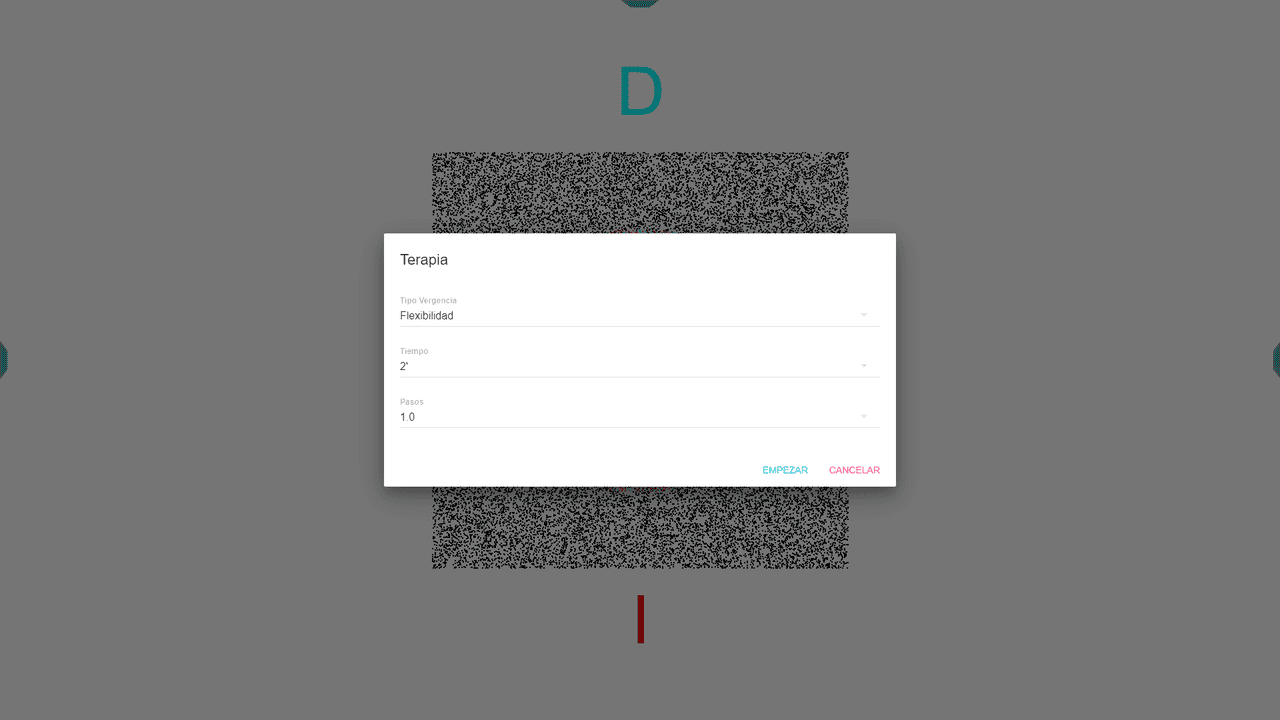
The exercise initiates with a divergence demand matching the configured step (here, 1 ∆). Successful fusion and correct identification of the ring’s direction change the images to an equivalent convergence demand (also, 1 ∆).
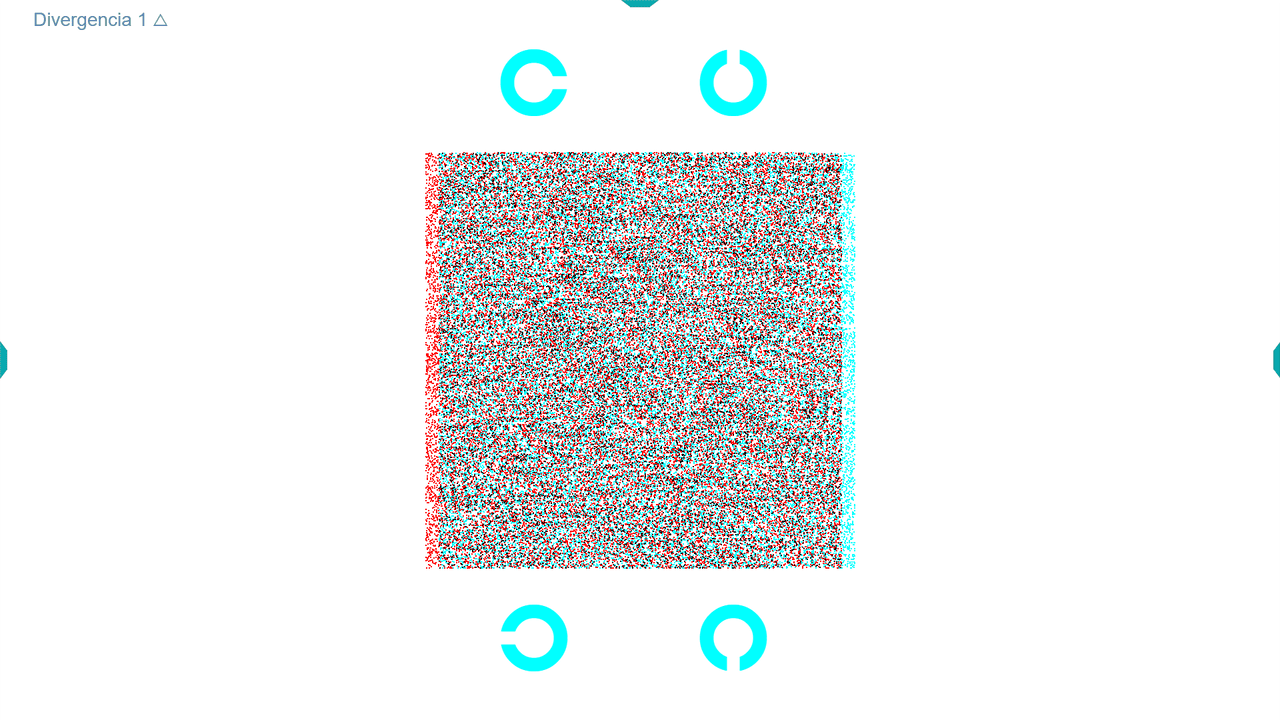
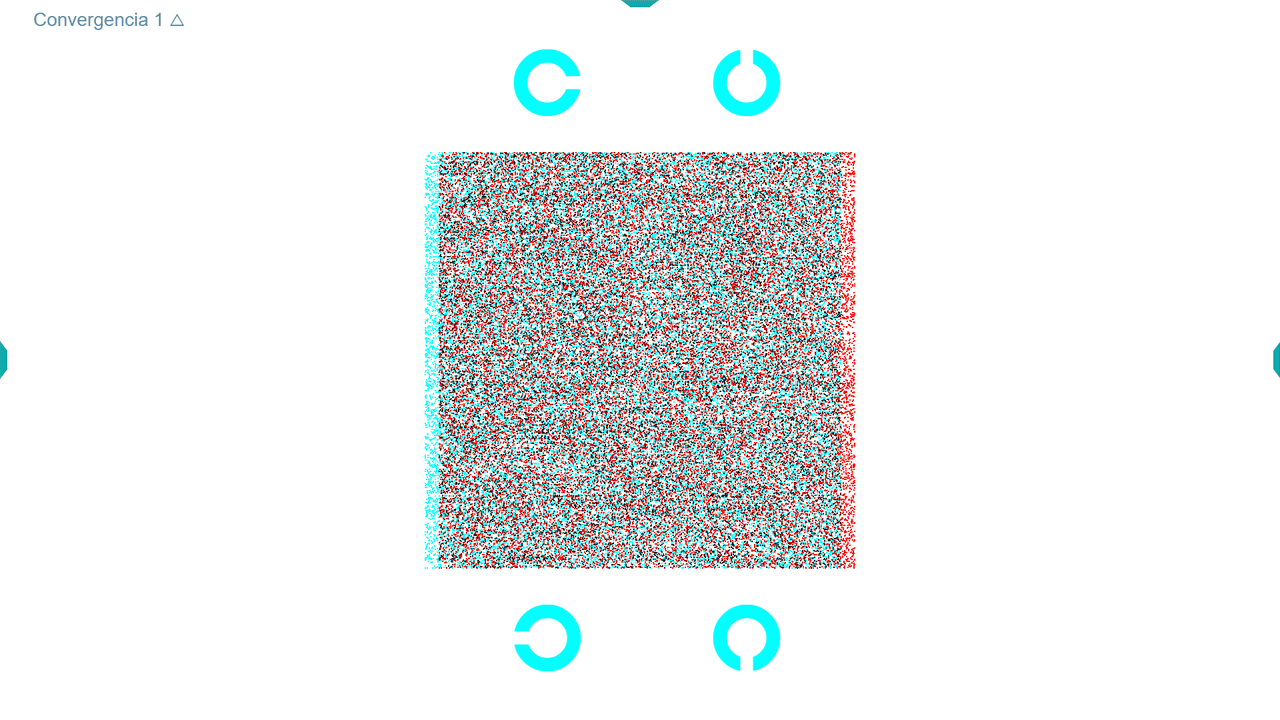
After equal amounts of divergence and convergence fusion, image separation increases by one step for subsequent divergence. Difficulty level progressively rises.
Failure to fuse allows for spacebar pressing or screen clicking in a blank area.
Upon an error, image separation decreases by one step for a retry without altering the vergence type. Switching to the opposite vergence happens post-accurate response, ensuring fusion in convergence before divergence shifts, and vice versa, essential in facility training.
Completion displays results, including ∆ steps, correct and incorrect response counts, success rate, highest and last achieved values in Divergence and Convergence, and total exercise duration.
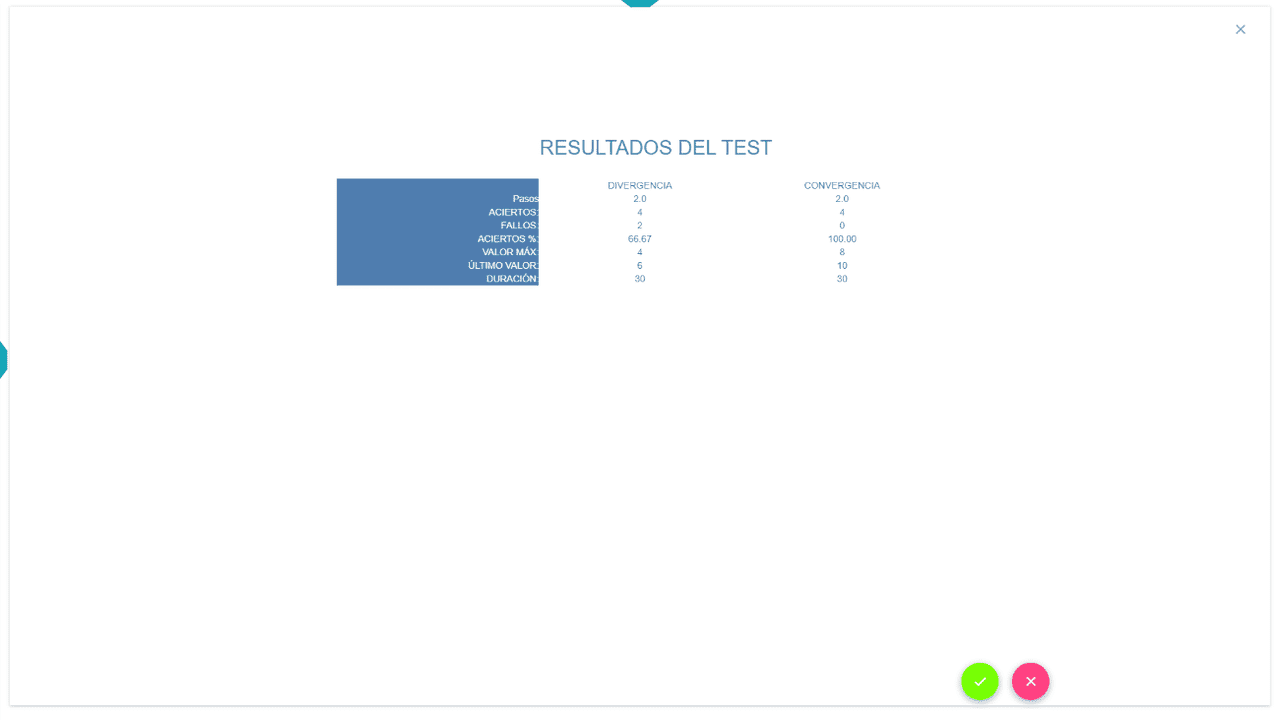
*Note: The duration displayed for divergence and convergence reflects the overall duration.
Results, formatted in tables, facilitate comparative analysis between convergence and divergence functions.
Vergence Training with Accommodation Control #
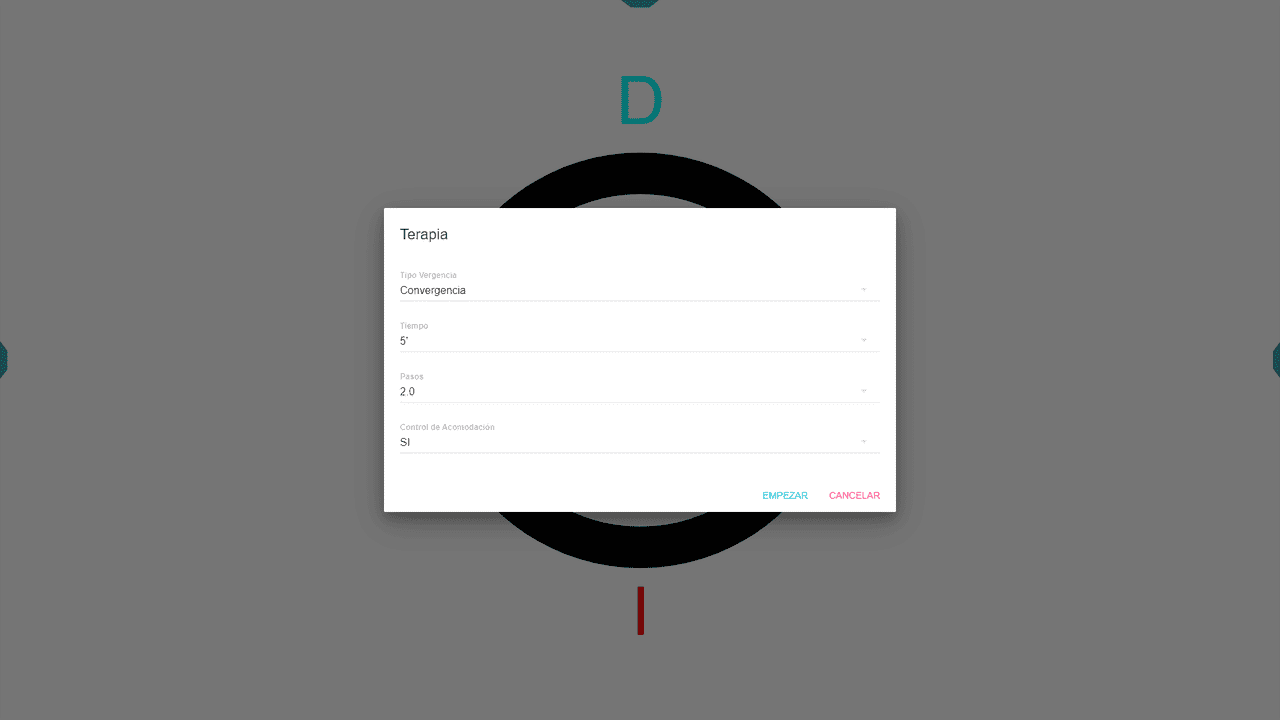
Available solely with the circles exercises (Stereo-local), this option integrates Automatic Accommodation Control into Convergence, Divergence, and Facility exercises. It ensures patients maintain screen plane accommodation despite their visual axes crossing either in front or behind. Opting for “YES” in Accommodation Control during exercise setup activates this feature.
Following each correct response, central figures are replaced with a Landolt C, requiring direction indication via arrow keys. Successful direction identification prompts a circle separation increase, continuing the chosen exercise.
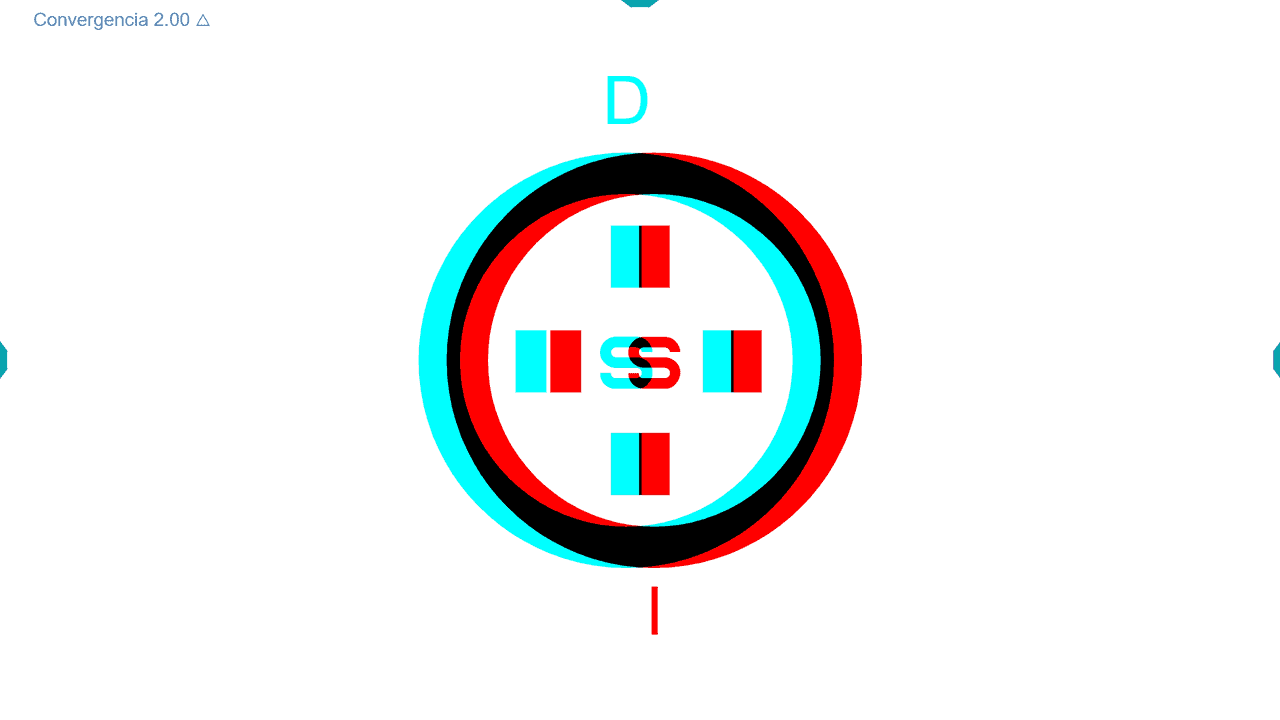
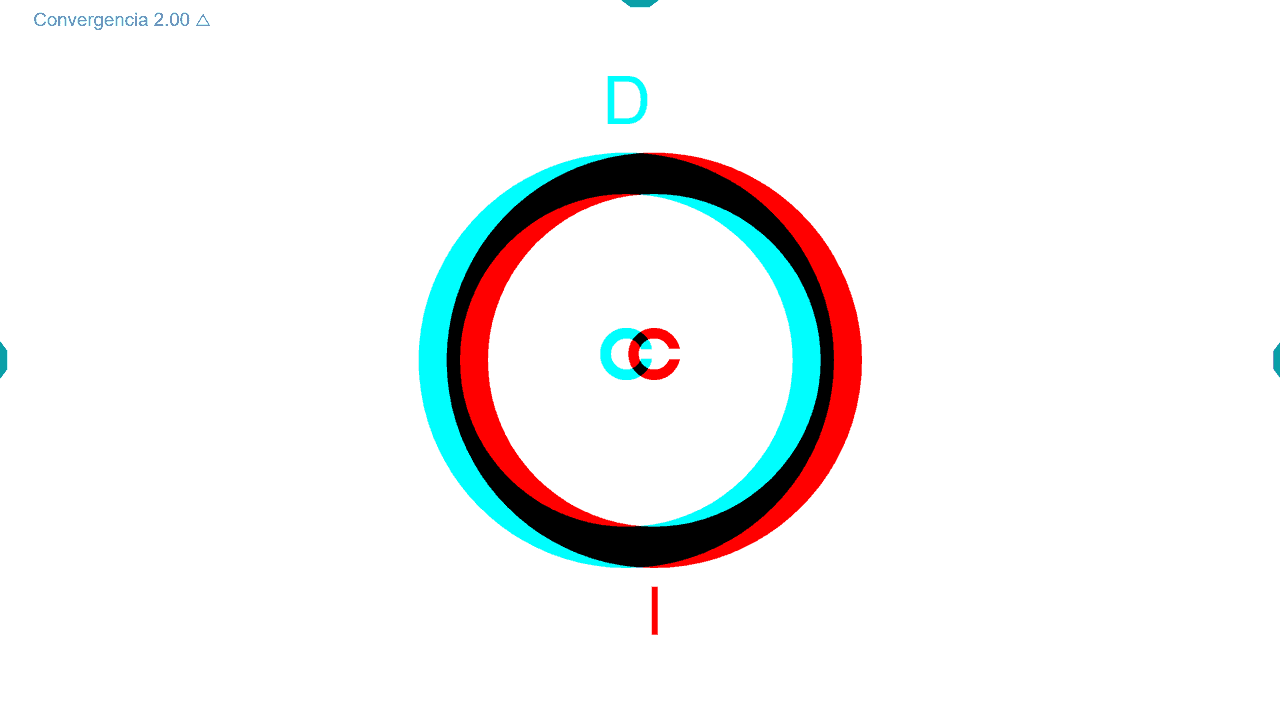
Incorrect Landolt C direction guesses result in multiple chances until success, with only one correct answer needed to increase vergence demand.
Failures to fuse lead to circle separation reduction until a correct response is achieved, proceeding from that point.
The program continues this routine until the set time expires, Then, the results of the vergence exercises are displayed as usual, along with the number of correct and incorrect answers.
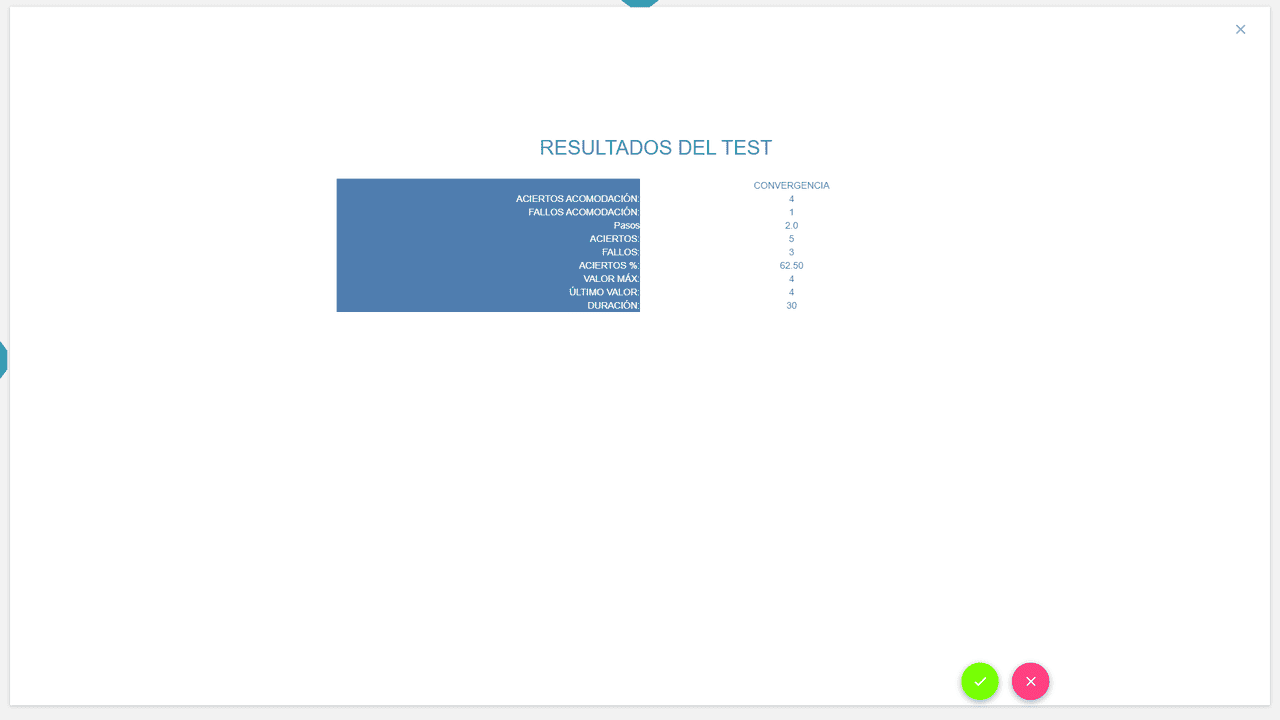
These procedures aim to train the patient’s vergences, maintaining constant accommodation.
