We are pleased to introduce a new update to the Vision Unit of Optonet.
The first thing you will notice is that its appearance has been refreshed to adapt to more modern devices.
Main Menu #
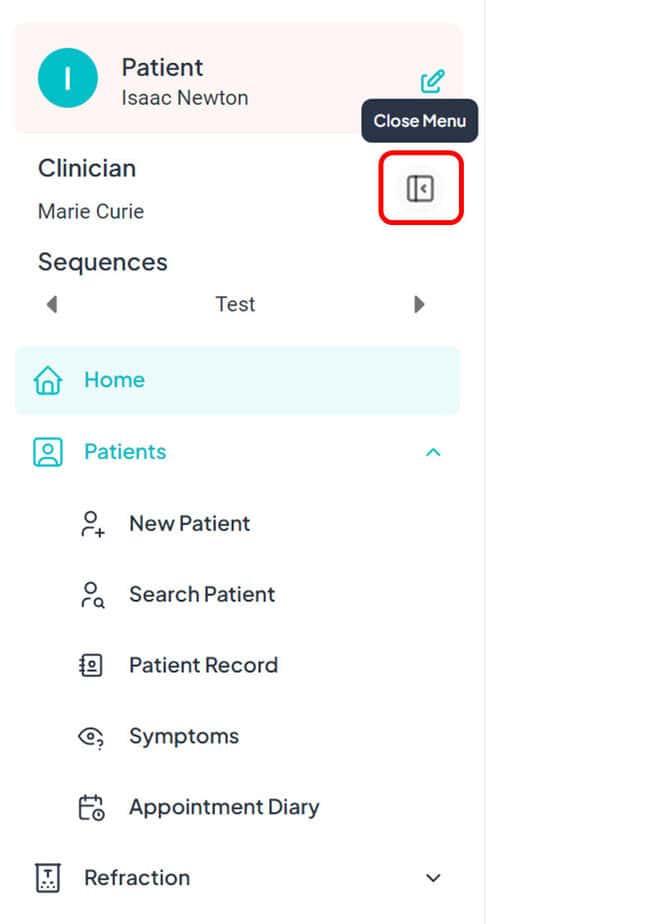
Now, the options in the main menu are displayed vertically along the left side of the screen. This new layout optimizes space usage and enhances accessibility, especially on mobile devices.
You can easily close the menu using the button located in the upper right corner or through the last link at the end of the menu.
Tool Menu #
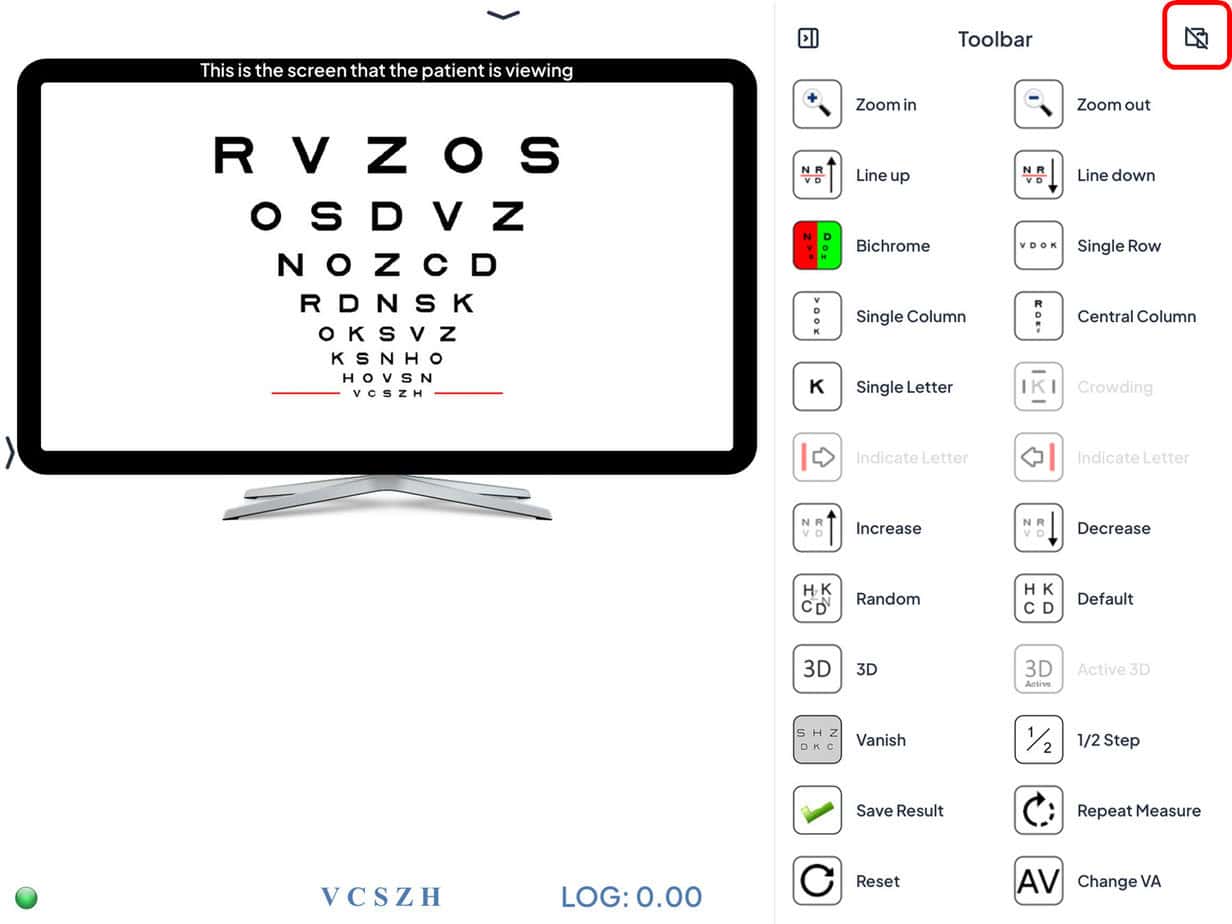
The tool menu, located to the right of the tests, now includes text descriptions to remind users of the function of each button.
At the top of this menu, there is a button to minimize it by hiding these texts. This option is also available on the tablet when it serves as a remote control.

Tablet as Remote Control #
Additionally, we have improved the stability of the tablet connection when used as a remote control.
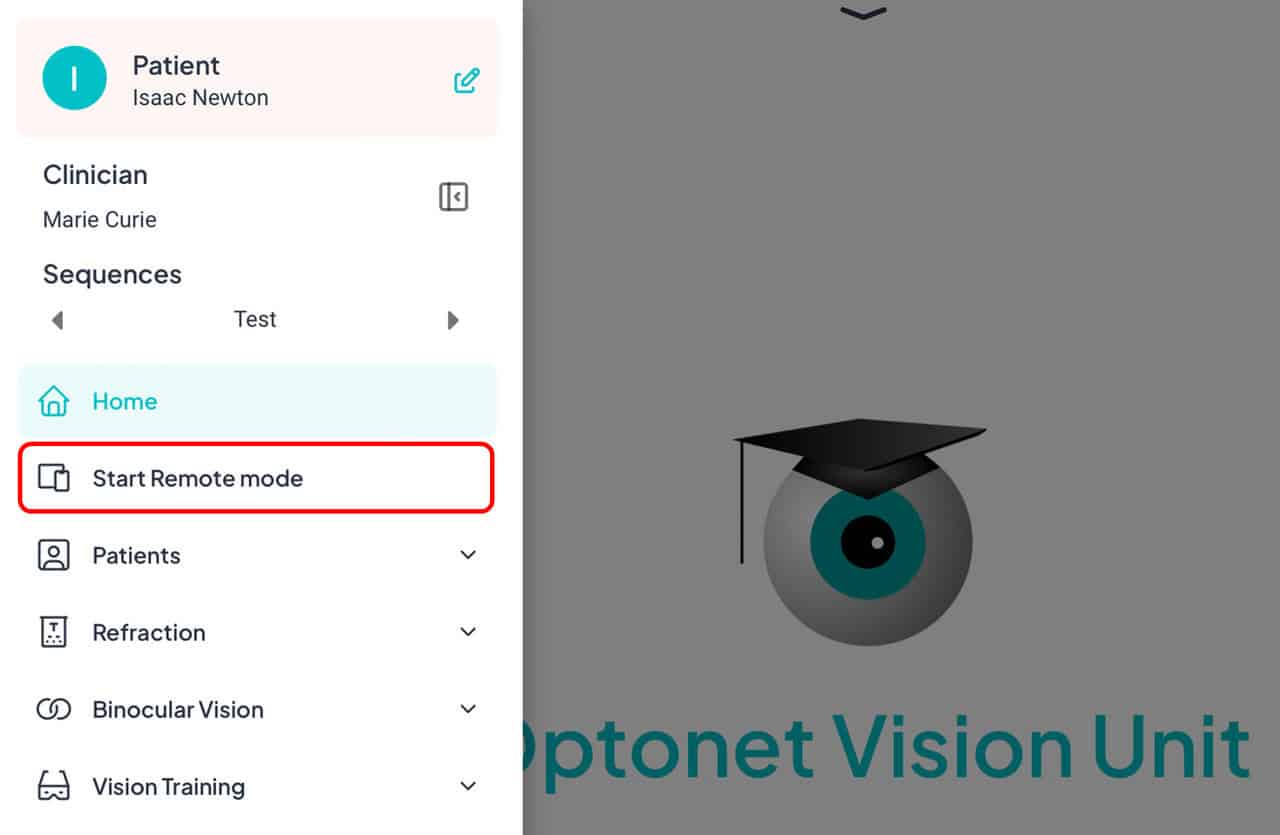
Now, on tablets, the link to “Start Remote Mode” or “Exit Remote Mode” appears at the top of the main menu for easy access:
We have also added another button to “Exit Remote Mode” at the top of the right tool menu.
These buttons are very useful for quickly switching the tablet between a remote control and a display for near vision tests:
Note: Reverse Remote Control
It is now possible to remotely control tablets and mobile phones from a computer. If you are interested, you can write to us for instructions.
Home Training #
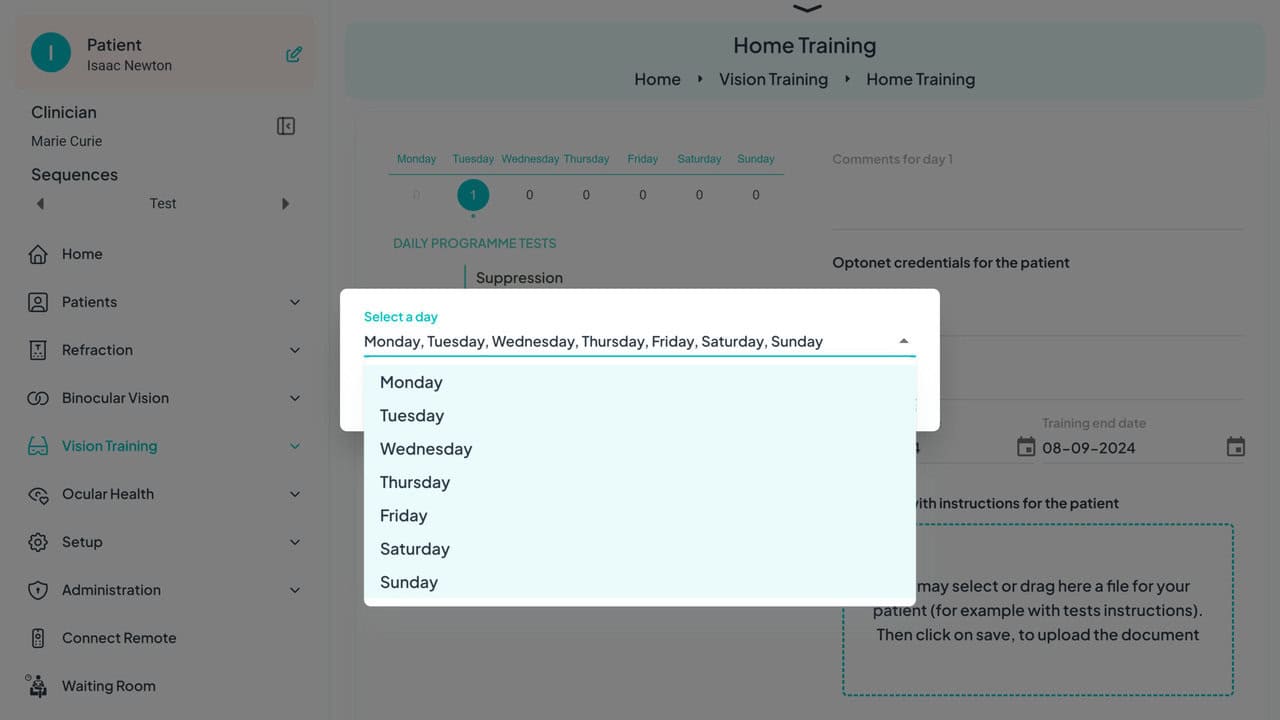
In the Home Training section, you now have the ability to clone exercises to multiple days of the week simultaneously.
Appointment Diary #
In this update, within the “Patients” section, we have added a new feature: the Appointment Calendar:
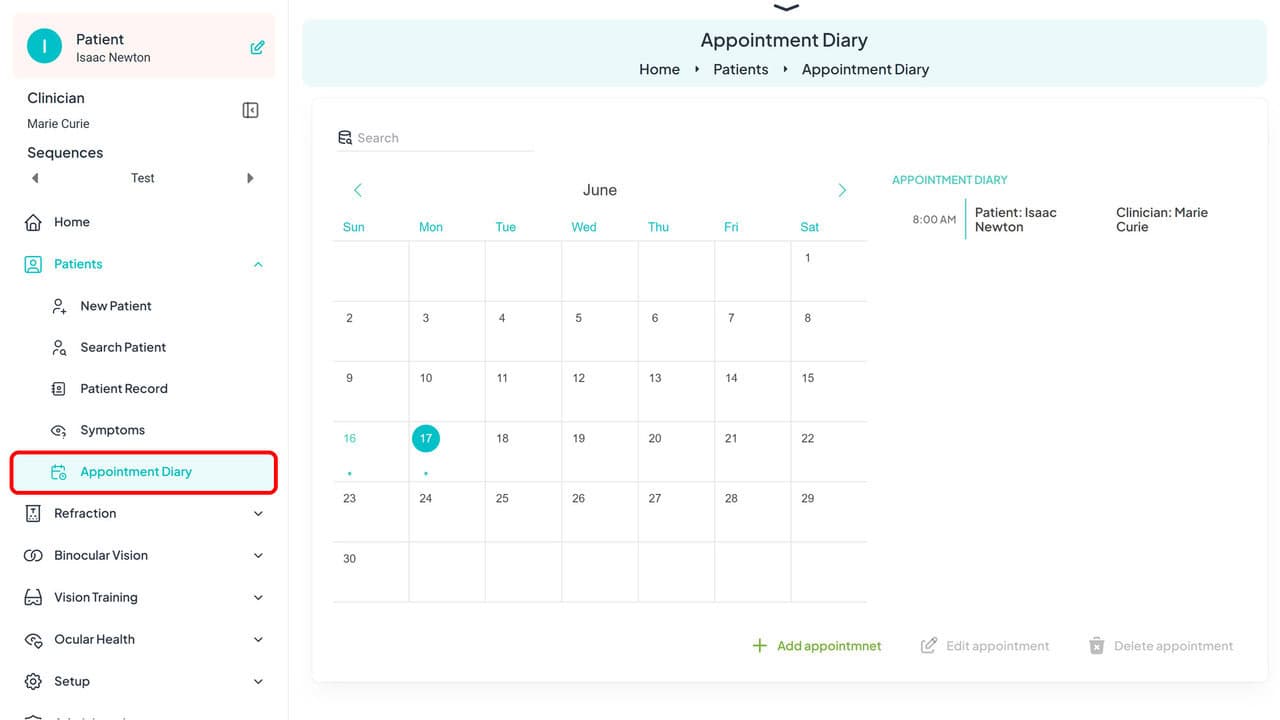
This tool allows you to schedule appointments for your patients, whether video consultations or in-person, which are marked on the calendar with dots.
Creating Appointments: When creating an appointment, you can specify the name of your Clinic, the patient, the examiner, the date and time of the appointment, and any additional comments you wish to include in the email sent to the patient. You can also specify the type of appointment (in-person or video consultation):
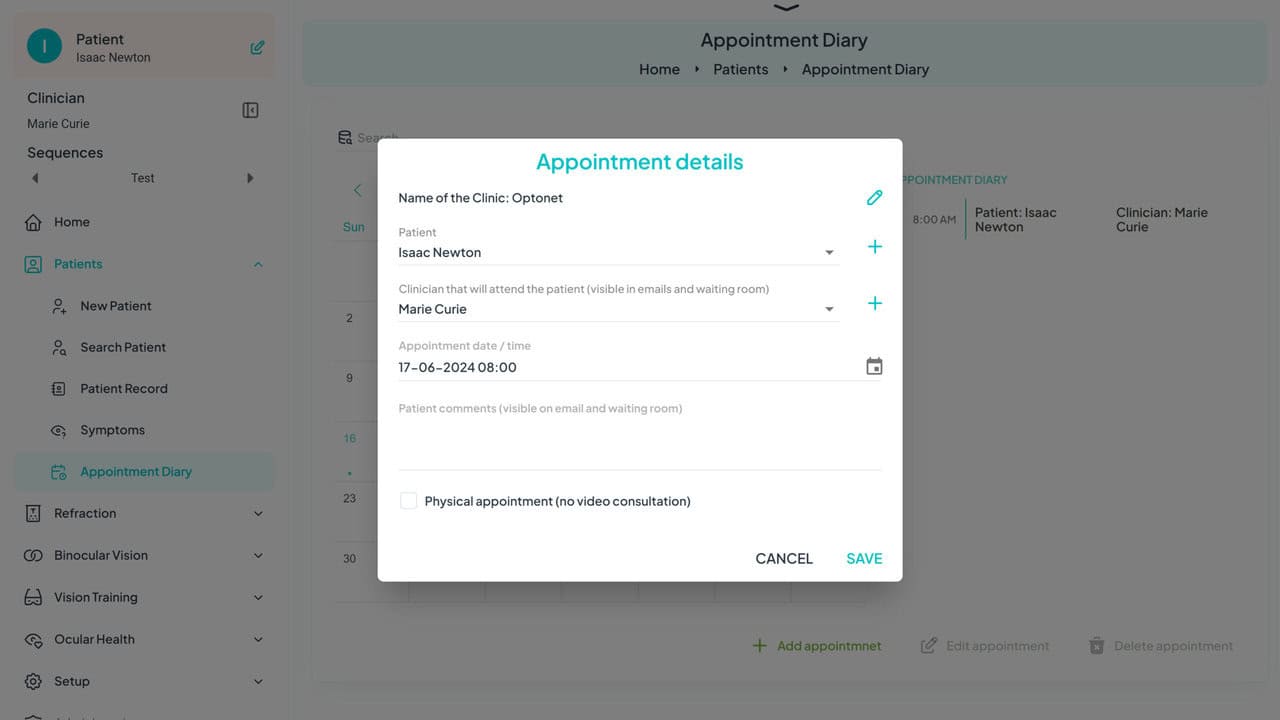
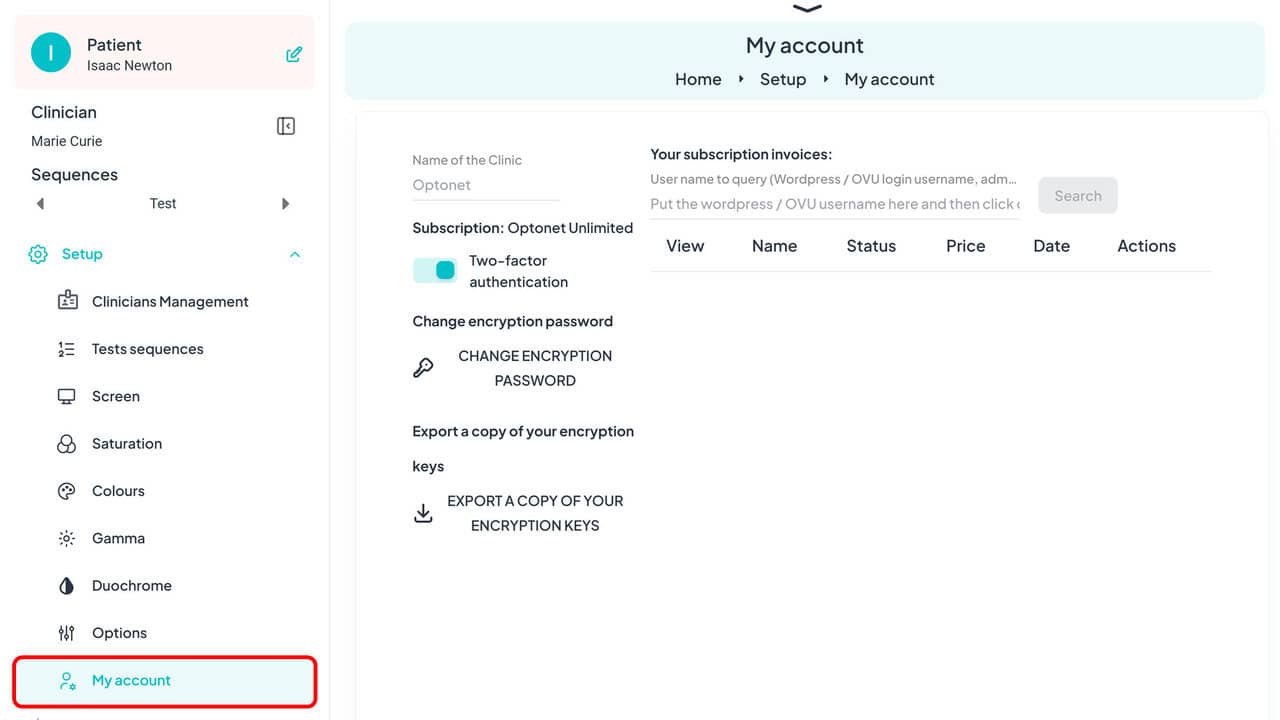
Customizing the Email: You can incorporate the name of your clinic in the patient’s email. To do this, go to “Setup” and then “My Account”.
Automatic Notifications: Once the appointment is created in the calendar, the program will send an email to the patient with the appointment details. If a video consultation is scheduled, the email will include the link and instructions for accessing the virtual waiting room on the day of the appointment. Two days before the appointment, the program will send a reminder email to the patient.
Waiting Room #
For video consultations, on the day of the appointment, the patient must connect using the link received by email. Thus, they will enter the waiting room:
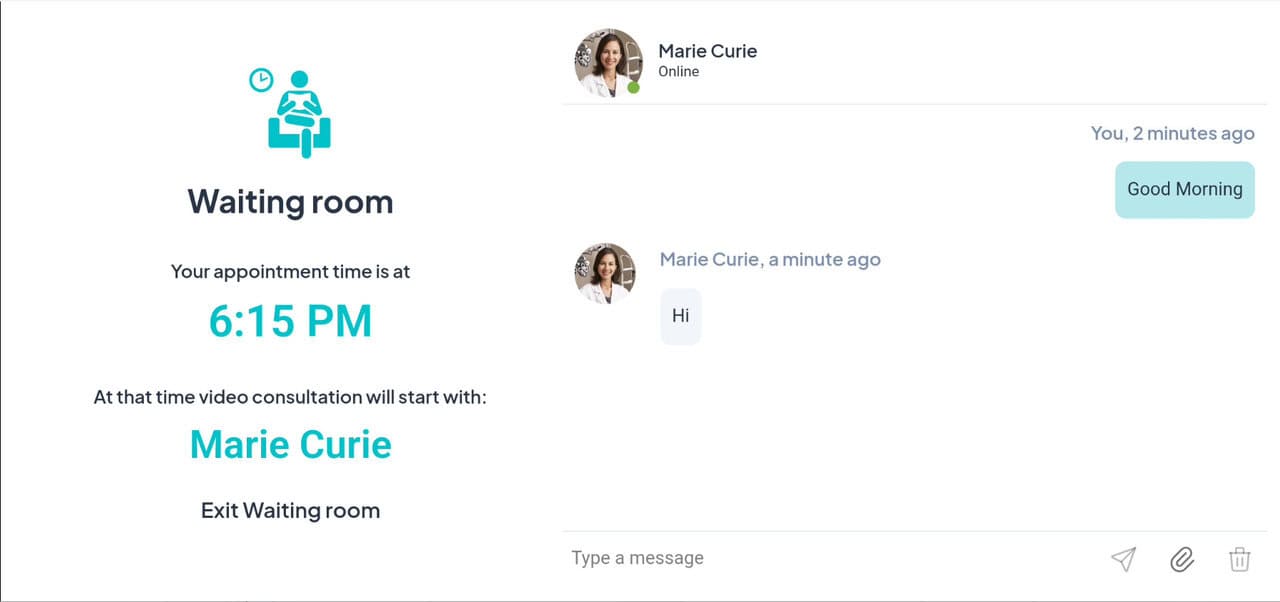
Durante este proceso, el programa verificará la calidad de sonido y vídeo del paciente y realizará la calibración de su distancia interocular. Esta calibración es importante para medir la distancia de observación, en caso de que se le muestren tests visuales de forma remota.
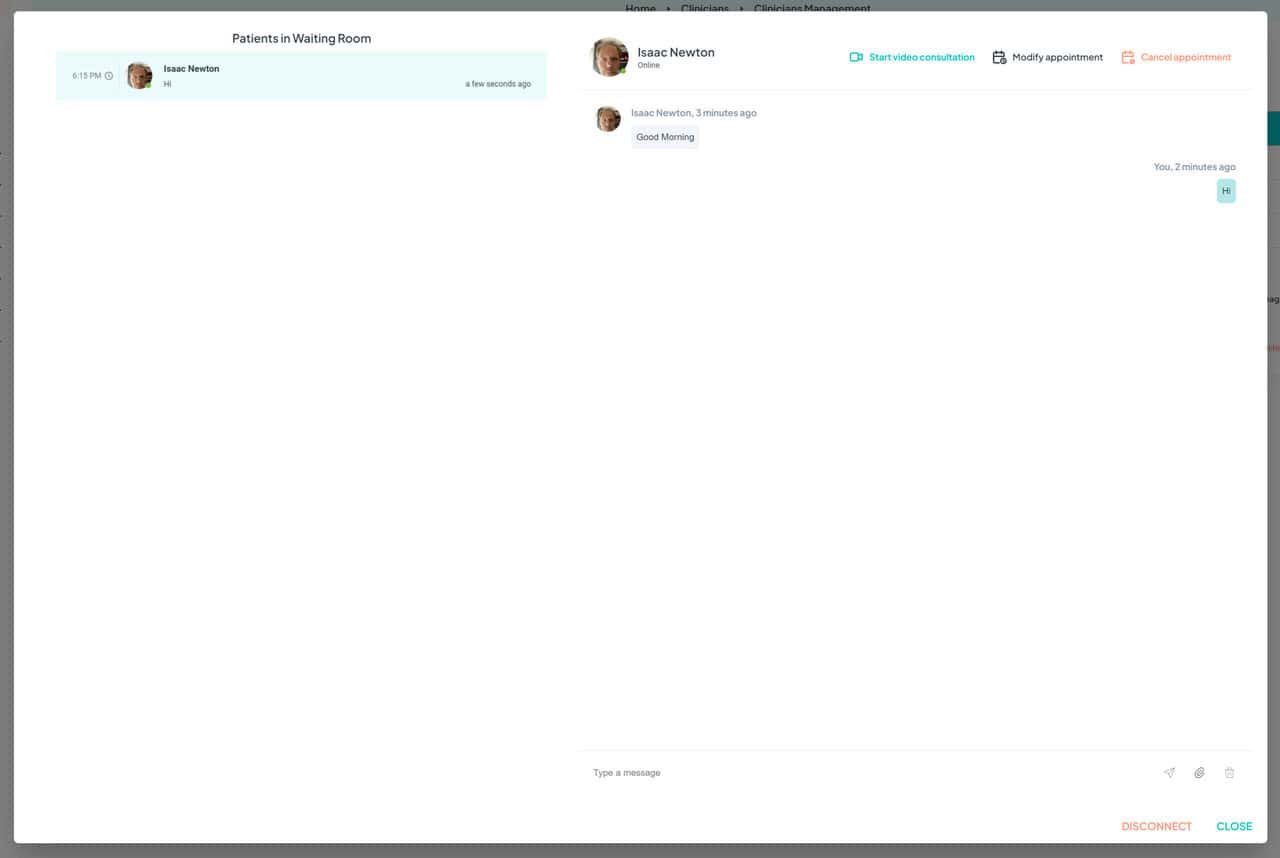
El profesional accederá a la Sala de Espera y pulsará en el nombre del paciente para comenzar la consulta. Tanto el paciente como el profesional tienen a su disposición un chat para comunicarse mientras están en la sala de espera.
During this process, the program will check the sound and video quality of the patient’s device and perform the interocular distance measurement. This calibration is important for measuring the viewing distance if vision charts are to be shown remotely.
The professional will access the Waiting Room and clic on the patient’s name to start the consultation. Both the patient and the professional have access to a chat to communicate while in the waiting room.

Videoconference #
Another new feature is that we have incorporated our own video system for video consultations, so it is no longer necessary to use a Zoom account nor are there any time restrictions.
During the videoconference, the professional can decide when to launch the device calibration of the patient’s device. For this, the patient will be asked to position themselves at the proper viewing distance to display the vision charts on their screen (normally this distance will be between 50 cm and 3 meters). The Optonet system will measure this distance using the patient’s device camera.
We encourage you to try a video consultation with a test patient to see how it works. We believe this tool can be very useful for monitoring vision training, troubleshooting prescription issues, contact lens reviews, emergencies, and more.
Auto-Test #
We are developing a new tool that allows patients to perform tests at home without supervision.
This new Auto-Test functionality allows, for example, monitoring of visual acuity for myopia control or tracking conditions such as optic neuritis, amblyopia treatment, and age-related macular degeneration (AMD). It will also be very useful for vision training. We are currently creating the instructions for its use.
Clinicians Management #
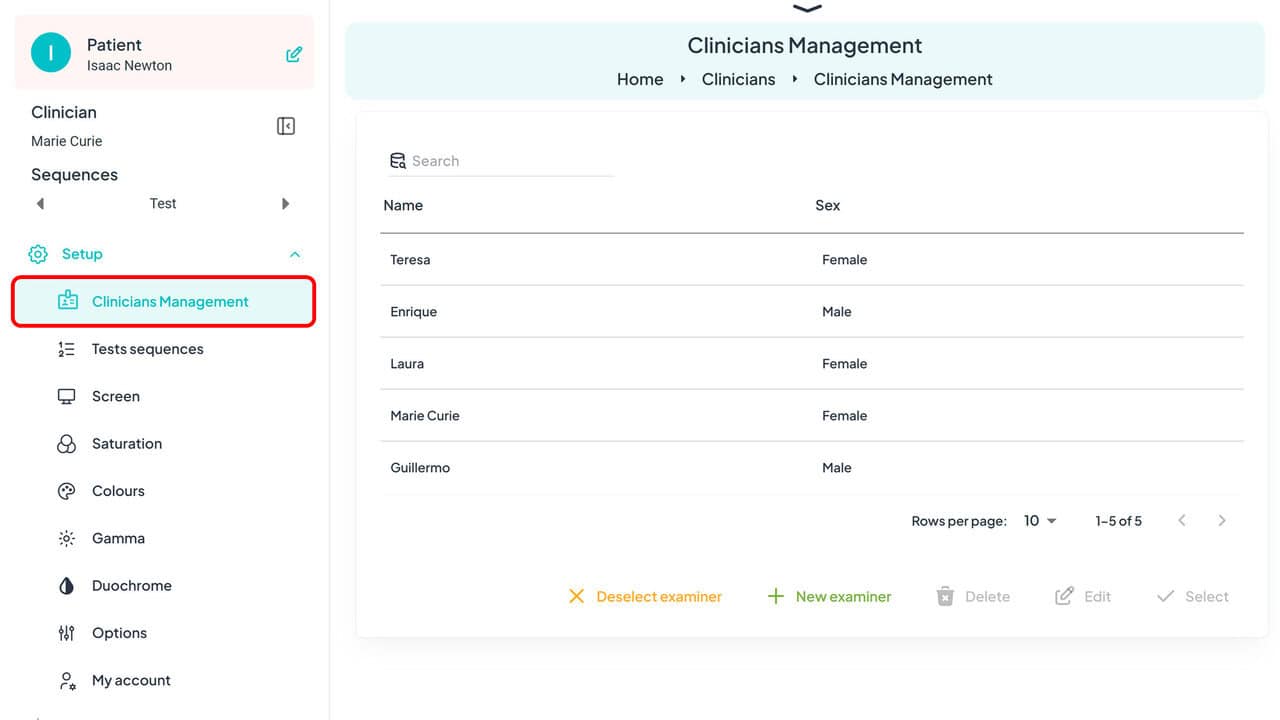
In the Setup section, we have added a link for clinicians management, where you can create a new clinician, edit their name, delete them, select or deselect them. This tool is useful for clinics with multiple professionals.
My Account #
In the Setup section, you will find a new section called My Account. This section allows you to access invoices, activate two-factor authentication for increased security when logging into the Optonet Unit, change the encryption password, and even export a copy of the encryption key to keep it in a safe place.
Also, in this section, you can indicate the name of the Clinic, so it appears in the messages patients receive when they are scheduled for an in-person or video consultation appointment.
Motor Field Test #
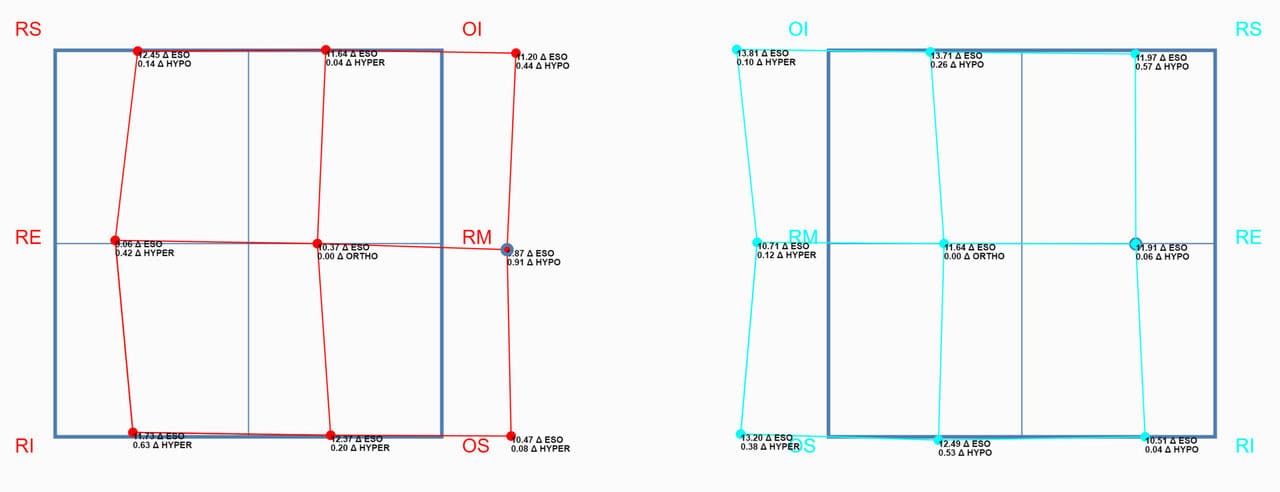
In the Motor Field test, the results are now automatically saved as a graph in the patient’s file. Thus, it is no longer necessary to export them as an image.
Automatic Calculation for Isolated Letters/Figures #
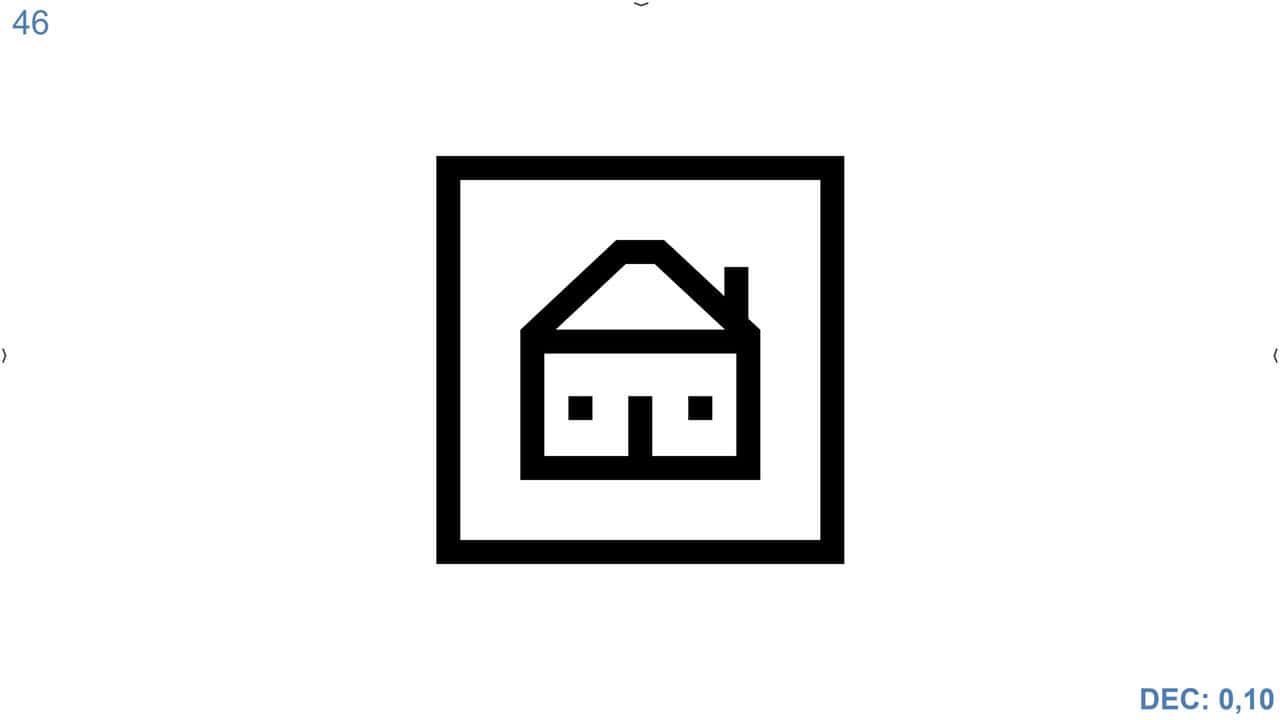
Now, when measuring visual acuity with isolated letters/pictures, you can perform an automatic count of responses. You just need to press “1” for correct answers and “0” for errors. Automatically, 5 letters are displayed for each level of visual acuity (VA).
You will find a more detailed explanation at this user guide link: AV Calculation (To access the user guide, you need to enter your Vision Unit credentials).
Compatibility with Windows 11 Mini PCs #
We have optimized the Unit to be more compatible with the new Windows 11 Mini PCs. This significantly improves the fluidity of Optonet compared to older Android devices. Additionally, these Mini PCs have significantly decreased in price and can be obtained for less than €100. See example.
Another advantage is that Mini PCs can be easily adapted to the back of the monitor, remaining hidden behind the screen.
Phones #
This new version of Optonet is also more compatible with phones. Although they have a small screen for displaying some vision charts, they can be useful for performing certain tests, such as colour vision, for example. We encourage you to install the Optonet Unit on your phone and share your impressions with us.
User Guide #
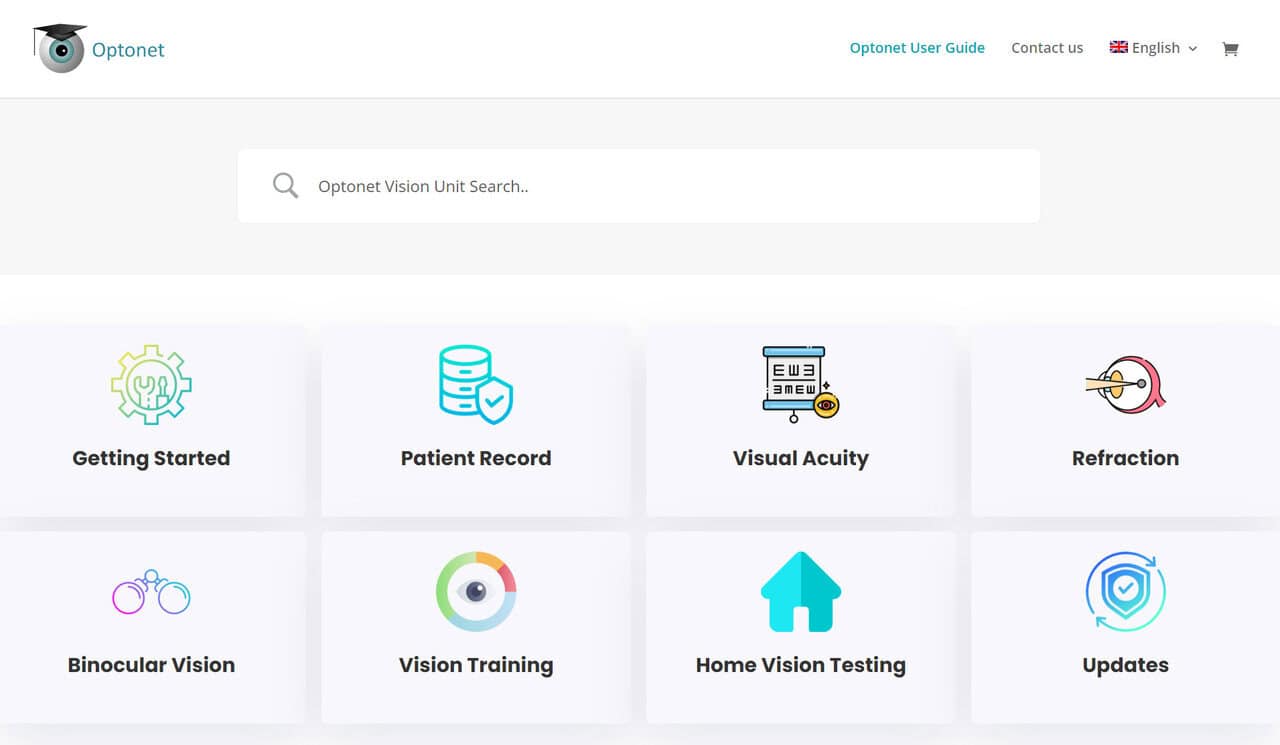
We are updating the User Guide, which you can access from the Main Menu on the left or from the right Tool Menu when you see the book symbol. The direct link is:
Now, you must enter the same username and password that you use to access the Vision Unit.
Farnsworth D15 #
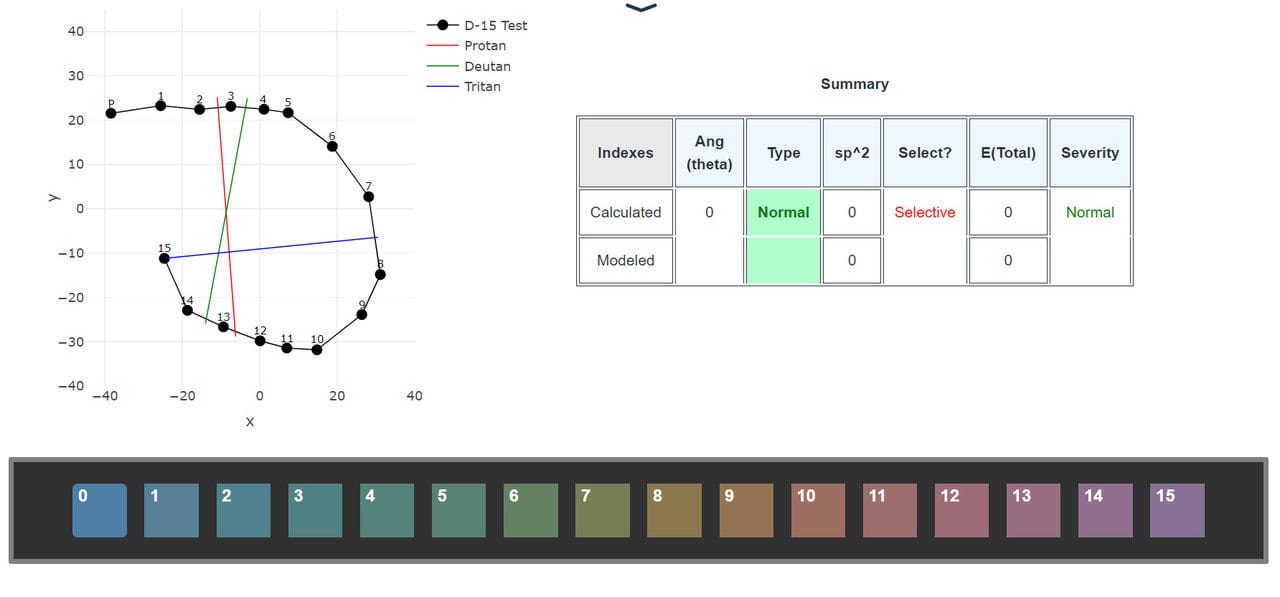
Lastly, we have optimized the Farnsworth D15 colour test, which now operates very smoothly on touchscreen tablets and phones. At the end of the test, the results show the corresponding number in each coloured square in the correct order.
We hope you find all these improvements to the Optonet system useful. Please do not hesitate to send us your feedback.
